How to protect photos on Windows 10 with Top-secret Photos
To protect important images on Windows 10, users can install the Top-secret Photos application..
To protect personal information, data such as images on phones or computers, users can use data hiding programs such as Top-secret Photos on Windows 10.
Top-secret Photos will hide the images you choose through various forms such as password, encryption or anti-capture. Other people who want to see the image must enter the correct password for the application. The following article will guide you how to use the Top-secret Photos application to protect images on Windows 10.
- How to hide photos on iPhone without application
- How to use NEV Privacy - Hide Pictures hide photos, apps on Android
- How to cover personal information of photos on the phone
Instructions on how to secure Windows 10 images
Step 1:
You download the Top-secret Photos application on Windows 10 according to the link below and then proceed to install on your computer.
- Download the Top-secret Photos application
Step 2:
At the interface for the first time the application will ask users to set a secure password, in the length of about 6 to 32 characters.Enter the password at the First time using bar and then click Register . The application will not have a password recovery feature so users need to remember the correct password to use.
Step 3:
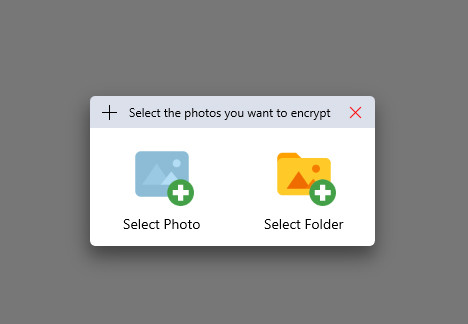
Next, click Default directory at the left side of the interface to select more images, or add the folder you want to hide. Click on the plus icon at Select Photo or select Select Folder.
Step 4:
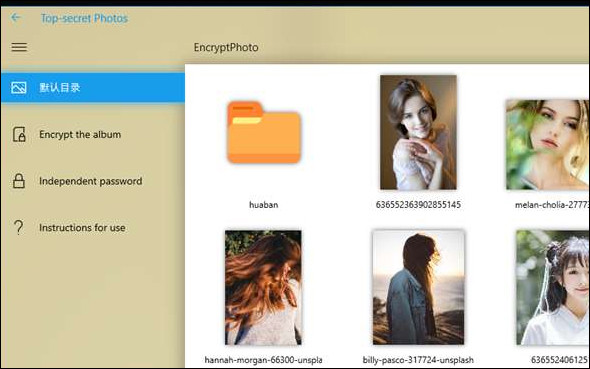
Immediately the selected image will be transferred to the application and created a copy in encrypted form in the EncryptPhoto folder . Thus we can delete the original image hidden on the computer.
Step 5:
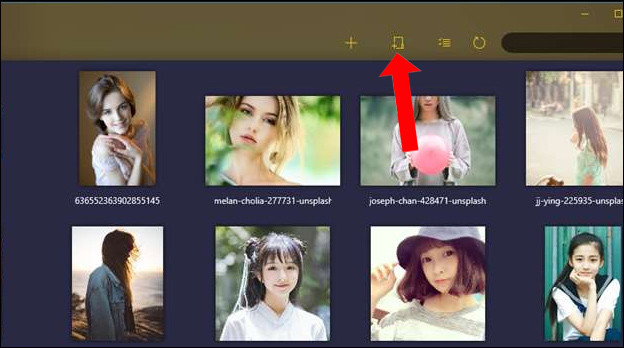
In the Top-secret Photos interface, users can view photos, rename, delete photos, etc. If you want to display the original image again, click on the Export icon as the image.
If you want to extract multiple images, click on the Select icon, select the image and then click Export photos. Then select the image storage location and click Select Folder to select the folder. Image reworked folder is still displayed in the application.
Step 6:
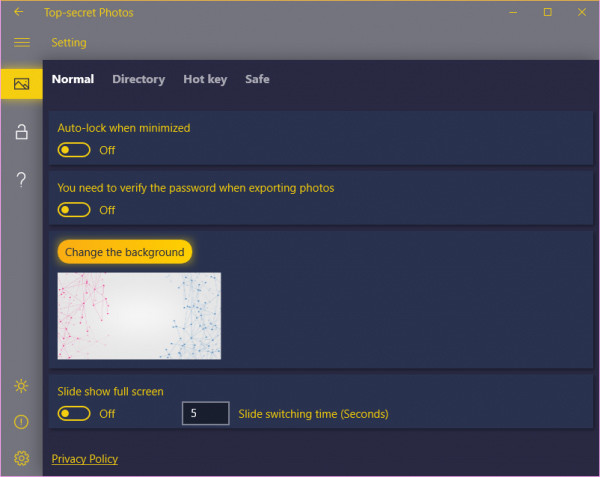
Also when clicking on the gear icon below the user will have some other optional features.
In the Normal section, the user will select the auto-lock mode when zooming down to the Taskbar, entering the password when exporting the image, changing the interface background, the time to show the image.
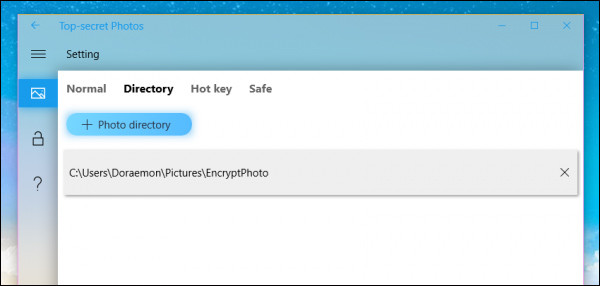
The directory will display the path of the encrypted image directory. This is the default folder for encrypting images on the application and is not deleted.
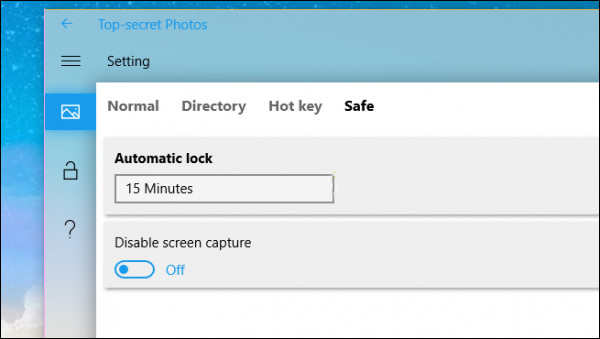
The hot key will be a shortcut to control the Top-secret Photos and Safe will be the time to lock apps and the option to block application screen capture.
Top-secret Photos will take security of images on Windows 10 via application lock password. If others want to see the image in the encrypted folder on the application, forcing them to enter the correct password to view the content inside.
See more:
- Create passwords for File and Folder protection on Android
- PrivateMe: Free application to help hide applications and sensitive data for Android
- How to hide sensitive content on Android and iPhone screens
I wish you all success!