Table of Contents
This guide explains how to play Wi-Fi on Windows 10, with clear steps, practical tips, and important checks before you begin.
In this article, Thuthuatphanmem will show you two ways to broadcast Wi-Fi on a Laptop using utilities in Windows 10 and via external devices (USB Wi-Fi).
Method 1: Broadcast Wi-Fi on Windows 10 using Mobile Hotspot
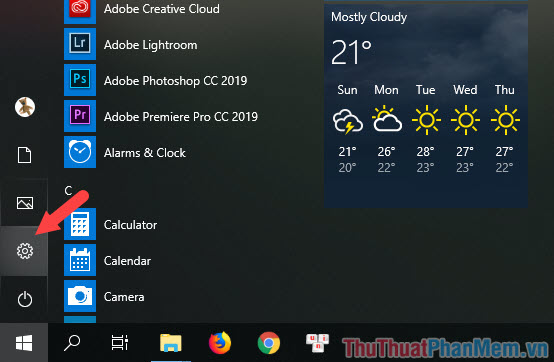
Step 1 : Go to Start Menu => Windows Settings as shown below.
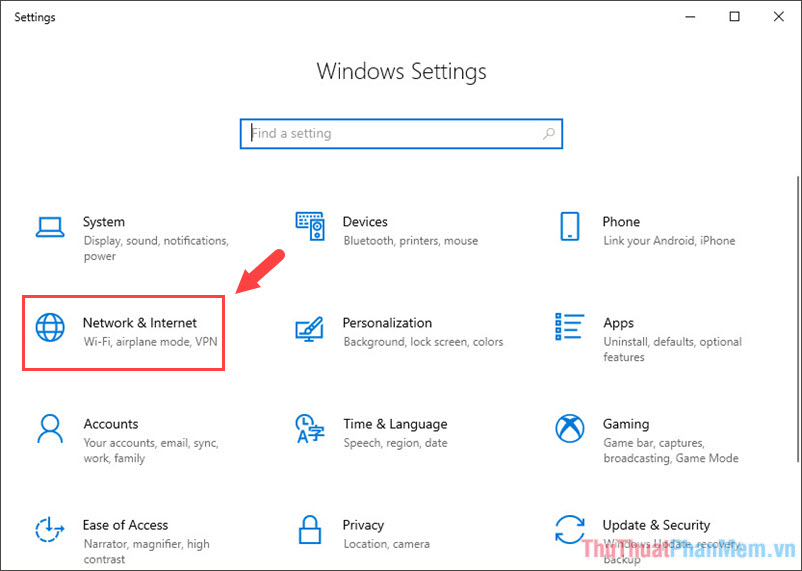
Step 2: Select Network & Internet section.
Step 3: You choose to Mobile Hotspot => Edit as shown below to edit the Wi-Fi network information to broadcast.
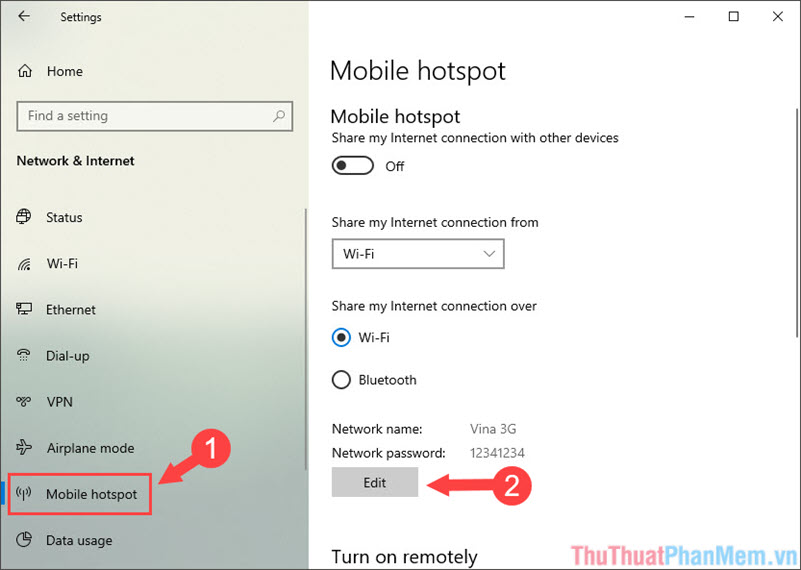
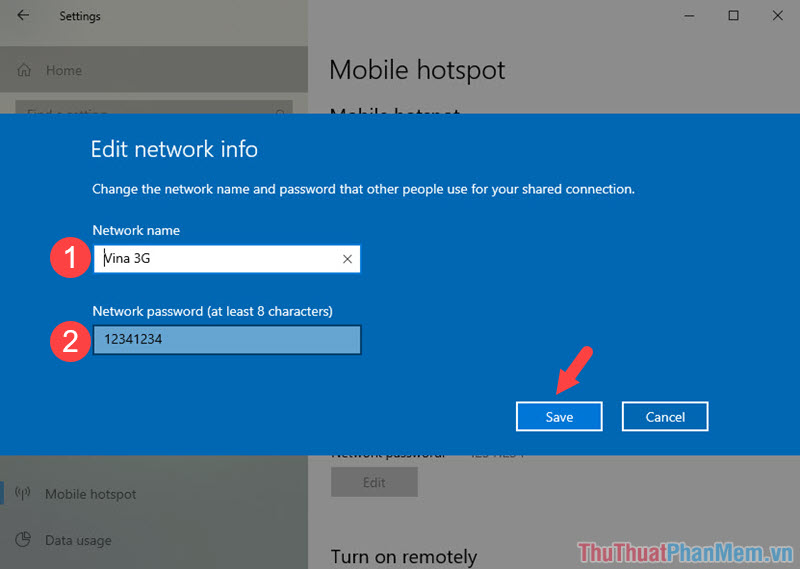
Step 4: You name the Wi-Fi in the Network name section and the password in the Network password section. Then, click Save to save.
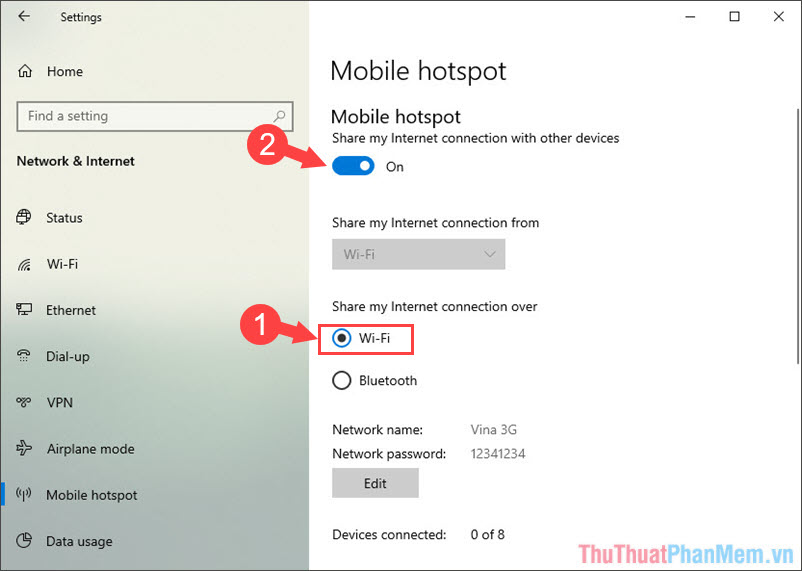
Step 5: Go back to the mobile hotspot section, select the Wi-Fi checkbox in the Share my Internet connection over section . Then you turn off the switch Share my Internet connection with other devices to On to play Wi-Fi on the Laptop is finished.
Method 2: Play Wi-Fi on windows 10 using USB Wi-Fi
This way, you can do it on both Laptop and Desktop. The device used in this article is Tp-link usb Wi-Fi wn722n
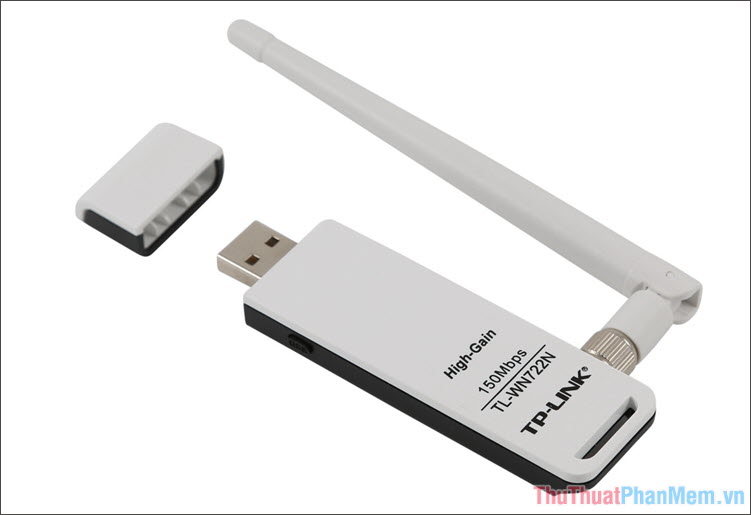
Step 1: You can go to the homepage of the usb Wi-Fi carrier such as Tplink, Lblink. to find the right driver or download the driver for Tplink wn722n here.
https://static. tp-link. com/2018/201808/20180820/TL-WN722N(EUUSES)_V3_180807_Win. zip
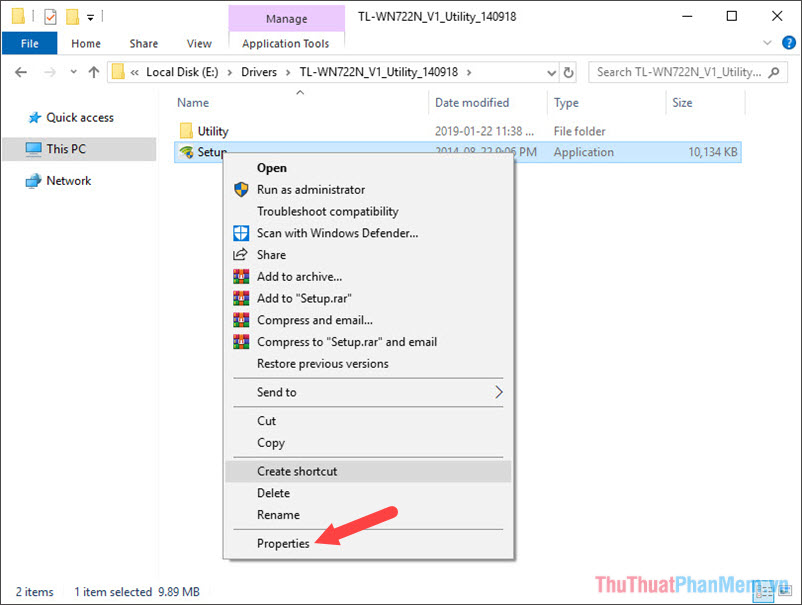
After downloading, extract and right-click on the installation file and select Properties.
Step 2: Go to the Compability tab, select Run this program in compability mode for and select Windows 7. Because the old driver driver is not compatible with Windows 10, we have to use this method to install.
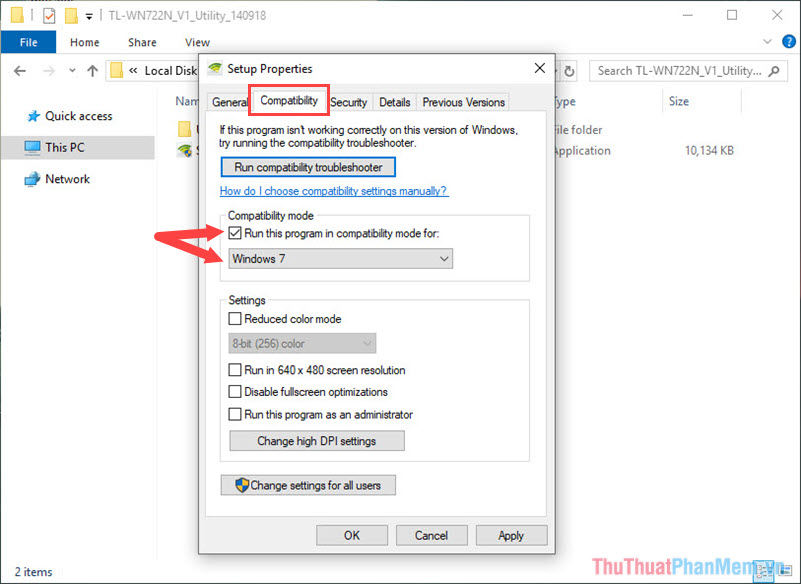
Step 3: Now you can install normally, click Next to continue.

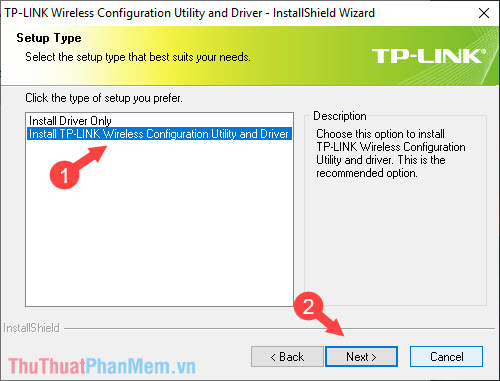
Step 4: In this step, you select the 2nd line to install drivers and drivers for USB Wi-Fi. Click Next to continue the installation.
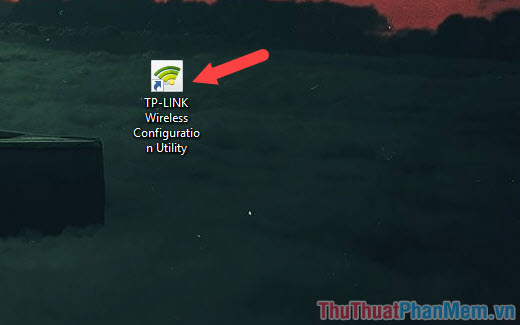
Step 5: Open the application on the desktop with the Wi-Fi icon as shown below.
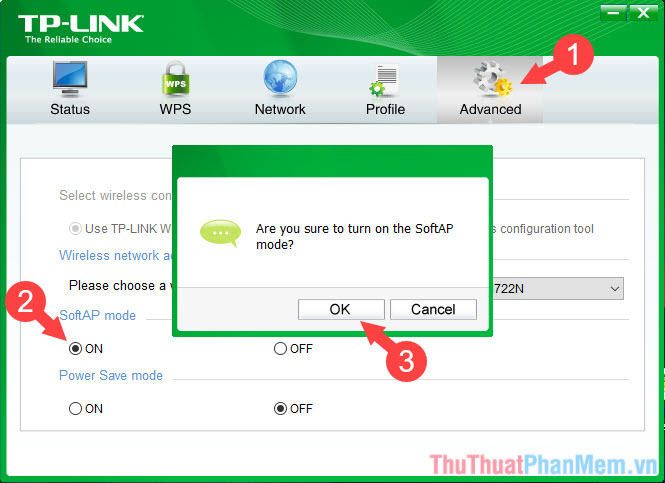
Step 6: On the application's interface, you switch to the Advanced tab, select ON in SoftAP mode and OK .
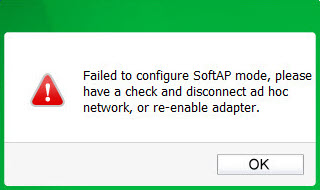
Step 7: If the error message as shown in the picture, you reinstall the following information.
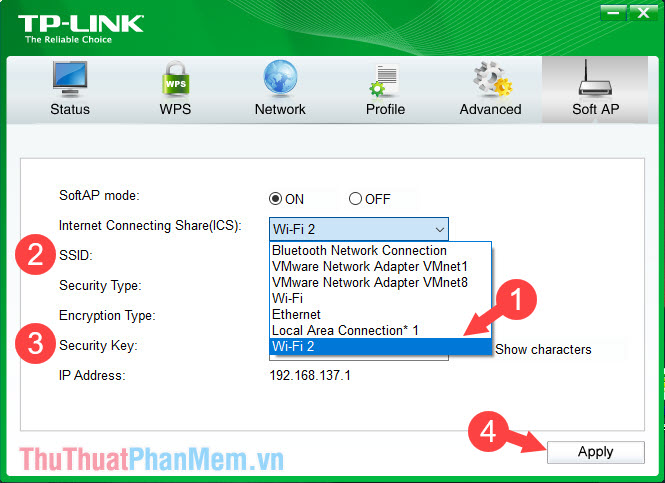
- Set Internet Connecting Share (ICS) as Wi-Fi 2 (your USB Wi-Fi name).
- SSID: name for Wi-Fi.
- Security Key: set a password for the Wi-Fi network to broadcast.
Then you click Apply to save.
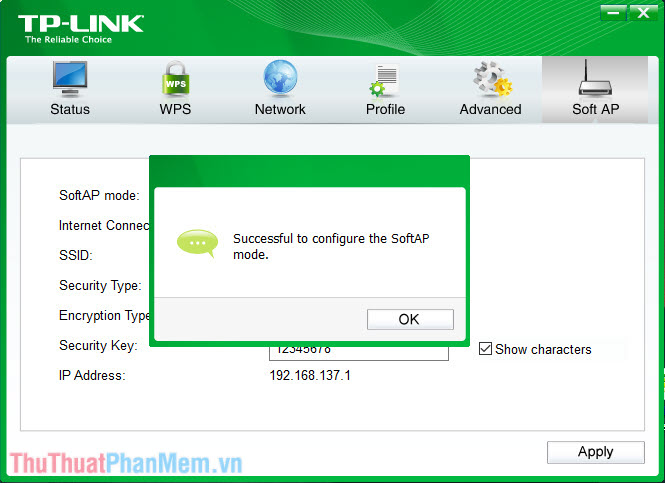
If the Successful message is successful.
Note: If your phone or tablet is connected to Wi-Fi because usb Wi-Fi emits the error No Internet Access or exclamation mark, it may be because your Windows Firewall blocked the connection. You proceed to turn off the Firewall as follows:
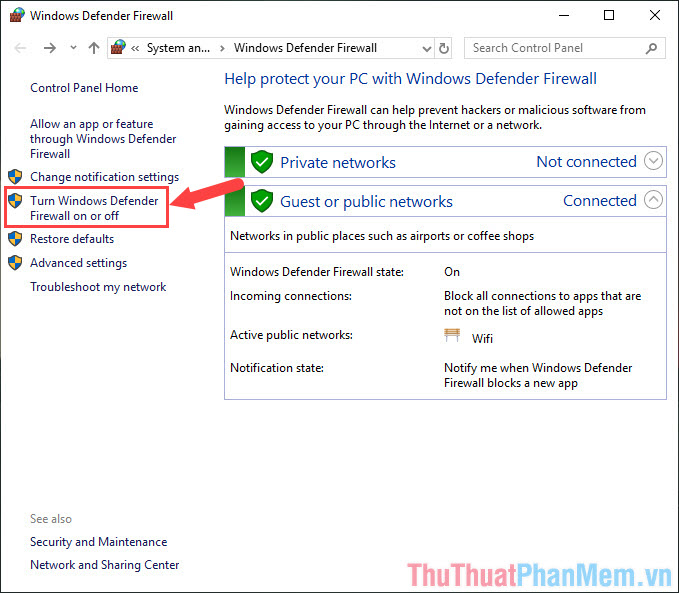
Step 1: Go to the search section of Windows and enter Firewall => Select the first search result.
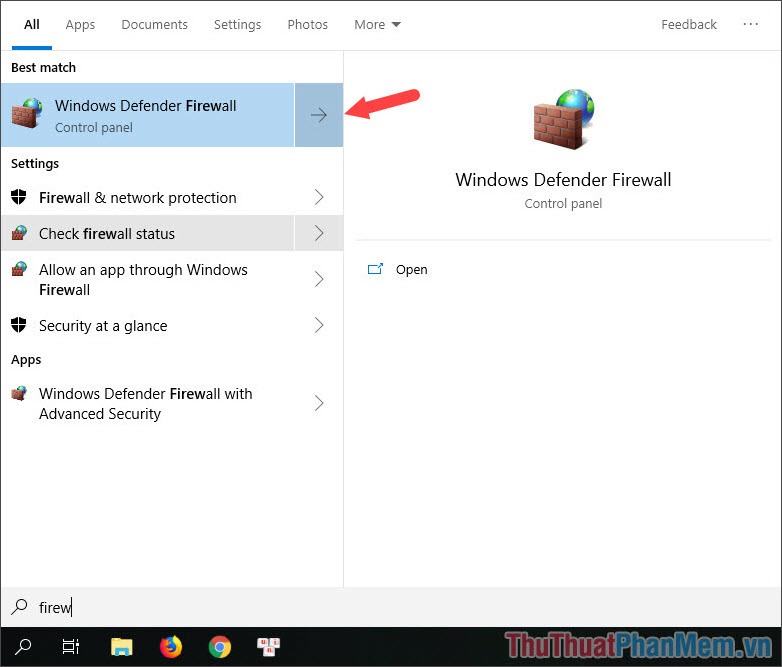
Step 2: Select Turn Windows Defender Firewall on or off .
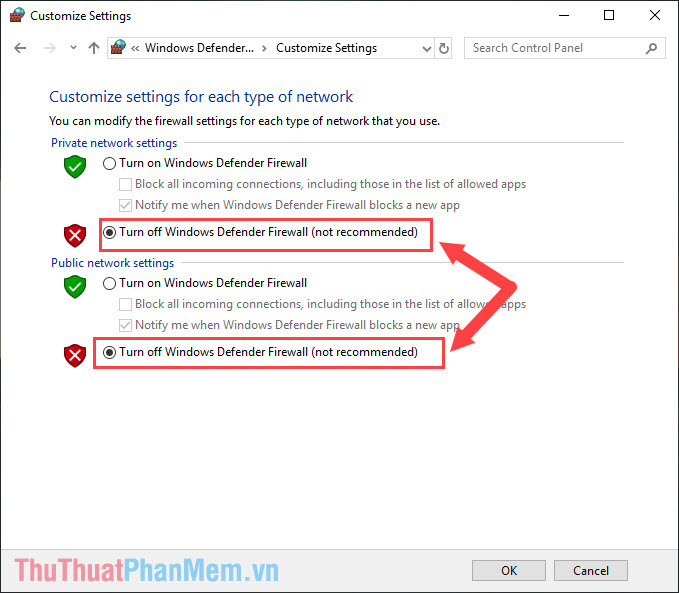
Step 3: Check the Turn off Windows Defender Firewall (not recommended) check box to turn off the Firewall and then click OK . Then you try to reconnect Wi-Fi on your phone to see if the Internet connection is successful.
With two simple ways to broadcast Wi-Fi on Windows 10, you can turn your laptop into a portable hotspot wherever you are. Good luck!
FAQ
What should I know about Play Wi-Fi on Windows 10?
Focus on the key features, requirements, limitations, and practical use cases explained in this guide.
How do I get the best results with Play Wi-Fi on Windows 10?
Follow the recommended steps, use current software or information, confirm compatibility, and review settings before major changes.
Are there any risks or limitations?
Potential limitations depend on compatibility, data quality, cost, privacy, support, and how the product or method is used.
Related Articles
 How to Play Wi-Fi (Hotspot) on Windows 10 Computers5 minutes read
 How to Play Wi-Fi on Windows 8, Share Wi-Fi on Windows 8 Without Software4 minutes read
 Play Wi-Fi on Super Simple Computers with Mypubicwifi4 minutes read
 The Easiest Way to Play Wi-Fi on Windows 83 minutes read
 How to Play Wi-Fi on Lumia Phones3 minutes read
 Configure Your Laptop to Be a Wi-Fi Hotspot3 minutes read
Reader Comments 0
Sign in with email or Google to join the discussion.