How to Optimize a Slow Running Computer
Method 1 of 7:
Optimizing Your Computer's Speed with Good Habits
-
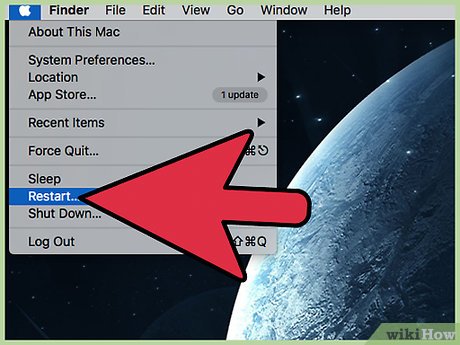
 Restart your computer. If you are noticing your computer running a little slower than usual, you may want to simply restart your machine. When you restart your computer you are not only closing out of old programs but you are allowing your PC or Mac to check for new updates.
 -
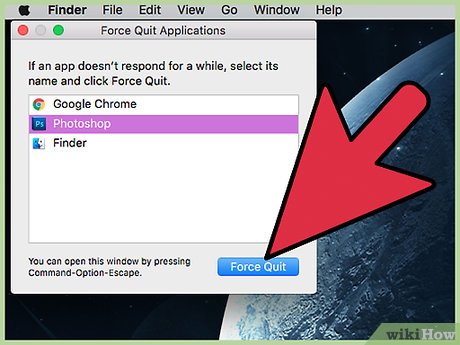
 Close unnecessary apps. Another way to improve the speed of your computer quickly and easily is by closing out of applications that you are not currently using. By having a ton of applications and programs open at once, you are putting unnecessary strain on the speed and performance of your device.
 -
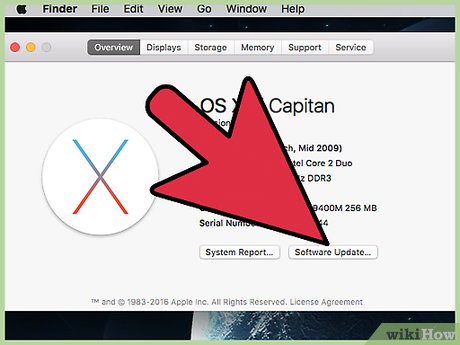
 Update your operating system. Always check for the latest updates to your operating system. These are usually free and can be found by going to the App Store on your Mac or your operating system's webpage. Once the update has completed, restart your computer in order for the changes to take place.
 -
 Empty your Trash. While it may seem unnecessary, making sure that your recycling or trash bin is empty is essential for optimizing your computer's performance. Simply double-click on your trash or recycling bin and then select "Empty All."
Method 2 of 7:
Removing Viruses
-
 Check for viruses. Viruses are by far one of the most common cyber security issues computer systems encounter. One of the most common symptoms of a computer virus is a slow your PC or Mac, however, it is not unusual to have an infected computer system without even knowing it. Therefore, it is extremely important that you scan and remove viruses using the most up-to-date and advanced virus removal tools. This should be your first step to optimizing your slow computer for top performance.
 -
 Research antivirus software. Some of the most common and recommended software is Norton Antivirus Software and Spyware Removal and Kaspersky. Some great free options are Avast or AVG AntiVirus. Simply navigate to their webpage and purchase the software. There are also built-in malware protection services, like XProtect for the Mac and Windows Defender for Windows 8 and 10 but they are not the most reliable options out there.
 -
 Scan your machine. If you choose to use Norton, open the Norton application and from the main window select "Security" and then "Run Scans." This will prompt a window entitled "Scans" to appear. Select "Full System Scan" and then "Go." Once the scan is complete, click "Finish."[1]
 -
 Run LiveUpdate. Open the Norton application and from the main window select "Security" and then "LiveUpdate." When it has completed the update, click "OK." This process may take a few minutes to complete. Run LiveUpdate until you receive a message that states "Your Norton product has the latest updates." When you have finished updating the software, restart your computer.
Method 3 of 7:
Cleaning Your Disk on a PC
-
 Open "My Computer." Right-click on the drive that you want to clean and select "Properties" at the bottom of the menu that appears. You will now want to locate "Disk Cleanup. Disk Cleanup is a built in feature of Windows that allows you to delete unnecessary files from your PC, which in turn may help boost the speed of your sluggish computer.
 -
 Select "Disk Cleanup." This can be found in the "Disk Properties Menu."
 -
 Identify the files you wish to delete. You will most likely want to delete things like temporary files, log files, files in your recycling bin, and other unimportant files. You can do this by ticking the box next to its name.[2]
 -
 Delete unnecessary files. Once you have selected the files you wish to delete, select "Ok." This may prompt a window to appear that will confirm your actions. Click "Yes."
- There may be system files that you want to delete but are not shown in the Disk Cleanup Menu. To access them, go to "Cleanup System Files" at the bottom of the Disk Cleanup window.
-
 Go to "More Options." Once the More Options Tab appears, look under the section entitled "System Restore and Shadow Copies" and select "Clean Up." This may take a few minutes to complete.
 -
 Finish Up. Now that you have deleted unnecessary or temporary files on your computer, your PC should run faster and smoother. You can determine how much space you have freed up on your hard drive by going to Computer and then selecting your hard drive. The amount of space you now have will be in the bottom of the window.
Method 4 of 7:
Cleaning Your Disk on a Mac
-
 Click on the search icon. This is the icon in the upper right-hand corner on your menu bar that resembles a magnifying glass. Wait for a window to appear.
 -
 Enter "Disk Utility." The Disk Utility window will appear where you can now select your hard drive. This will usually be titled "Macintosh HD."
 -
 Select "First Aid." At the top of the screen, hit the "First Aid" button. A window will appear where you will be asked if you would like to run First Aid. Select "Run." First Aid will now go through your hard drive and isolate certain errors as well as repair them. This process may take a few minutes to complete but once it has, you may exit out Disk Utility.
Method 5 of 7:
Deleting Temporary Internet Files on a PC
-
 Go to "Internet Options." This can be found by selecting the Start Icon in the lower left-hand corner, then "Control Panel," and then selecting "Network and Internet." In this method, you will be deleting temporary internet files, which accumulate when you visit certain websites. They serve as your browser's cache and save content like videos and music. It does this to decrease the load time the next time you visit that site.
 -
 Select the "General Tab." Under Browsing History, select "Delete." This will prompt a window that will ask you to confirm your actions. Select "Delete All" and then "Yes."[3]
 -
 Click "Ok." This will delete all of the Temporary Internet Files on your computer in order to free up space on your disk.
 -
 Finish up. Once you have done this, exit out of the program and determine the amount of space you now have freed up on your hard drive. You can do this by going to Computer and then clicking on your hard drive. The amount of space you have will be in the bottom of the window.
Method 6 of 7:
Deleting Temporary Internet Files on a Mac (Safari)
-
 Open "Safari." Once the page has loaded, select "Safari" from the menu bar.
 -
 Select "Preferences." If you are using a version earlier than Yosemite, click on "Reset Safari" rather than going to "Preferences."[4]
 -
 Choose the "Privacy" tab. Next to the label "Remove all website data," check the box.
 -
 Select "Remove Now." If you are using a version earlier than Yosemite, select "Reset" rather than "Remove Now."
Method 7 of 7:
Defragmenting or "TRIM"ming Your Disk
-
 Go to the "Start Menu." In the Start Menu, click "All Programs," then "Accessories," and then go to "System Tools." Locate "Disk Defragmenter." When files are deleted from your disk, they can become fragmented. This can lead to slower performance on your device. By collecting and organizing these fragments you can improve your performance speed.
 -
 Select "Disk Defragmenter."
 -
 Select your "Windows Disk." If you have Windows 8, proceed to the next step.
 -
 Select "Defragment Disk."
- If you have an SSD, or solid-state disk, do not defrag your computer. Instead, proceed to the next step.
-
 Select "Optimize." This will initiate the TRIM command.
 -
 Check to see if TRIM is enabled. You can do this by opening the command prompt and inputting a simple command.
 -
 Click Start. Type "cmd" without the quotation marks into the search bar and then select "cmd."
 -
 Click "Run as Administrator."
 -
 Wait for a black window, or terminal, to appear.
 -
 Enter the following command:
Fsutil behavior query disabledeletenotify. If TRIM is supported, the response will be '= 0.' If you do not receive this response, enter the commandfsutil behavior set DisableDeleteNotify 0. If you receive the same response, you may need to upgrade your firmware.[5] -
 Restart your computer. once you have restarted, check if to see if your computer's speed has improved. If it has not, try another method.
Share by
Lesley Montoya
Update 05 March 2020


