How to Defragment Files on a Mac Computer
Method 1 of 2:
Defragmenting With Software
-
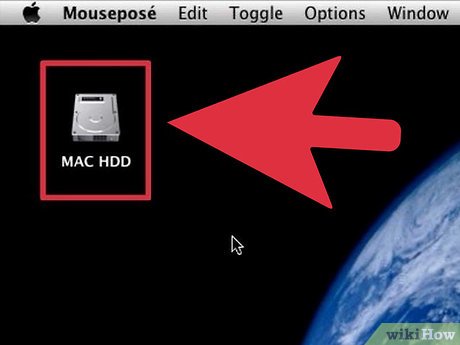
 Assess your need. OS X (10.2 and on) automatically decreases the potential for file fragmentation by writing the new data to the largest block of free space on the hard drive. However files can still become fragmented depending on how many times they are opened and if there is not a large enough amount of space to fit the complete file. These are some additional conditions in which Mac OS X will automatically defragment files and reasons that your computer could benefit from defragmentation:
- Files that are less than 20 MB in size.
- Files that have more than eight fragments.
- Files that are not in use.
- If you've downloaded many large files (such as video files) over time, your Mac may benefit from defragmentation.
- If your hard disk is over about 90% full, defragmentation may help as well.
- If your computer meets neither of these criteria, it's a safe bet that disk defragmentation won't speed it up, though it doesn't ever hurt your computer to defragment it.
- Computers running System 9 and older may or may not benefit from defragmentation, but it is very difficult to find programs for them these days.
-
 Increase hard disk space. If you're defragmenting your hard disk because it's nearly filled to capacity, this is a good time to clear up some of the clutter. Consider investing in an inexpensive external hard drive for media files, or store some excess files on a cloud storage service such as Apple's iCloud or Microsoft's SkyDrive.
- SkyDrive, iCloud, and similar services typically offer anywhere between 2 and 7 gigabytes of free storage. To get more, you'll have to pay a yearly fee, which varies but always works out to less than $10 per month.
- Hard drives will work with any computer they can plug into. The computer will automatically offer to format the drive so that it can be read the first time you hook it up. There's no need to spend extra money buying a special hard drive 'for Macintosh computers.'
-
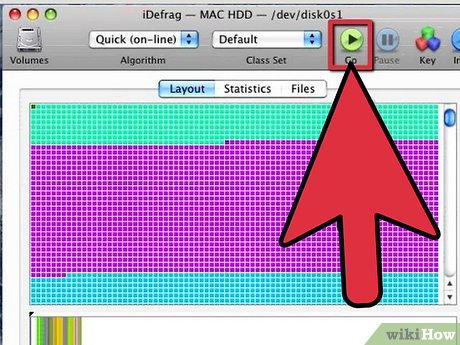
 Acquire defragmentation software. Since most OS X Macs, most of the time, don't need defragmenting, no defragmentation tool is included in the computer's Disk Utility program. To 'manually' defragment your disk, you'll need third-party software. A commonly used utility to defragment and optimize your hard disk is Coriolis Systems' iDefrag, which costs about $30. Another software option is Prosoft's Drive Genius 3, Genius 3 addresses both free space and data fragmentation on a hard drive. Is also offers a graphical window that gives you a color coded preview of how fragmented your hard drive is, as well as several other features to maintain the health of your hard drive.
- There are other options available. Be sure to thoroughly check reviews and user ratings before paying for any of them, and be sure to download them from a clean site.
- Unfortunately, Macintosh computers running System 9 and earlier are now considered so outdated that software for them isn't widely available anymore, even online. To find a defragmentation utility (such as Norton Utilities or Alsoft PlusOptimizer), you'll probably have to get in touch with other longtime Mac users about purchasing or trading for a used copy.
-
 Install and run the defragmentation utility. If you bought your program online, it should download as a file you can double-click to open. Follow the instructions on the screen until the program is successfully installed, and then launch it. In most cases, the available options from this point are self-evident. Choose to defragment your hard disk and allow the program to run until finished.
- Generally speaking, you shouldn't move the computer while your hard disk is being de-fragmented. Choose a time to defragment when you won't have to lift, drag, or otherwise move the computer for a while.
-
 Be sure to backup up your computer before beginning the defragmentation process.
Method 2 of 2:
Defragmenting By Erasing
-
 Back up files. Fortunately, Mac owners have a plethora of options available to them for doing this. Choose whichever method suits you the best. Remember that virtual storage and physical storage each have advantages and disadvantages, and remember that anything you don't back up will be gone forever once you reformat your computer's hard drive. Be thorough.
- Back up with iCloud if most or all of your content is legally purchased files from the iTunes store. The iCloud service backs up all such content automatically on a daily basis, as well as details like user settings, text messages, phone contacts, and so on. For most users, iCloud is more of a smartphone option than a computer option.
- Back up to an external hard drive. This is the time-honored method most people use to back up their computer. Run a program such as Apple's own Time Machine utility, and point it to the external drive you have connected to your computer. The program will create a backup copy of everything except system files.
- You can also back your drive up manually by literally dragging everything you want to save onto your external hard drive's desktop icon en masse, but this is messy, slow, and less reliable than letting a program take care of it for you, in most cases.
- Back up to physical media. When all else fails, if your computer has a writable optical drive (such as a DVD/RW drive), you can purchase a stack of blank discs and manually back up content to the discs, one disc at a time. This isn't recommended, as it's easy to misplace or damage the discs, but in a dire emergency it can help you save data and applications that might otherwise have been lost.
-
 Restart from disc. Load your Mac's Install disc into the optical drive and reset the computer. As the computer boots up again, hold down the 'c' key to force it to boot up from the Install disc. You'll see a list of language options, and then a menu screen.
- From this point until you've completely finished reinstalling your system software and reset the computer, do not remove the Install disc from the drive for any reason.
-
 Run Disk Utility. Select 'Utilities' from the menu, and 'Disk Utility' from there. In Disk Utility, choose the hard disk you want to erase from the drop down menu and click the 'Erase' tab, then click and confirm the 'Erase' button. Disk Utility will erase that entire drive.
- Erasing a hard drive takes time. Be prepared to wait a while and, as before, don't jostle or move the computer while it's erasing.
- Be very careful not to select your backup drive by accident. If you're worried you might, just unhook it from your computer before you restart it.
-
 Reinstall the system software. Once you're done erasing your hard disk, quit Disk Application to find a Mac Installer window. Click the 'Continue' button to view the license agreement. Read it if you want, then accept it and click the hard drive you just erased on the next screen. Click 'Install' to install the system software.
 -
 Restart and update. Once you've finished installing the system software, click 'Restart' to restart your Mac and boot up as normal. Your Mac will guide you through initial setup; once you've finished, it's time to update to the latest version of the OS you were using. Visit your account at Apple.com and download and install all the updates you previously purchased.
 -
 Restore your files. Depending on the method you chose, either load your optical discs sequentially, drag files from your external hard drive, or run Time Machine (or another backup utility) and choose to restore your old files from an external hard drive. All three methods take time, so be patient.
- If you have data backed up on iCloud, you can simply log in and copy it back to your hard disk.
Share by
David Pac
Update 04 March 2020


