Flash CS4: Learn about the Oval Tool

To select the Oval Tool, click on the Rectangle Tool icon on the toolbar and hold down the mouse for a few seconds for the submenu to appear.

To select the Oval Tool, click on the Rectangle Tool icon on the toolbar and hold down the mouse for a few seconds for the submenu to appear. Click on the Oval Tool:

Flash CS4: Learn about the Oval Tool Picture 1Flash CS4: Learn about the Oval Tool Picture 1

After selecting the Oval Tool , the mouse will switch to the + sign. To draw, click on the top position, drag the mouse to the last position and release the mouse to get an oval shape. If you hold down the Shift key while drawing, you will get a circle. You can also draw a scarf or a part of a circle or a scarf by adjusting the parameters on the Property Inspector.

Property Inspector will automatically update to provide the information related to the Oval Tool as follows:

Flash CS4: Learn about the Oval Tool Picture 2Flash CS4: Learn about the Oval Tool Picture 2

Just below the Property Inspector is an oval icon with the words indicating you are choosing the Oval Tool

Flash CS4: Learn about the Oval Tool Picture 3Flash CS4: Learn about the Oval Tool Picture 3

Just below the Fill and Stroke section is the color selection for the border (Stroke - on the left) and the bowel (Fill - on the right).

Select the color from the palette when you click on the black box next to the pencil to set the color for the border, or the green box on the right next to the paint bucket to set the color of the oval:

Flash CS4: Learn about the Oval Tool Picture 4Flash CS4: Learn about the Oval Tool Picture 4

Flash CS4: Learn about the Oval Tool Picture 5Flash CS4: Learn about the Oval Tool Picture 5

Next, choose the size of the border. You can either drag the slider to the right of the Stroke text or type the number directly into the box to the right. When you drag the slider, the right pane updates the value according to the slider position.

Flash CS4: Learn about the Oval Tool Picture 6Flash CS4: Learn about the Oval Tool Picture 6

The next part is to select the style for the border. If you click on the black triangle next to the pencil, you can choose one of the following contour types:
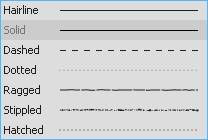
Flash CS4: Learn about the Oval Tool Picture 7Flash CS4: Learn about the Oval Tool Picture 7

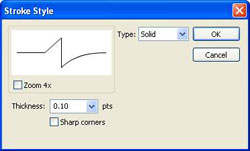
If you click on the pencil, you can customize the extra parameters for the border in the following dialog box:
Flash CS4: Learn about the Oval Tool Picture 8Flash CS4: Learn about the Oval Tool Picture 8

You can experiment to find a nice border style. However, one thing to note is that complex designs will increase the final size of the work.

Flash CS4: Learn about the Oval Tool Picture 9Flash CS4: Learn about the Oval Tool Picture 9

Flash CS4: Learn about the Oval Tool Picture 10Flash CS4: Learn about the Oval Tool Picture 10

The Scale section shows the outline when enlarged or reduced. If you click on the black triangle, you will have the following options:

Flash CS4: Learn about the Oval Tool Picture 11Flash CS4: Learn about the Oval Tool Picture 11

Normal : change according to scale value.

Horizontal : only scale horizontally.

Vertical : indicates the vertical scale.

None : does not change with scale value.

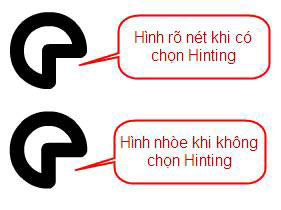
If you select the Hinting box, Flash will adjust itself to round the stroke value, avoiding blurring.

Flash CS4: Learn about the Oval Tool Picture 12Flash CS4: Learn about the Oval Tool Picture 12

Flash CS4: Learn about the Oval Tool Picture 13Flash CS4: Learn about the Oval Tool Picture 13

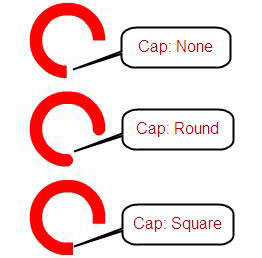
The Cap option helps you show the tip style of the closed loop. If you click on the black triangle, you will have the following options:

Flash CS4: Learn about the Oval Tool Picture 14Flash CS4: Learn about the Oval Tool Picture 14

Flash CS4: Learn about the Oval Tool Picture 15Flash CS4: Learn about the Oval Tool Picture 15

Flash CS4: Learn about the Oval Tool Picture 16Flash CS4: Learn about the Oval Tool Picture 16

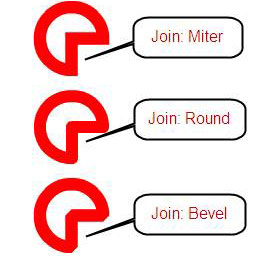
Join helps you show the style of the intersection of the roads. You will get the following choices when clicking on the black triangle:

Flash CS4: Learn about the Oval Tool Picture 17Flash CS4: Learn about the Oval Tool Picture 17

Flash CS4: Learn about the Oval Tool Picture 18Flash CS4: Learn about the Oval Tool Picture 18

Flash CS4: Learn about the Oval Tool Picture 19Flash CS4: Learn about the Oval Tool Picture 19

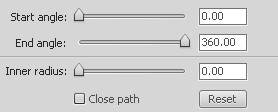
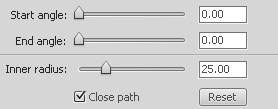
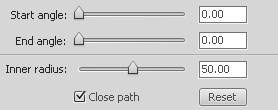
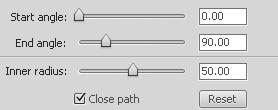
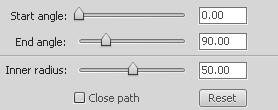
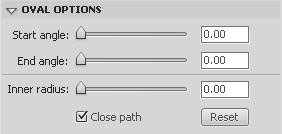
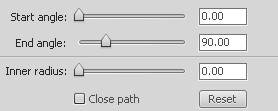
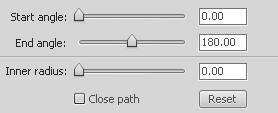
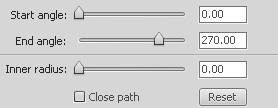
Oval Options helps you adjust parameters when you want to draw a scarf or draw a part of a circle or a scarf. You can drag the slider to change the value or type the number directly into the boxes on the right.

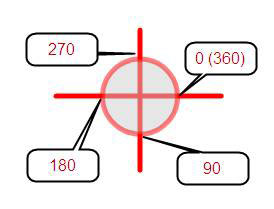
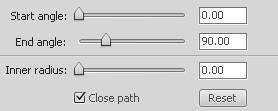
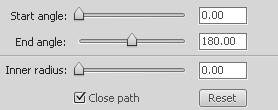
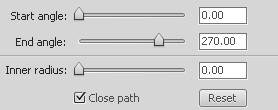
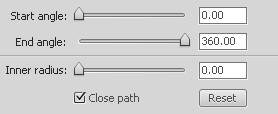
Start angle : the initial value of the arc. This value can be from 0 to 360 degrees clockwise. The value 0 starts from the right edge of the circle.

End angle : the end value of the arc. This value can be from 0 to 360 degrees clockwise. The value 0 starts from the right edge of the circle.

Inner radius : the value of the inner radius of the scarf shape. Calculated as a percentage of the outside radius. Acceptable value from 0 - 99.

Close path : set closed or open strokes. If checked, the stroke is closed.

To return to the initial default values ​​of the Oval Tool , click the Reset button.
Flash CS4: Learn about the Oval Tool Picture 20Flash CS4: Learn about the Oval Tool Picture 20

An oval example with a value set to the left:

Flash CS4: Learn about the Oval Tool Picture 21Flash CS4: Learn about the Oval Tool Picture 21

Flash CS4: Learn about the Oval Tool Picture 22Flash CS4: Learn about the Oval Tool Picture 22

An oval example with a value set to the left:
Flash CS4: Learn about the Oval Tool Picture 23Flash CS4: Learn about the Oval Tool Picture 23

Flash CS4: Learn about the Oval Tool Picture 24Flash CS4: Learn about the Oval Tool Picture 24

An oval example with a value set to the left:

Flash CS4: Learn about the Oval Tool Picture 25Flash CS4: Learn about the Oval Tool Picture 25

Flash CS4: Learn about the Oval Tool Picture 26Flash CS4: Learn about the Oval Tool Picture 26

An oval example with a value set to the left:
Flash CS4: Learn about the Oval Tool Picture 27Flash CS4: Learn about the Oval Tool Picture 27

Flash CS4: Learn about the Oval Tool Picture 28Flash CS4: Learn about the Oval Tool Picture 28

An oval example with a value set to the left:

Flash CS4: Learn about the Oval Tool Picture 29Flash CS4: Learn about the Oval Tool Picture 29

Flash CS4: Learn about the Oval Tool Picture 30Flash CS4: Learn about the Oval Tool Picture 30

An oval example with a value set to the left:
Flash CS4: Learn about the Oval Tool Picture 31Flash CS4: Learn about the Oval Tool Picture 31

Flash CS4: Learn about the Oval Tool Picture 32Flash CS4: Learn about the Oval Tool Picture 32

An oval example with a value set to the left:

Flash CS4: Learn about the Oval Tool Picture 33Flash CS4: Learn about the Oval Tool Picture 33

Flash CS4: Learn about the Oval Tool Picture 34Flash CS4: Learn about the Oval Tool Picture 34

An oval example with a value set to the left:
Flash CS4: Learn about the Oval Tool Picture 35Flash CS4: Learn about the Oval Tool Picture 35

Flash CS4: Learn about the Oval Tool Picture 36Flash CS4: Learn about the Oval Tool Picture 36

An oval example with a value set to the left:

Flash CS4: Learn about the Oval Tool Picture 37Flash CS4: Learn about the Oval Tool Picture 37

Flash CS4: Learn about the Oval Tool Picture 38Flash CS4: Learn about the Oval Tool Picture 38

An oval example with a value set to the left:
Flash CS4: Learn about the Oval Tool Picture 39Flash CS4: Learn about the Oval Tool Picture 39

Flash CS4: Learn about the Oval Tool Picture 40Flash CS4: Learn about the Oval Tool Picture 40

An oval example with a value set to the left:

Flash CS4: Learn about the Oval Tool Picture 41Flash CS4: Learn about the Oval Tool Picture 41

Flash CS4: Learn about the Oval Tool Picture 42Flash CS4: Learn about the Oval Tool Picture 42

An oval example with a value set to the left:
Flash CS4: Learn about the Oval Tool Picture 43Flash CS4: Learn about the Oval Tool Picture 43

4 ★ | 1 Vote