How to install XAMPP, How to configure XAMPP on Windows 10
In this guide, you will learn the steps to install XAMPP on Windows 10 as well as instructions for configuring the web environment and fixing some common problems after setup..
XAMPP is free and open source software that provides an easy way for web designers and developers to install the components to run PHP-based software, such as WordPress, Drupal, Joomla, and others on Windows 10, Linux and macOS.
If you are a web developer or someone trying to get involved in blogging, XAMPP will save time and reduce the hassle of having to manually install and configure Apache, MySQL, PHP and Perl on the machine. calculator to create test environment.
In this guide, you will learn the steps to install XAMPP on Windows 10 as well as instructions for configuring the web environment and fixing some common problems after setup.
What makes XAMPP so special?
Here we are talking about the problem of installing Apache in Windows. You spend a lot of time setting up everything and starting your website running. The problem is that you cannot do anything with a static website unless you use SQL server.
Then all you need to do is install the SQL server application but the PHP is missing. A missing list can be time consuming and complicated, especially for beginners.
For XAMPP, there you have an application that helps to install all that is needed to run a perfect website, the installation process is similar to the application in Windows.
This service allows the computer to run Apache and everything else. Whenever the computer is started, the applications will run silently in the background and do not consume a lot of system resources.
How to install XAMPP on Windows 10
To download and install XAMPP on Windows 10, follow these steps:
Step 1. Download XAMPP for Windows here.
Quick note: If you have special version requirements for PHP, then download the version you need. If you don't have a version requirement, download the oldest version as it can help you avoid problems installing PHP-based software. In addition, these instructions have been tested and work for XAMPP version 7.3.22, as well as earlier versions, but you can also use them to install later versions.
Step 2. Double-click the downloaded file to launch the installer.
Step 3. Click the OK button.
Step 4. Click the Next button.

Step 5. XAMPP provides various components that you can install, such as MySQL, phpMyAdmin, PHP, Apache, etc. In most cases, you will use most of these, Therefore, you should leave the default options.
Step 6. Click the Next button.
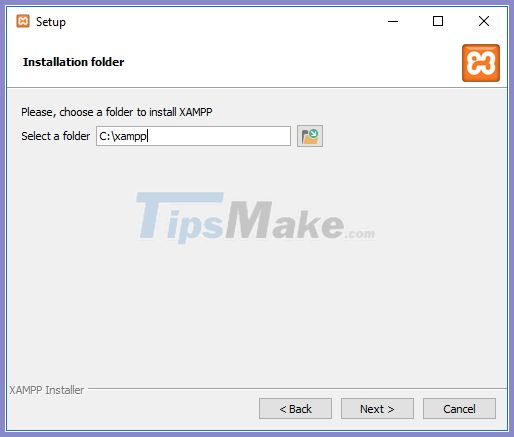
Step 7. Use the default installed location. (Or choose a different folder to install the software in in the Select a folder field).
Step 8. Click the Next button.
Step 9. Select the language for XAMPP Control Panel.
Step 10. Click the Next button.
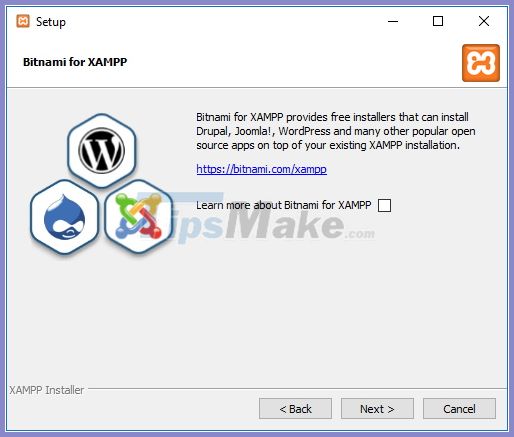
Step 11. Clear the Learn more about Bitnami for XAMPP option.
Step 12. Click the Next button twice.
Step 13. Click the Allow access button to allow the application through Windows Firewall (if any).
Step 14. Click the Finish button.
After you complete the steps, the XAMPP Control Panel will launch and you can begin configuring the web server environment.
How to configure XAMPP on Windows 10
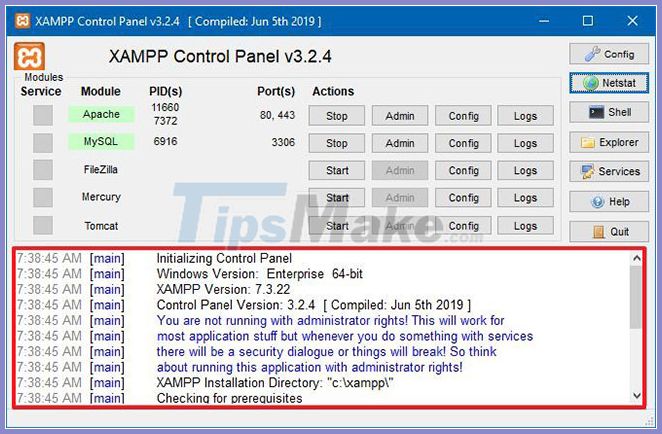
XAMPP Control Panel consists of 3 main parts. In the Modules section, you will find all available web services. You can start each service by clicking the Start button.
When you start several services, including Apache and MySQL, on the right side, you'll also see the process ID number (PID) and the TCP / IP port number (Port) each service is using. For example, by default Apache uses TCP / IP ports 80 and 443, while MySQL uses TCP / IP ports 3306.
You can also click on the Admin button to get access to the admin dashboard for each service and verify that everything is working correctly.
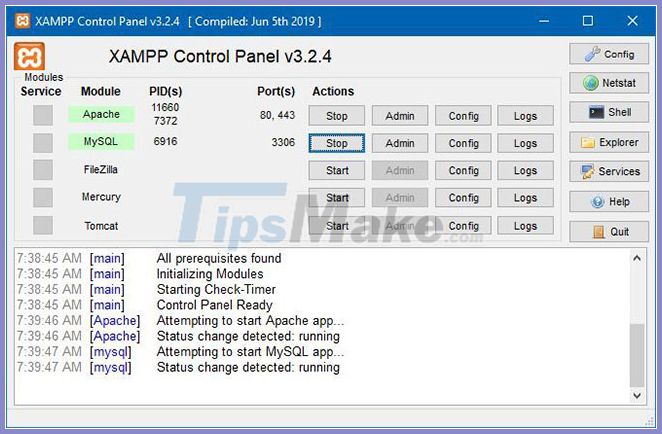
On the right side is a list of buttons for configuring various aspects of the dashboard, including a Config button to configure which modules should start automatically when you start XAMPP.

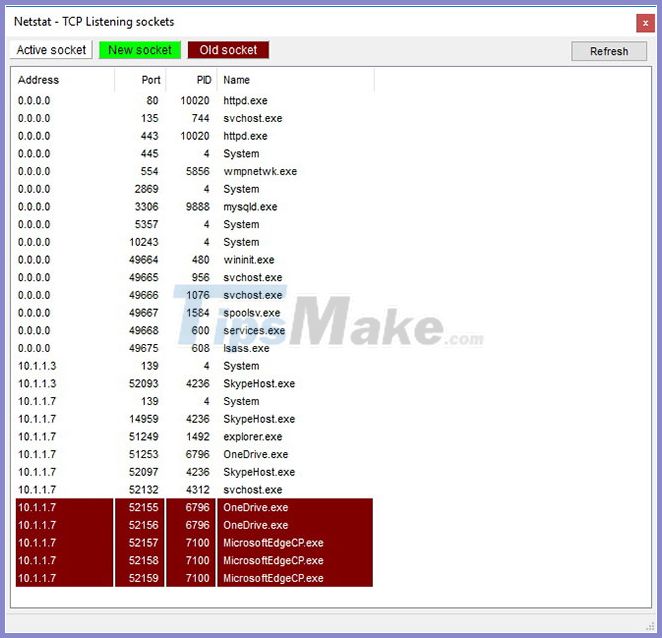
Clicking the Netstart button will give you a list of the services currently accessing the network, including TCP / IP addresses and ports, as well as process ID information.
In addition, from the control panel, there are also quick access buttons to open the shell command line utility, the XAMPP installation directory, services, and close the application.
Finally, you will see a log section where you can see what happens each time you start the module or change the settings. This is also the first place to look when something isn't working.
The default setting will work for most people who use XAMPP to create a test environment running websites. However, depending on your setup configuration, you may need to change the TCP / IP port number for the Apache server, the size of the upload to the database, or set a password for phpMyAdmin.
To change these settings, you need to use the Config button for the corresponding service. For example, you will need to open the httpd.conf file to change the settings on the Apache server and the my.ini file to change the MySQL settings.