How to install Pydio on Windows 10 or Ubuntu 19.04
There are several other open source options that can be considered as alternatives and Pydio is one of them. Pydio is an open source file sharing and synchronization software..
When thinking about building your own network storage, Owncloud or NextCloud will immediately appear in your head. However, there are some other open source options that can be considered as alternatives and Pydio is one of them. Pydio is an open source file sharing and synchronization software.
Although it is also a free network hosting program, Pydio is divided into a paid version and an open source free version. Using Pydio for personal purposes to store and share files is definitely not a problem. However, NextCloud will be much better.
Activate Windows Subsystem for Linux
To install Pydio on Windows 10 / Windows Server 2016, we will use Windows Subsystem for Linux. So first activate it by following these steps:
- Go to the Windows 10 search bar and type Turn Windows features On or Off .
- Scroll down and search for Windows Subsystem for Linux option and click the OK button
- Now, restart the computer or laptop that has Windows 10 installed.
- After activating WSL, once again go to Windows to search and enter the Microsoft store. When it appears, click on it.
- Click the search icon given in the upper right and enter Ubuntu 18.04 .
- Install Ubuntu 18.04 application on Windows 10.
- Again go to the search box and this time search for Ubuntu 18.04 . The application will appear, open it.

This step will take some time to set up. Once you've followed the steps below on Ubuntu 19.04 to install Pydio on Windows 10 or Windows Server 2016. The steps will be the same for both operating systems, even for older Ubuntu versions like Ubuntu 18.10. /18.04/17.04/16.10/16.04/14.04, Debian, Elementary OS and Linux Mint.
Install Pydio on Ubuntu 19.04 / Windows 10
Pydio offers two types of files to install. One is Pydio Cell and the other is Pydio 8 (complete php version). Due to some limitations of the PHP language, the Pydio development team decided to completely rewrite the existing version of PHP for Pydio and switch to the Go language, the open source server language written and maintained by Google. Pydio Cell also does not require some third-party web servers, it has its own web server installed automatically while setting up Pydio.
The installation process for Pydio Cells Home and Pydio Enterprise will be the same.
Install Pydio Cell on Ubuntu 19.04
Step 1 : Open terminal on Ubuntu (Shortcut key is CTRL + ALT + T ).
Step 2 : Create a user that will use for Pydio:
sudo useradd -m -s /bin/bash pydio sudo passwd yourpassword
Note : " pydio" in the above command is the user created. Similarly, replace " yourpassword" with the password you want to set for user Pydio.
Alternatively, you can add your current Ubuntu user to the Pydio group using the following commands:
sudo usermod -aG pydio
Set permissions for Pydio:
sudo chmod -R g+w /home/pydio
Again, replace pydio with the name of the user you added for Pydio.
Step 3 : Install My SQL server for Pydio
sudo apt-get install mysql-server
Step 4 : Create database for Pydio Cell
In case the MySQL service has not been started, you can use the following command:
sudo service mysql start
Log in to MySQL:
mysql -u root -p
Create user and MySQL database:
Replace the terms h2spydio, your user password for DB user, h2sdata below with user name, database name and password of your choice.
CREATE USER 'h2spydio@localhost' IDENTIFIED BY 'your user password for DB user'; CREATE DATABASE h2sdata; GRANT ALL PRIVILEGES ON h2sdata.* to 'h2spydio@localhost'; FLUSH PRIVILEGES; EXIT
Step 5 : Switch to the Pydio folder
To switch to the pydio directory, enter the following command:
cd /home/pydio
Note : If you have created a user for Pydio with some other names, use that name instead of the word pydio in the above command.
Step 6 : Download Pydio
1. Visit the Pydio download site.
2. On the download page, go to the version of Pydio you want to download. Because the article is installing the Pydio Home version , so right-click on the Linux version and copy the link address of that version.

3. Now, once again go back to Terminal and type wget. Then, right-click to paste the Pydio Cell file download link.
sudo wget (dán liên kết tải xuống đã sao chép)
The command will look like this:
sudo wget https://download.pydio.com/pub/cells/release/1.5.0/linux-amd64/pydio-cells-1.5.0-linux-amd64.zip
4. After downloading, unzip the zip pydio file:
sudo apt-get install unzip
ls
sudo unzip tên file được tải xuống
In this case, the file name is pydio-cells-1.5.0-linux-amd64.zip.
Therefore, the command to extract the files will be:
sudo unzip pydio-cells-1.5.0-linux-amd64.zip
5. Change permissions
Create Pydio's executable file file for the user:
sudo chmod u+x cells
Assign cells to users and pydio groups:
sudo chown pydio.pydio cells
6. Change the current user to a user pydio created at the beginning of the article.
su - pydio
7. Installation order for Pydio Cells:
./cells install
Step 7 : Set up Pydio to install
Once you have Cells enabled for installation, you will be provided with 2 options to install Pydio on Ubuntu 19.04 / 18.04 or older versions.
One is Browser-based (requires browser access) and two are Command lines (performed in this terminal) . You can choose any of these 2 options. However, because the article is installing Pydio on the Ubuntu server with the GUI, the example will choose Browser based. In addition, this option is also easier for newbies.
Note : After selecting any of these options, you will need to provide the External and Internal IP addresses you want to link to Pydio. You will be provided with the IP address available to the system.

Access the browser and open server-ip-address: 8080.
Accept the terms to start Pydio's browser-based setup wizard.

Provide the MySQL database details created above and click the NEXT button .

Create Administrator account for Pydio. The default username provided is admin , if you want to change it, type anything you want and then add a password. Finally, click the NEXT button .
Note : It is important not to skip this step.

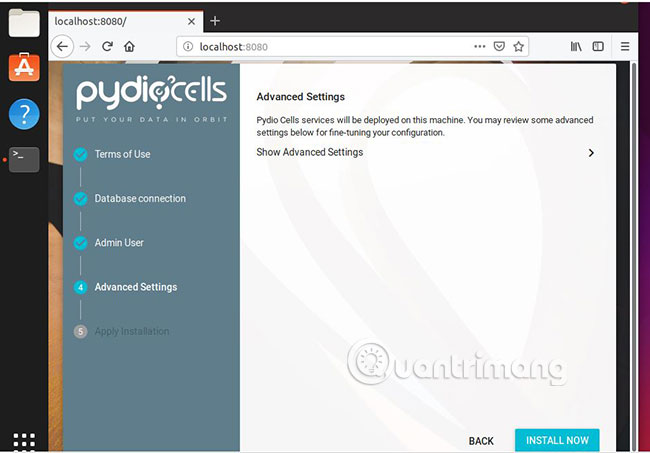
Click the Install Now button .
After installation, you will enter the Login screen . Use the information created above to login.

Step 8 : Create the Systemd service file for Pydio
After all these steps, you will see, to run Pydio, you must run the ./cells start command each time you use it. To automatically restart the cells after booting or any errors occur, you need to create a file service for Pydio Cells.
So, press Ctrl + C to finish running Pydio commands and create file service:
sudo nano etc/systemd/system/cells.service
Now paste the following commands into:
( Note : here. Pydio is the user created earlier. So, if you have created another name, use it).
[Unit] Description=Pydio Cells Documentation=https://pydio.com Wants=network-online.target After=network-online.target AssertFileIsExecutable=/home/pydio/cells [Service] WorkingDirectory=/home/pydio/.config/ User=pydio Group=pydio PermissionsStartOnly=true ExecStart=/bin/bash -c 'exec /home/pydio/cells start &>> /home/pydio/.config/pydio/cells/logs/cells.log' Restart=on-failure StandardOutput=journal StandardError=inherit LimitNOFILE=65536 TimeoutStopSec=5 KillSignal=INT SendSIGKILL=yes SuccessExitStatus=0 [Install] WantedBy=multi-user.target
To save the file, press CTRL + X and select Y and Enter .
Activate and start Pydio Cells service:
sudo systemctl enable cells sudo systemctl start cells
In this way, you can install Pydio Cells on Ubuntu.
Hope you are succesful.