Table of Contents
Windows can install TrueType (.ttf) and OpenType (.otf) font files for use in Word, Photoshop, and other desktop applications. Install only the fonts you need and obtain them from a trusted, licensed source; a large “complete font pack” can contain duplicates, poor-quality files, or fonts you are not permitted to use.
Before installing a font
- Confirm that the download comes from the font designer, a reputable marketplace, Microsoft Store, or an approved organizational source.
- Read the license. A font that is free for personal use may not be licensed for commercial work.
- If the download is a ZIP file, right-click it and select Extract All before installing.
- Preview the .ttf or .otf file to confirm its family name, available styles, and Vietnamese character support.
Method 1: Install from the font file
- Open the folder containing the extracted font files.
- Select the required .ttf or .otf files.
- Right-click the selection and choose Install. Choose Install for all users only if you have administrator permission and everyone on the PC needs the font.
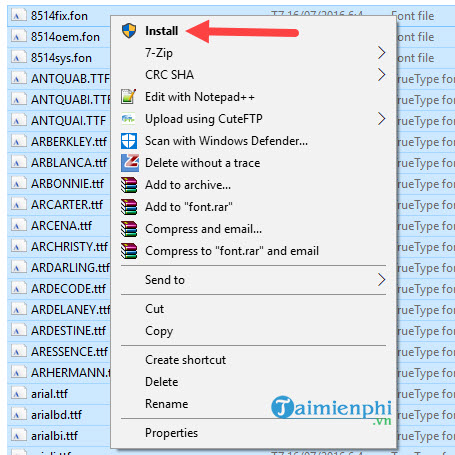
- If Windows asks for permission to make changes, verify the source again before selecting Yes.
- Wait for installation to finish. If Windows reports that a font already exists, compare the version before replacing it; do not automatically overwrite every installed font.
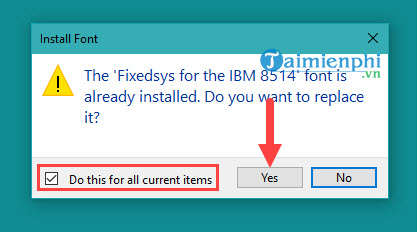
Close and reopen Word or the design application so it reloads the installed font list.
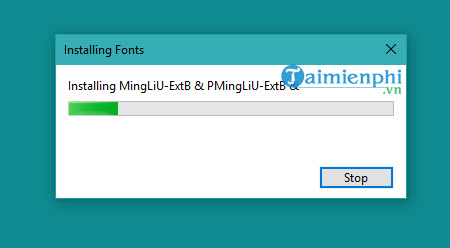
Method 2: Use Windows Settings
In Windows 11 or 10, open Settings > Personalization > Fonts. You can drag extracted font files onto the installation area or select Get more fonts in Microsoft Store. The same page lets you preview, search, and uninstall fonts.
Microsoft's Windows font-management guide documents the current Settings options.
Method 3: Use the Fonts folder
Open File Explorer and enter C:WindowsFonts in the address bar. Drag or paste the extracted font files into the folder; Windows installs them automatically.
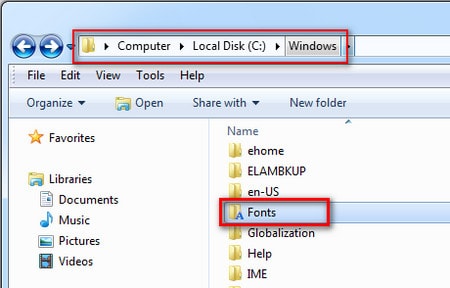
If Windows detects an existing font, review the prompt carefully. Replacing a system or work-required font with a different version can change document layout.
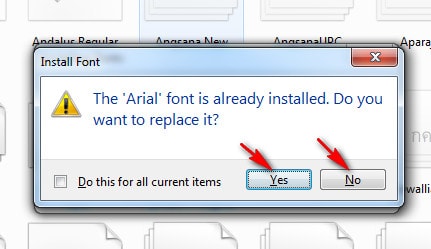
The Fonts folder method is also available on older Windows versions, although menu wording and permission prompts can differ. Windows 7 is no longer a supported operating system, so use a supported Windows release for current security updates.
Install Vietnamese fonts without creating encoding problems
A font and a text encoding are not the same thing. Modern documents should normally use Unicode fonts that contain the required Vietnamese glyphs. Older documents may use TCVN3 fonts with names beginning .Vn or VNI fonts; simply installing Times New Roman will not convert that old encoded text.
If an old document displays incorrect characters, identify its encoding before changing the typeface. The guide to converting VnTime text to Unicode and Times New Roman explains the transcoding process.
Choose fonts for the document's purpose
A decorative or calligraphy font can work in a short title but may be difficult to read in body text. Use a small, consistent set of typefaces and test Vietnamese accents, punctuation, numbers, and bold or italic styles before committing to a design. TipsMake's font-selection guide covers readability and context, while the Word font-formatting guide shows how to apply a font and size consistently.
If the font does not appear in an application
- Close and restart the application.
- Confirm the font appears under Settings > Personalization > Fonts.
- Check whether you installed a variable, web-only, or otherwise unsupported format instead of a .ttf or .otf file.
- Look for the font's family name; it may differ from the filename.
- Restart Windows if an older application keeps a cached font list.
- Test the font in Word or Notepad. If it works there but not in one application, check that application's font-format support.
Remove a font safely
Open Settings > Personalization > Fonts, select the font, and choose Uninstall. Do not remove a font required by Windows, an organization, or existing projects. Export important work to PDF or package its fonts when licensing and software allow, so another computer does not substitute a different typeface.
Related Articles
 How to Install and Remove Fonts on Mac: Install Fonts on Mac11 minutes read
 The Simplest Way to Install Additional Fonts for Computers4 minutes read
 How to Install Fonts on Windows 115 minutes read
 How to Install New Fonts in Windows, Mac and Linux7 minutes read
 How to Download and Install Vietnamese Fonts for Computers5 minutes read
 How to Add Fonts, Change Beautiful Fonts for iPhone Keyboard3 minutes read
Reader Comments 0
Sign in with email or Google to join the discussion.