How to Install Tomcat on Windows
Part 1 of 2:
Installing Java JDK
-
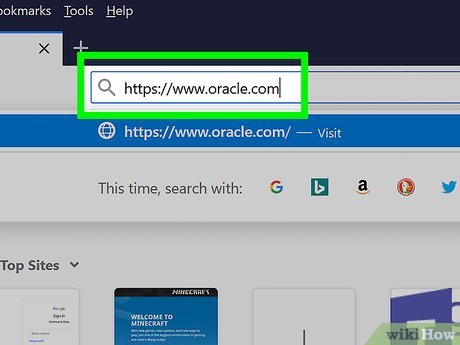
 Open the Oracle website. Type or paste https://www.oracle.com into the address bar, and press ↵ Enter or ⏎ Return on your keyboard.
- You will have to download, install, and configure JDK (Java Development Kit) in order to install and run Tomcat.
-
 Click the Downloads button next to "Top Actions." This button looks like a white, downward arrow in a blue circle on a quick menu bar. You can find it below the main showcase box on the welcome page.
 -
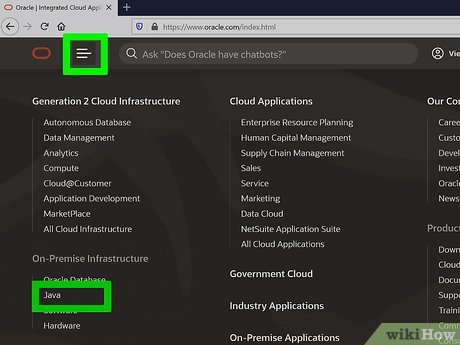
 Scroll down and click Java SE in the Java section. You can find all the Java Standard Edition downloads here, including JDK, JRE, and Server JRE versions.
 -
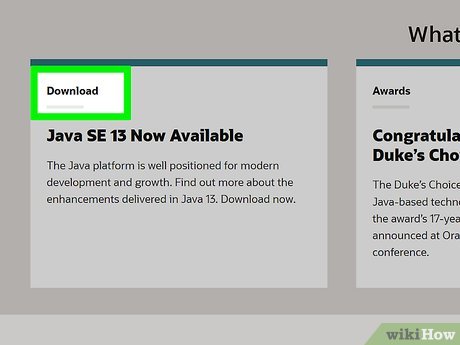
 Click the DOWNLOAD button below "JDK" or "Oracle JDK." This is a blue button on the right-hand side. It will open the available download versions.
- The newest release version will show up at the top of the "Java SE Downloads" page.
-
 Select Accept License Agreement at the top of the download links. All the download versions are listed at the bottom of the page. You can find the license agreement option at the top of this list.
- You'll have to accept the license agreement here in order to download a file.
-
 Click the blue download link next to your Windows version. This will download the installer file to your default Downloads folder.
- Some of the latest Oracle JDK versions only have 64-bit (x64) support for Windows.
- If you're using Windows in 32-bit version (x86), you may have to check several JDK/Oracle JDK versions on the Java SE page, and find one that's compatible with your system.
-
 Launch the JDK installer file on your computer. Find the installer file you just downloaded in your Downloads folder, and double-click on it to run the installer.
 -
 Click Next in the installer window. This will take you to the installation preferences on the next step.
- Make sure to note down the folder directory of the installation location here. You can find it near the bottom-left corner.
- The installation location is usually "C:Program FilesJavajdk1.8.*" with the latest version and release number.
-
 Click Next. This will start your installation, and install Java Development Kit (JDK) on your computer.
- If you're prompted during the install, click Next to confirm the installation location.
-
 Click the Close button. At the end of your installation, click this button to close the installer window.
 -
 Open the Java installation location on your computer. Double-click This PC on your desktop or Start menu, and find the Java folder in your Program Files.
- If you install JDK to a different location, make sure to open the same location as your install location from the installation wizard.
-
 Open the jdk folder in your files. You will usually have two folders named jdk and jre in your Java folder. Double-click the JDK folder to open it.
 -
 Copy the folder directory for the JDK folder. Select the directory from the address bar at the top of the File Explorer window, right-click on it, and select Copy on the menu.
 -
 Right-click This PC on your desktop. The "This PC" icon looks like a desktop computer. This will open your right-click options on a drop-down menu.
 -
 Click Properties on the right-click menu. This will open your system information in a new window.
 -
 Click Advanced system settings on the left-menu. This is a blue link on the left-hand side of the System window. It will open a new dialogue box titled "System Properties."
 -
 Click the Advanced tab. You can change your performance, user profile, and other advanced settings here.
 -
 Click the Environment Variables button. This button is near the bottom-right corner of the dialogue box. It will open a new window.
 -
 Click the New button under the "System variables" section. This section is the second box at the bottom of the Environment Variables window. You can create a new system variable here.
 -
 Type JAVA_HOME into the "Variable name" field. This will be the name of your new system variable.
 -
 Paste the copied folder directory into the "Variable value" field. Right-click the bottom field, and select paste to paste the copied folder directory.
 -
 Click OK. This will add your new system variable.
 -
 Select Path in the "System variables" section. Scroll down the variable list in the bottom box, and click Path to select it.
 -
 Click the Edit button. This will allow you to edit the contents of the Path variable in a new dialogue box.
 -
 Click New in the new dialogue box. It's in the upper-right corner of the window. This will add a new entry at the bottom of the list.
 -
 Type %JAVA_HOME%bin into the new entry field. This will be added to the Path variable in your system.
 -
 Click OK. This will save the new contents of the Path variable.
 -
 Click OK in the Environment Variables window. This will save your new environment variables.
 -
 Click OK in the System Properties window. This will save and apply all your new settings.
- You are now ready to download and install the Tomcat files on your computer.
Part 2 of 2:
Installing Tomcat
-
 Open the Tomcat website in your internet browser. Type or paste http://tomcat.apache.org into your browser's address bar, and press ↵ Enter or ⏎ Return on your keyboard.
 -
 Click Tomcat 9 on the left sidebar. You can find this option under the "Downloads" heading on a navigation menu on the left-hand side.
 -
 Download 32-bit/64-bit Windows Service Installer under "Core." You can find this option in the "Binary Distributions" section at the bottom.
- If you're prompted, select a saving location for the installer file.
-
 Launch the installer file on your computer. Find the installer in your Downloads folder, and double-click on it to start the installation wizard.
 -
 Click Next on the welcome page. This will open the License Agreement on a new page.
 -
 Click the I Agree button. It's on the bottom-right corner of the installer window. This will let you choose the components you want to install on the next page.
 -
 Select Full as your install type. Click the drop-down next to "Select the type of install," and select Full here to install all the Tomcat components, including documentation and app shortcuts.
- Optionally, you can click and uncheck the components you don't want to install on the list here.
-
 Click Next. This will confirm your selection, and take you to the configuration page.
 -
 Click Next on the configuration page. Unless you're customizing your ports, click Next here to proceed.
- Optionally, you can set an admin user name and password for your Tomcat service at the bottom here.
- You will have to specify the Java SE location on your computer on the next page.
-
 Click the three-dot button next to the text field. When you're prompted to specify the location of your JRE (Java Runtime Environment), click this button to select your file location.
 -
 Select the jre folder in your Java folder. You can usually find your Java folder in Program Files under This PC.
 -
 Click OK. This will confirm your selection, and copy the folder directory to the text field in the installer.
 -
 Click Next in the installer. You can select the install location on the final page in the next step.
 -
 Click the Install button. This will start your installation. You can track the install on a green progress bar here.
- Optionally, you can click Browse before beginning installation, and set a custom location for your Tomcat install.
-
 Click Finish on the last page. When your Tomcat setup is finished, click this button to close the installer.
 -
 Press the ⊞ Win+R Windows and "R" keys on your keyboard. Make sure to press both buttons at the same time. This will open the "Run" window.
 -
 Type services.msc in the Run window. You can check all your running and paused system services here.
 -
 Right-click Apache Tomcat on the list. This will open your right-click options on a drop-down.
 -
 Select Properties on the right-click menu. This will open a new dialogue box.
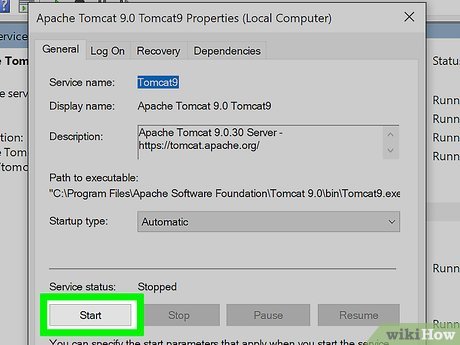
 - Click the Start button under "Service status." This will take a few seconds, and start the Tomcat service on your computer.

Share by
Jessica Tanner
Update 04 March 2020


