Get familiar with NetBeans Java IDE
In the following article, we will introduce you the most basic features of NetBeans IDE through a small test, which is to create the 'Hello World' Java application. And when finished, you will know the general knowledge and process when programming applications in IDE ...
Table of Contents
TipsMake.com - In the following article, we will introduce you the most basic features of NetBeans IDE through a small test, which is to create "Hello World" Java application . And when finished, you will know the general knowledge and process when programming applications in the IDE.
1. Initialize Project:
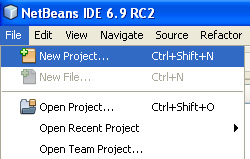
First, start NetBeans IDE . From within the IDE, select File> New Project ( Ctrl + Shift + N shortcut) as shown below:
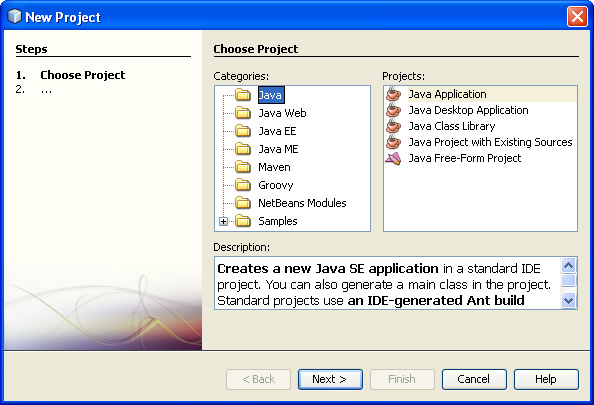
The New Project window displays, select Java> Java Application . Then click Next :
In the Name and Location section, enter the following information:
- Project Name: HelloWorldApp
- Do not select Use Dedicated Folder for Storing Libraries
- Create Main Class: helloworldapp.HelloWorldApp
- Check the Set as Main Project box

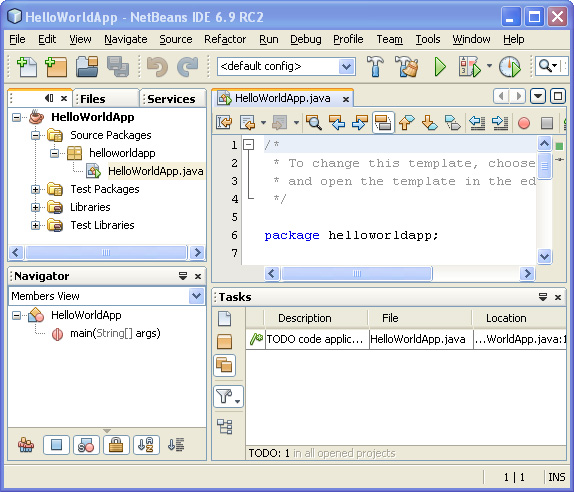
Click Finish and the Project will be opened in the IDE, we will see the following components:
Projects window: with the tree view mode of the project components, such as: source files, libraries .
- The Source Editor window with the HelloWorldApp file is open.
- Navigator window: is used to move between elements within the open class.
- The Tasks window: lists all the errors that occurred during compile and related components, marked with XXX and TODO .
2. Merge Code into Generated Source File:
At the top, we have selected the Create Main Class checkbox when creating Project , so the IDE will create the main class. You can assign " Hello World! " To the main code section by replacing the line:
// TODO code application logic here
by code:
System.out.println ("Hello World!");
Select File> Save to save the changes. Our result file in this step will look like this:
/ *
* To change this template, choose Tools | Templates
* và mở tập tin mẫu trong phần mềm.
* /
package helloworldapp;
/ **
*
* @author
* /
public class HelloWorldApp {
/ **
* @param args the arguments line command
* /
public static void main (String [] args) {
System.out.println ("Hello World!");
}
}
3. Compile and run the program:
Because the IDE's Compile feature is in the Save section, so we will not have to compile the previous project to be able to run inside the IDE. When saving a Java source file, the IDE automatically compiles it. Note that the Save Compile function can be turned off in the Project Properties by right-clicking on the project and selecting Properties . In this Properties window, select the Compiling tab, with the Compile on Save checkbox at the top right. This Project Properties can also adjust settings for: project libraries, packaging, building, running .
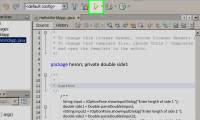
To run the program, select Run> Run Main Project or press F6:
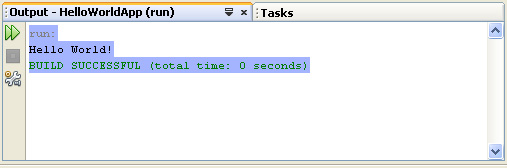
When the system displays the message as above it means that the compilation process was successful
If an error occurs, they will be marked with a red arrow symbol on the left and right-aligned at the Source Editor section . The markings on the left will correspond to the lines of the code containing the error, and the right error symbol will indicate all the files with errors, including unseen errors. Click the error icon to move to the line containing the code.
4. Building and deploying applications:
After writing the source code, checking it, we can use the Clean and Build feature to build the program. Using this Clean and Build command, the IDE will run the necessary code to perform the following tasks:
- Delete all files that have been compiled and previously built.
- Recompile the application and create a * .JAR file containing the compiled files.
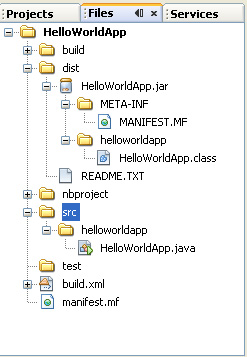
To build the program, select Run> Clean and Build Main Project or press the shortcut Shift + F11 . We can check the built files by opening the Files window and expanding the HelloWorldApp section (the name of the project). File bytecode HelloWorldApp.class after compilation is inside the build / classes / helloworldapp section . Package the * .JAR file containing the HelloWorldApp.class file inside the dist.
Very simple and easy, wish you success!
Was this article helpful?
Your feedback helps us improve.
Related Articles
 How to Install the JDK (Java Development Kit) on a Mac3 minutes read
 How to Install Netbeans on a Linux5 minutes read
 How to Create a Java Class in Netbeans to Compute the Area of a Triangle Using Heron's Formula9 minutes read
 What is Java? Why choose Java?7 minutes read
 Basic Java syntax10 minutes read
 What is JAVA file? How to open, edit and convert JAVA files5 minutes read
Reader Comments 0
Sign in with email or Google to join the discussion.