How to Download, Install and Use Google Fonts on Ubuntu
Ubuntu is one of the best open source operating systems on the market today. It provides a real software ecosystem with many premium services, services that you can usually only expect in Windows or macOS.
Table of Contents
To this effect, Ubuntu provides you with a default cache that is widely used for various typing purposes. However, users can take advantage of some of the highest quality Google Fonts on Ubuntu for various word processing purposes. Here's how to do it.
Download and Install Google Fonts on Ubuntu
To install Google Fonts on Ubuntu manually, the first step is to download the fonts directly from fonts.google.com.
Select the font family you want to download. In this tutorial, the article will download the Open Sans font. Click the Download Family button in the top right corner.
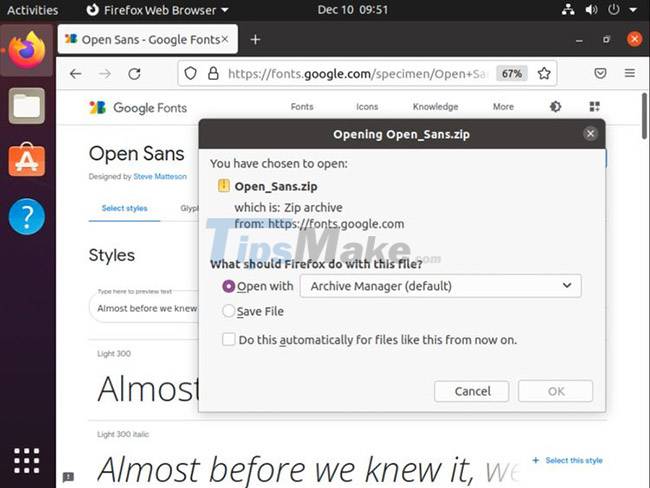
A compressed archive containing the necessary fonts will be downloaded to the machine. You need to unzip this downloaded file and install the fonts through the Linux Terminal.
Navigate to your pre-installed fonts folder.
cd /usr/share/fonts
Create a folder in the directory using the mkdir command.
sudo mkdir googlefonts
Navigate to the newly created googlefonts folder using the cd command.
cd googlefonts
Extract the ZIP archive containing the fonts you need to install.
sudo unzip -d . ~/Downloads/Open_Sans.zip
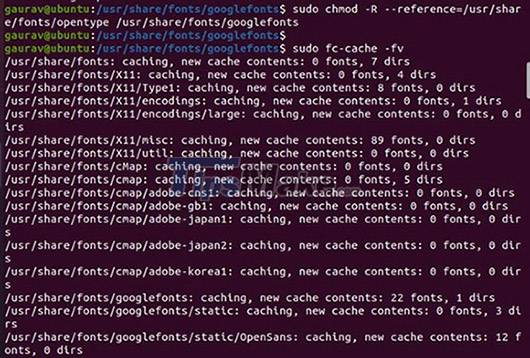
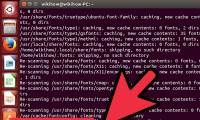
Once you have unzipped the archive, register the font with the following command:
sudo fc-cache -fv
Finally, check if the font has been installed successfully by typing:
fc-match OpenSans

That's it, you're ready to start using fonts now.
Install Google Fonts on Ubuntu using TypeCatcher
As shown above, you can download and install any font you want directly from the web on Ubuntu. However, Google offers fonts for a variety of use cases.
These fonts are available in narrow, bold, italic, and light spacing formats, thus allowing you to download and install them in one go. However, it is best to get a hold of TypeCatcher for easy installation.
How to install and use TypeCatcher
TypeCatcher, as a font archive, downloads and installs a wide variety of fonts on Linux systems. It is a very convenient application to have, in case you regularly use Ubuntu for word processing and graphic design.
It's easier to install TypeCatcher from Terminal. First, launch Terminal and update existing packages with the following command:
sudo apt install typecatcher
Now, to install TypeCatcher, run the following command:
sudo apt install typecatcher
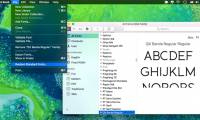
Once done, close Terminal and launch TypeCatcher from the Applications menu. After TypeCatcher launches, you can review the available fonts listed on the left panel.

As soon as you click on the desired font on the left side, you will get a preview of the font on the right panel. This will make your task easier, as you can preview the font of your choice before you install it.

Once you have selected a specific font type, click the Download button in the top left corner. Additionally, you can search for fonts by their name to quickly locate them in TypeCatcher.
To make it even easier, you can batch select Google fonts for Ubuntu and have them install in an automatic sequence.
To test the fonts, use them on LibreOffice or any other word processing application you have installed on your system. Recently downloaded Google Fonts will be available in any installed word processor's font list.
Was this article helpful?
Your feedback helps us improve.
Related Articles
 How to install and remove fonts on Linux7 minutes read
 How to install and remove fonts on Mac10 minutes read
 How to Install TrueType Fonts on Ubuntu3 minutes read
 How to Install Custom Fonts in Ubuntu2 minutes read
 10 best free Google fonts for professional presentations9 minutes read
 How to Download Fonts6 minutes read
Reader Comments 0
Sign in with email or Google to join the discussion.