How to Install an Equalizer
Equalizer or equalizer is a useful audio device that helps users adjust the frequency response of an audio signal. This device has many features and segments, but in general it can adjust sound levels at different frequencies. Let's learn how to connect an equalizer to your home or car stereo system. Just by considering a few simple aspects, you will be able to set up your stereo to enjoy your favorite songs.
Table of Contents
Connect the equalizer between the receiver and the amplifier

The easiest connection to make is between the equalizer and the receiver (or receiver). The receiver is a system that receives and converts audio signals into digital signals, then decodes and transmits them to the speakers. Most receivers have preamp-in and preamp-out connections or a tape monitor port for recording tape. In most cases, this is the best way to connect an equalizer to your stereo.
Tape channels will only require connection to a receiver. You can learn how to connect an equalizer to the receiver to do this.

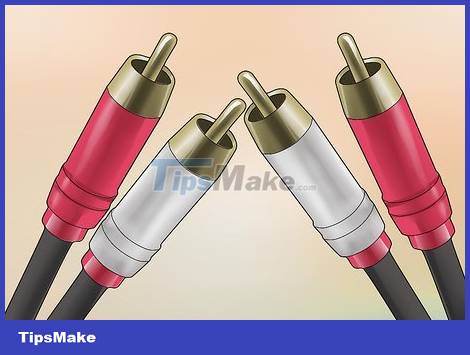
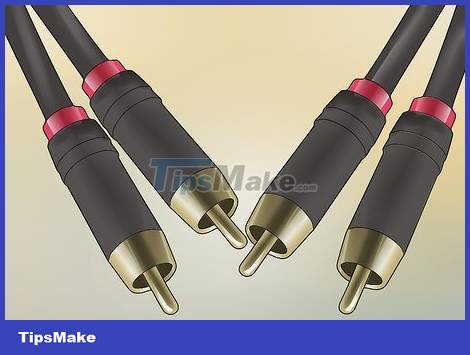
Buy two pairs of RCA cables. To transmit the signal from the stereo receiver to the equalizer and then to the amplifier (or amplifier), you need 2 sets of RCA cables (the type commonly used to connect source components such as turntables and turntables). CD player).
The RCA cable needs to be the right length for the distance between the receiver and the equalizer.

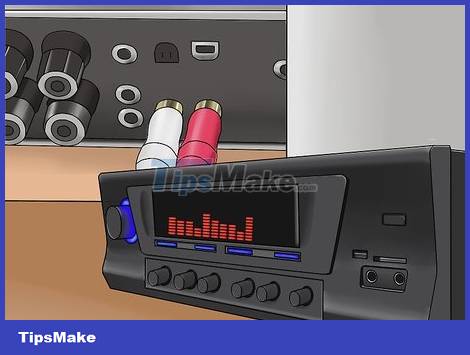
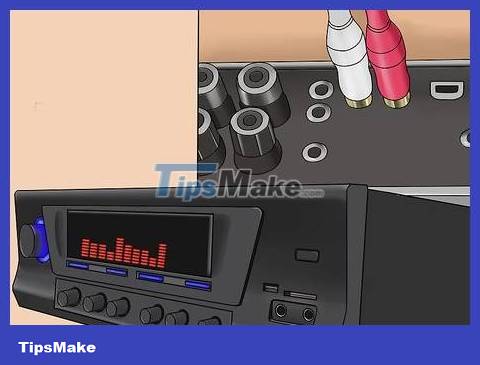
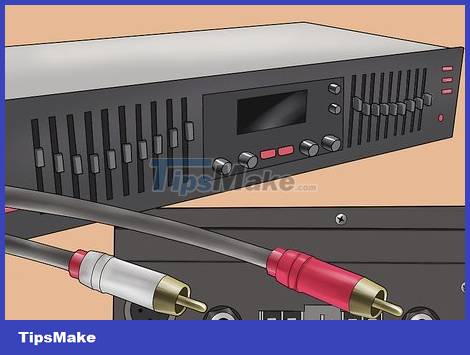
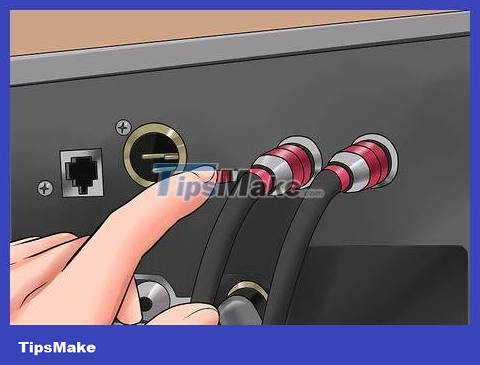
Use a pair of RCA cables to connect the receiver and tuner. Plug one end of the pair of cables into the pre-amp output on the receiver, and the other end into the left and right inputs on the equalizer.
These channels are usually located behind the equalizer.
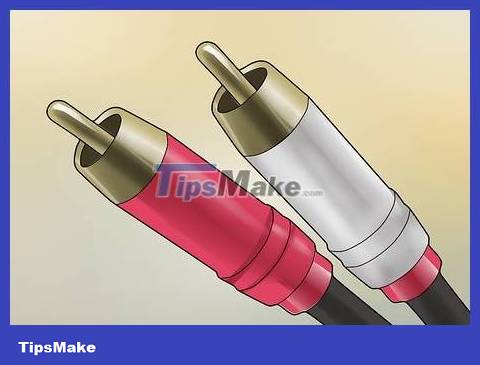
Normally, you need to plug the red RCA cable end into the right channel jack, and the black or white RCA plug will connect to the left channel.

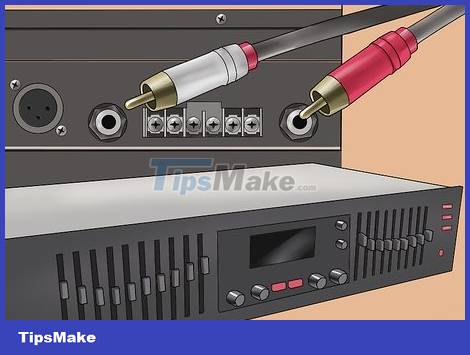
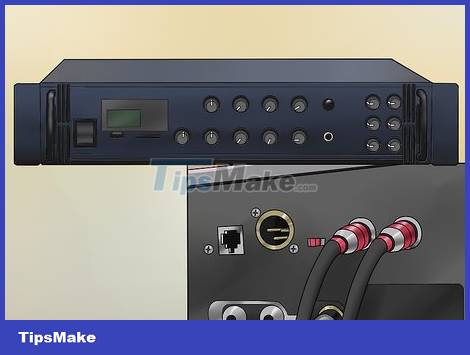
Connect the receiver and amplifier using a second pair of RCA cables. Use the remaining pair of RCA cables to connect from the output channels located on the back of the equalizer to the left and right input channels on the amplifier.
Usually, the red RCA cable end will plug into the right channel jack, while the black or white RCA cable end will connect to the left channel jack.
Connect the amplifier to the receiver. The amplifier needs to be connected to the receiver using an RCA cable from the amplifier output to the receiver input. This connection is very effective in creating a loop from the receiver through the equalizer to the amplifier and then back to the receiver.
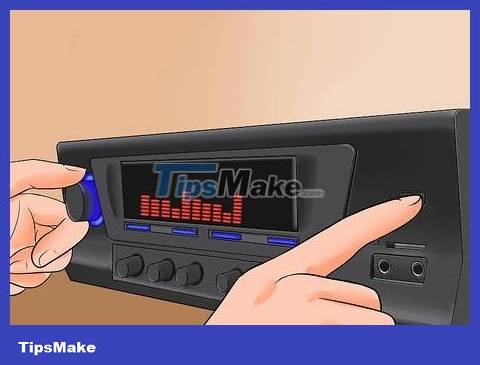
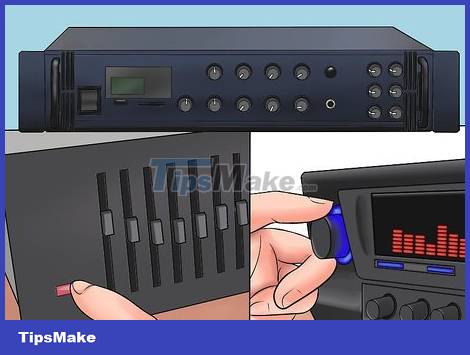
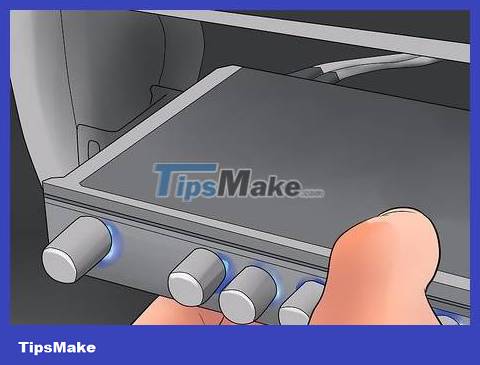
Turn on the receiver, equalizer and amplifier. Turn on all three devices and use the buttons on the equalizer to adjust to your liking. So you can manipulate the controls on the equalizer and change the frequency response or pitch of your music.
Connect the equalizer to the receiver

Connect an equalizer to an audio receiver if the device does not have preamp output channels. The equalizer is always located between the receiver and the amplifier. Amplifiers require integrated preamp-out and preamp-in connections to operate in this model.
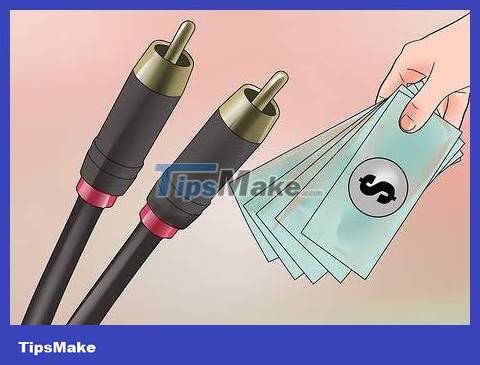
Buy 2 pairs of RCA cables. To transmit the signal from the stereo receiver to the equalizer and vice versa, you need 2 sets of RCA cables (the type commonly used to connect source components such as turntables and CD players).
The RCA cable needs to be the right length for the distance between the receiver and the equalizer.
Use a pair of RCA cables to connect the receiver and tuner. Plug one end of the cable pair into the tape channel output on the receiver, the other end of the cable connects to the left and right channel inputs on the equalizer.
These channels are usually located behind the equalizer.
Continue connecting the receiver and equalizer using the second pair of RCA cables. Use the remaining pair of RCA cables to connect from the output channels on the back of the tuner to the tape input channels located on the back of the receiver.
Usually, the red RCA cable end will plug into the right channel jack, while the black or white RCA cable end will connect to the left channel jack.

Use the equalizer. Turn on the receiver and set the input control on the front of the device to 'Tape Monitor' mode. The tape channels will be open, which means the sound will pass through the equalizer before reaching the amplifier. At that time, you can use the buttons on the equalizer to adjust to your liking.
So you can manipulate the controls on the equalizer to change the frequency response or pitch of your music.
To switch to 'Tape Monitor' mode, you need to push the function button on the front of the equalizer.
If the tape recorder is connected to the tape channel, you need to disconnect it first to connect to the equalizer.
Connect the equalizer directly to the amplifier

Connect an equalizer directly to an amplifier if the receiver does not have a preamp or tape output channel, but the amplifier has preamp-in and preamp-out channels. Most receivers have preamp-in and preamp-out connections or a tape monitor port. In most cases, these are the best methods for connecting an equalizer to a stereo. However, if the receiver does not have these channels, you can connect the equalizer directly to the amplifier.
To connect directly to an equalizer, the amplifier needs preamp-in and preamp-out channels.
Buy 2 pairs of RCA cables. To transmit the signal from the equalizer to the amplifier and vice versa, you need 2 sets of RCA cables (the type commonly used to connect source components such as turntables and CD players).
The RCA cable needs to be the right length for the distance between the receiver and the equalizer.
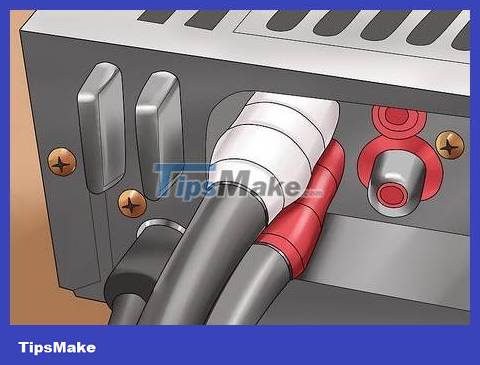
Use a pair of RCA cables to connect the equalizer and amplifier. Connect the pre-amp output channels on the amplifier to the pre-amp input channels of the equalizer.
These channels are usually located behind the equalizer.
Usually, the red RCA cable end will plug into the right channel jack, while the black or white RCA cable end will connect to the left channel jack.
Sometimes amplifier channels will be marked as 'tape monitor output' instead of 'pre-amp output'.
Use a second pair of RCA cables to connect the amplifier to the receiver. Connect from the output channels on the back of the equalizer to the pre-amp input channels on the amplifier.
Usually, the red RCA cable end will plug into the right channel jack, while the black or white RCA cable end will connect to the left channel jack.
Some amplifiers mark 'pre-amp input' input channels with 'tape monitor input'.
Switch to the pre-amp connection on the amplifier. Some amplifiers will have a switch to enable the pre-amp connections. If you are using tape channels, press this switch to switch to the preamp channel.
Turn on the receiver, tuner, and amplifier to begin use. Turn on all three devices and use the buttons on the equalizer to adjust to your liking. So you can manipulate the controls on the equalizer to change the frequency response or pitch of the music.
Connect the tuner to the car remotely
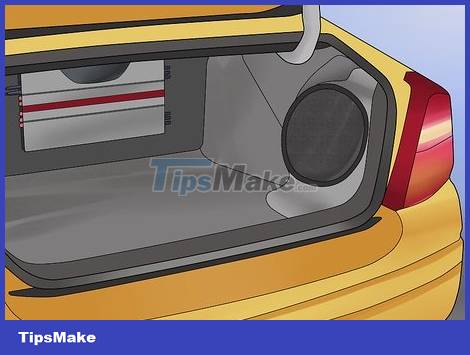
Use this method to connect the equalizer to your car stereo remotely for more ambience. Some equalizers are designed to be integrated into the dashboard, while others can be located further away (e.g. the rear luggage compartment). Installation location will depend on usage needs and specific equalizer.
Many people like to place the equalizer near the amplifier in the rear luggage compartment so they can easily add an additional amplifier later.
Some cars don't have space for an equalizer in the dashboard, so the device needs to be installed remotely.
The equalizer can be installed anywhere, as long as it is between the amplifier and the receiver.
Most remote-mounted tuners come with a remote so you can change settings while sitting in the driver's seat.
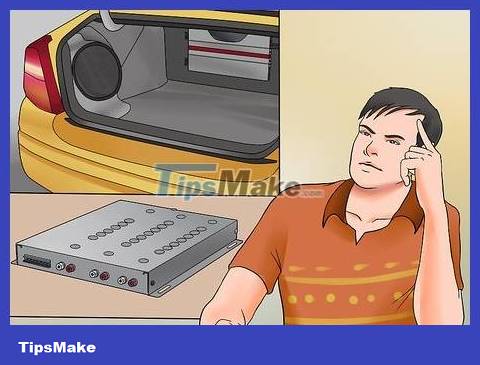
Decide where to place the equalizer. Most people prefer to place the remote tuner in the rear luggage compartment of the car and near the amplifier. This way, they can easily add an amplifier later, simply connecting the wires in close proximity. Or you can also place the equalizer under the seat in the car.
Note: no matter where you install the equalizer, you will need to connect electrical wires to the central player, receiver and amplifier.
Buy 2 pairs of RCA cables. To transmit the signal from the stereo receiver to the equalizer and vice versa, you need 2 sets of RCA cables (the type commonly used to connect source components such as turntables and CD players).
The RCA cable needs to be the right length for the distance between the receiver and the equalizer.
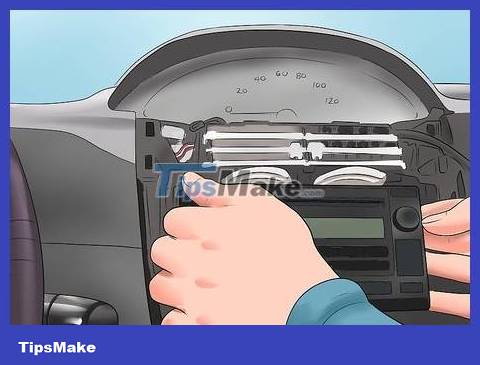
Remove the receiver from the control panel. Remove the receiver from the control panel so you can access the wiring behind the device. Normally, you can open the protective plastic cover on the control panel and gently pull the receiver out.
Plug the RCA cable into the receiver built into the console. Plug the two RCA cables into the preamp output on the receiver. You can use tape to wrap the two ends of the cable together to secure it securely.
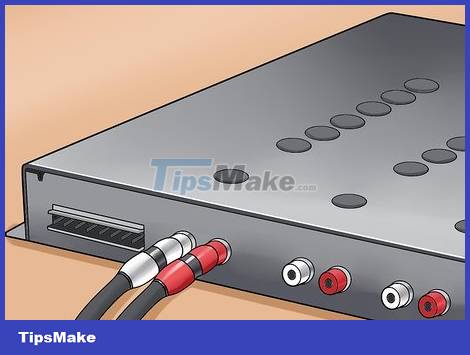
Pull the cable to the equalizer and connect. Route the cable through the control panel to the equalizer. You can use tape or wire to wrap the two cables together. Then, connect the cable to the preamp input on the equalizer.
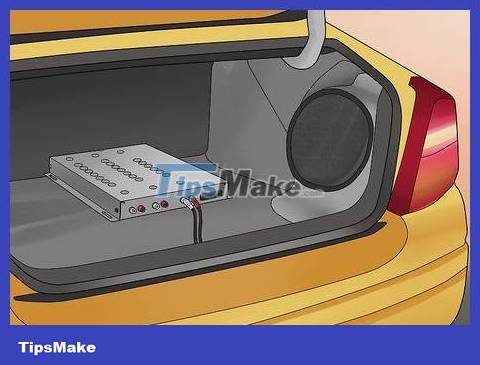
Place the equalizer on the car. Do not attach the equalizer directly to the metal frame because it will cause sound interference. It's best to place the equalizer on the floor or some other rubber surface to avoid interference.
If you must use screws to secure the equalizer to the metal frame, you will need to put rubber wedges between the device and the frame.
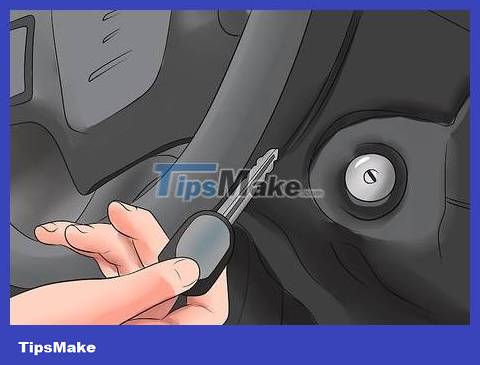
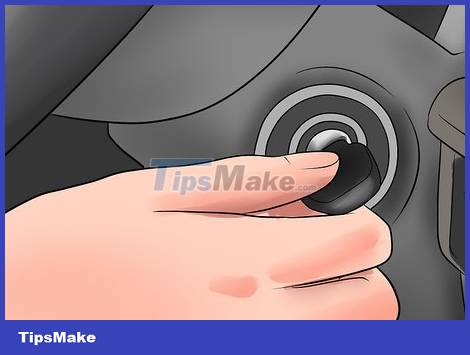
Turn off the key. Turn off the power and remove the key before starting installation. This preparation will keep you safe during the wiring connection process.
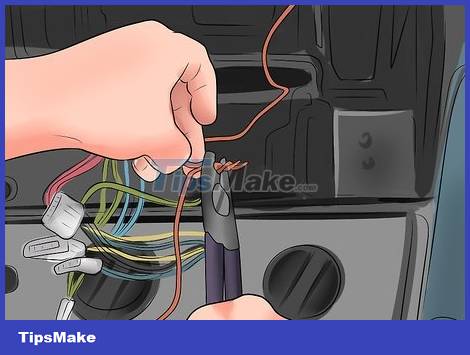
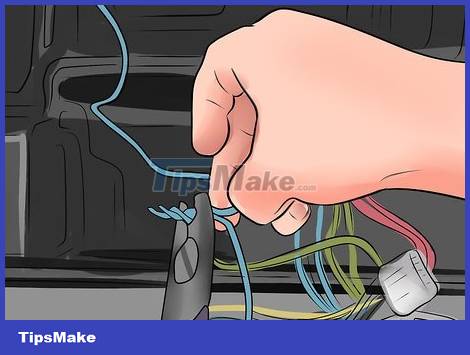
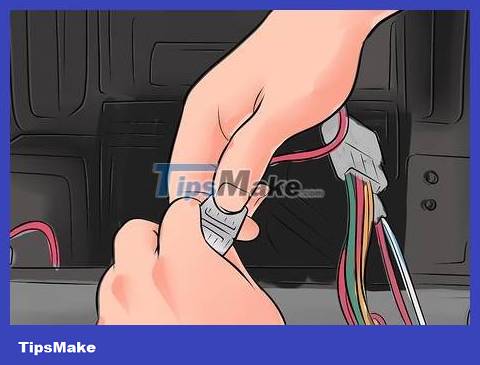
Connect the ground wire. On the equalizer there will be 3 colored wires, of which the black wire is the ground wire. Remove the bolt located near the equalizer installation location and scrape off the paint around the bolt. Bend the wire end into a circle around the bolt and screw it back into place.
If there is no suitable location, you may need to drill a small hole in the metal frame. Be careful not to damage the fuel tank or brake lines.
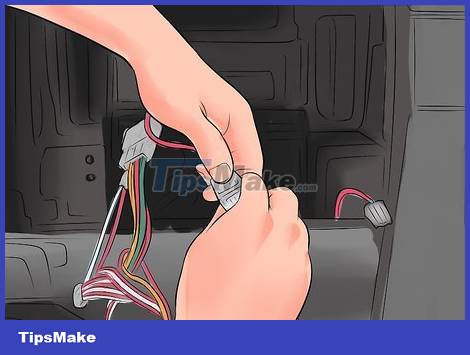
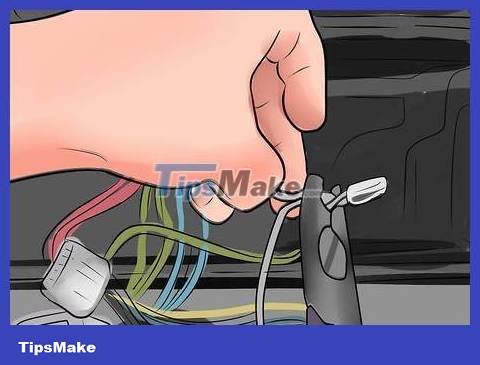
Connect the power cable. The yellow wire (can also be red or another color, you should check the manual) on the tuner is the 12 V power wire. Connect this wire to the power cable on the receiver or the optional 12 V power source in fuse box (such as wiper fuse).
If the receiver does not have a wiring diagram showing which power cable is switched, you will need to use a digital multimeter to determine the correct cable. Connect the multimeter to the cable. At this time, the car key must be off and the reading is 0. Then, turn the key on to see if the new reading is 12 V or not. If the wire is the same color as the manual and the indicator when turned on is 12 V, then this is a converted power cord.
Connect the wires together and wrap the bare metal section with electrical tape. This way the bare wire will not come into contact with other wires and potentially cause a short circuit.
You can also wrap the wires together, but that won't be as secure as connecting them.
This wire needs to be led from the receiver to where the equalizer is located.
Connect the remote start wire. On the tuner, this is a blue wire with white stripes and is labeled accordingly. On the receiver, the remote start wire is blue (in some cases other colors), you need to connect this wire to the amplifier. Proceed to route the remote start wire on the tuner to and connect it to the blue wire on the receiver.
Connect or wrap the wires together and then wrap electrical tape around the connection.
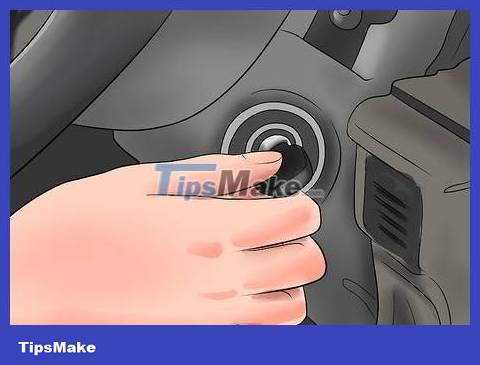
Turn the car key on to check the tuner. Turn the key to the 'on' position, then turn on the radio to see if the tuner kicks in at the same time and everything works as expected.
Reinstall the receiver. Place the receiver back into the frame and attach the protective cover. Check to make sure the power cord is pushed into the control panel before placing the receiver.
Connect the built-in equalizer to the car dashboard

Use this method to connect the equalizer to your dashboard stereo if you want to make it easier to use. In addition to remote-installed equalizers (such as in the rear luggage compartment), some other models are designed to be integrated into the dashboard. Installation location will depend on usage needs and specific equalizer.
Many people like to install an equalizer in their car's dashboard so they can make adjustments without leaving the car.
The equalizer can be installed anywhere, as long as it is between the amplifier and the receiver.
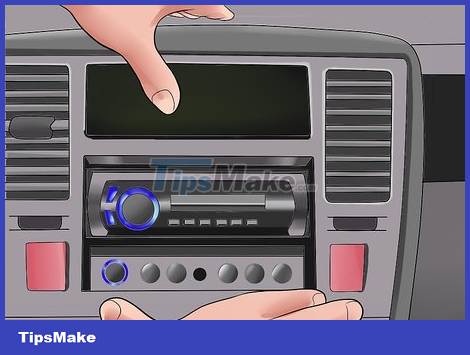
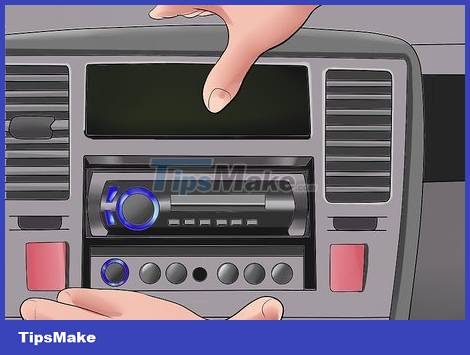
Decide where to install the equalizer. The best place to install an integrated equalizer in the console is directly above or below the center player or stereo controls. On some cars, space for an equalizer is built into the dashboard, but not all cars have it. If your vehicle doesn't have this space available, mount the equalizer below the dashboard. The final option is to intervene in the design to integrate the equalizer into the control panel.
If your control panel has space for an equalizer, you'll only need an installation kit to mount it. These include the bracket and some screws to secure the center player to the console. Included with the kit will be installation instructions.
If your vehicle does not have space available for this purpose, you will need to purchase a specialized accessory kit to attach the equalizer below the dashboard. These accessories are often designed to mount under the driver's side dashboard (or other locations depending on need). The design of these accessory kits is very diverse, so you can choose the type that suits your usage habits and vehicle structure.
If you want to customize to your own needs, it's best to take your car to a professional car audio installation service.
Buy 2 pairs of RCA cables. To transmit the signal from the stereo receiver to the equalizer and vice versa, you need 2 sets of RCA cables (the type commonly used to connect source components such as turntables and CD players).
The RCA cable needs to be the right length for the distance between the receiver and the equalizer. To avoid "cable clutter", it is best to buy a "patch" cable with a length of about 30 cm.
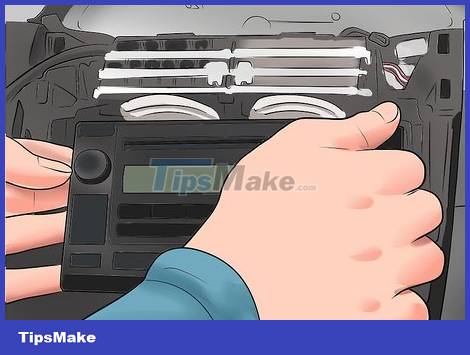
Remove the receiver from the control panel. Remove the receiver from the control panel so you can access the wiring behind the device. Normally, you can open the protective plastic cover on the control panel and gently pull the receiver out.
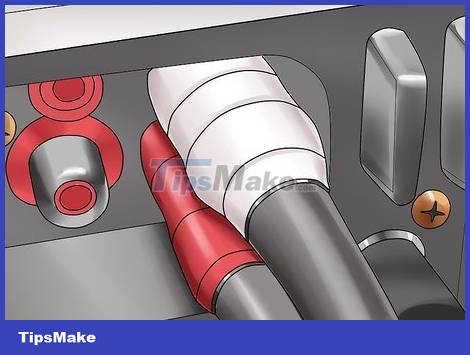
Connect the RCA cable to the console-integrated receiver. Plug both ends of the RCA cable into the preamplifier input on the receiver. Use tape to wrap them together to secure.
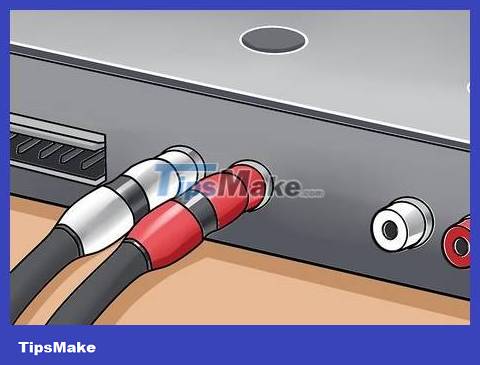
Connect the cable to the equalizer. Route the cable through the control panel to the equalizer. You should use tape or wire to fix the two cables together. Plug the cable into the preamp input port on the equalizer.
Install the equalizer. Mount the equalizer in the location of your choice. You just need to tighten a few screws to fix the equalizer.
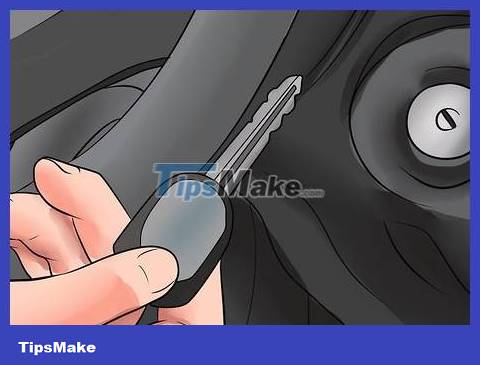
Turn off the key. Turn off the power and remove the key before starting installation. This preparation will keep you safe during the wiring connection process.

Connect the ground wire. On the equalizer there will be 3 colored wires, of which the black wire is the ground wire. There will also be a black ground wire on the back of the receiver, and you will need to connect (or wire) these two wires together. Then, use electrical tape to wrap around the connection.
If you cannot find the black wire on the receiver, remove the bolt located near the receiver's fixing position and then scrape off the bolt's coating. Then, you bend the end of the wire around the bolt and screw it back into place.
If there is no suitable location, you may need to drill a small hole in the metal frame. Be careful not to damage the fuel tank or brake lines.
Connect the power cable. The yellow wire (can also be red or another color, you should check the manual) on the tuner is the 12 V power wire. Connect this wire to the power cable on the receiver or the optional 12 V power source in fuse box (such as wiper fuse).
If the receiver does not have a wiring diagram showing which power cable is switched, you will need to use a digital multimeter to determine the correct cable. Connect the multimeter to the cable. At this time, the car key must be off and the reading is 0. Then, turn the key on to see if the new reading is 12 V or not. If the wire is the same color as the manual and the indicator when turned on is 12 V, then this is a converted power cord.
Connect the wires together and wrap the bare metal section with electrical tape. This way the bare wire will not come into contact with other wires and potentially cause a short circuit.
You can also wrap the wires together, but that won't be as secure as connecting them.
This wire needs to be led from the receiver to where the equalizer is located.
Connect the remote start wire. On the tuner, this is a blue wire with white stripes and is labeled accordingly. On the receiver, the remote start wire is blue (in some cases other colors), you need to connect this wire to the amplifier. Proceed to route the remote start wire on the tuner to and connect it to the blue wire on the receiver.
Connect or wrap the wires together and then wrap electrical tape around the connection.
Turn the car key on to check the tuner. Turn the key to the 'on' position, then turn on the radio to see if the tuner kicks in at the same time and everything works as expected.
Reinstall the receiver. Place the receiver back into the frame and attach the protective cover. Check to make sure the power cord is pushed into the control panel before placing the receiver.
Was this article helpful?
Your feedback helps us improve.
Related Articles
 3 Equalizer applications help improve sound quality on macOS5 minutes read
 5 best equalizer software for Windows 10 to improve PC sound6 minutes read
 How to turn on and use Groove Music Equalizer in Windows 104 minutes read
 How to Hook up an Equalizer22 minutes read
 How to adjust Equalizer on iPhone and iPad3 minutes read
 7 best equalizer software for Windows 10 to improve PC sound7 minutes read
Reader Comments 0
Sign in with email or Google to join the discussion.