How to insert a checkmark in Word - Fixed checkmark or checkbox
There are many different ways to insert a checkmark in Word, but the steps to do so are very simple..
There are many ways to insert checkmarks in Word, and the steps are quite simple. Checkmarks appear in survey documents, lists, forms, job applications, etc. The checkmark type in Word is usually a checkmark (v), check, or uncheck, depending on the requirements of the document you need to process. If you only need to insert a fixed checkmark, the steps are simpler and easier than inserting a checkmark that can be selected directly. If you want to use a checkmark directly from survey participants, you need the Developer tools in Word . Below are instructions on how to insert checkmarks in Word.
Insert a checkmark in Word using a keyboard shortcut.
Step 1:
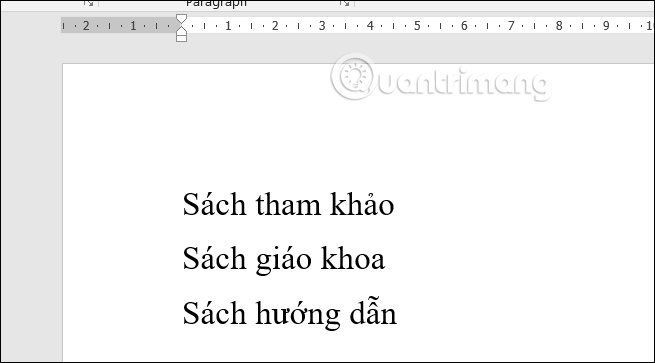
First, we enter the content we want to use the checkmark in Word as usual.
Step 2:
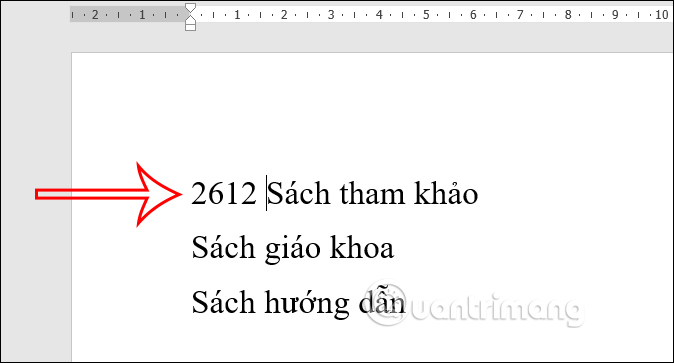
At the beginning of the content, enter the number sequence 2612 to insert a square box marked with an x .
Step 3:
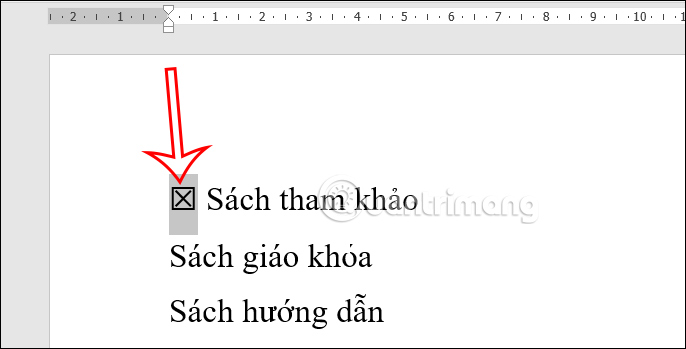
Next, highlight the number sequence 2612 and press Alt + X. The result will display a square with an x mark, as shown below.
We just need to copy this square with the 'x' mark down to the rest of the content, and we're done.
Step 4:
Besides the checkmark option with an "x" in the square box as shown above, you can also choose an empty square box (without a checkmark) for printing a Word document as a survey document, or a square box with a checkmark.
If the square box is empty and not checked , press the number key combination 2610 .
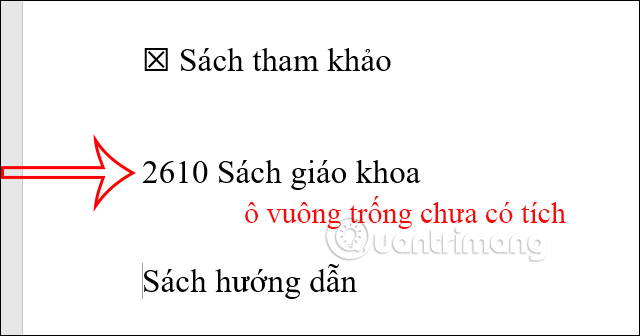
Next, highlight 2610 and press Alt + X. The result will be an unchecked square as shown below.
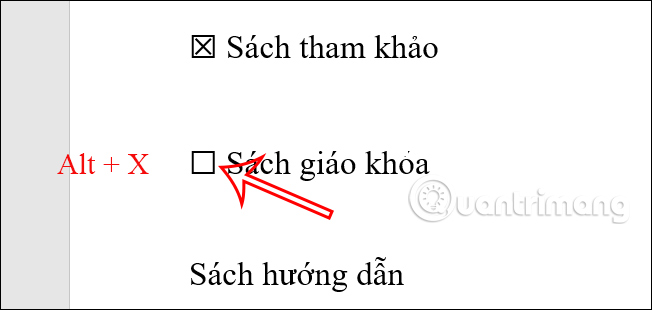
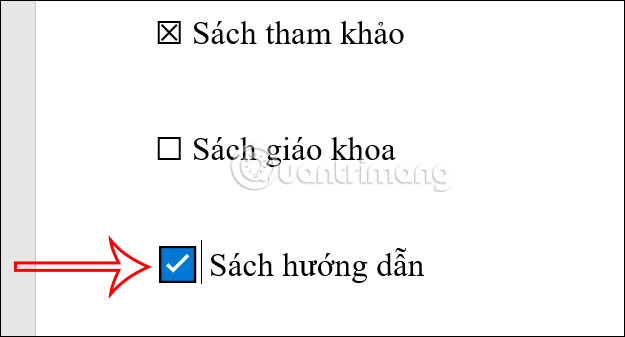
For the checkmark box, enter the number 2611 , highlight it, and then press Alt + X.
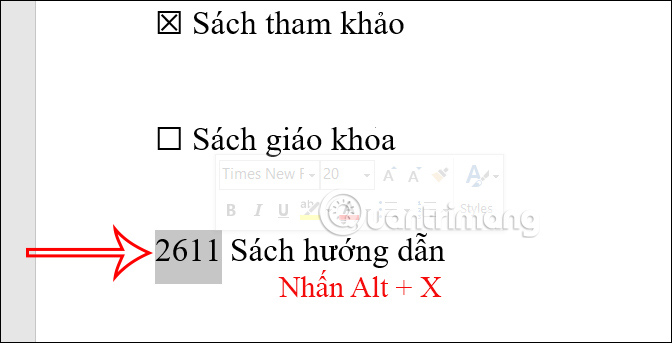
The result is a checkmarked square box in Word, as shown below.
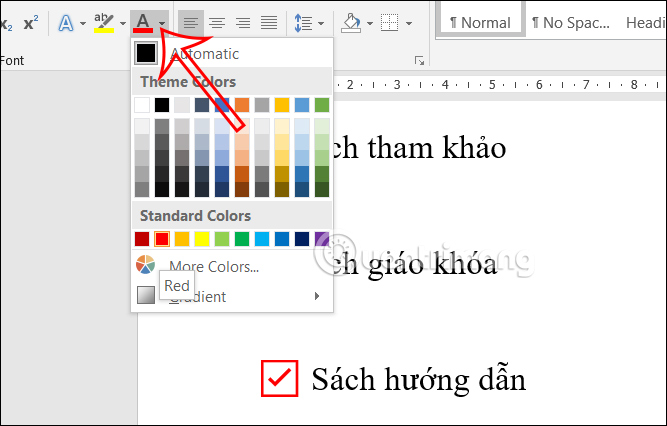
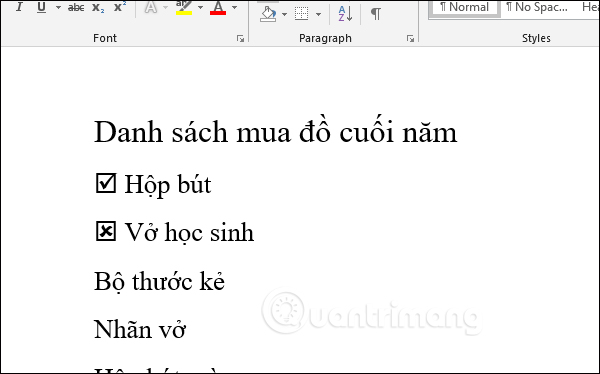
If you want to change the color of the checkmarked square, highlight the square , then select the "A" icon and choose the color you want for the square.
2. Create a permanent checkmark in Word
As mentioned above, the Symbol tool also offers various types of checkmarks for users to choose from.
Step 1:
Click on the content where you want to insert the checkmark. Then click the Insert tab on the toolbar and select Symbol . Click More Symbols… to expand the list of symbols.

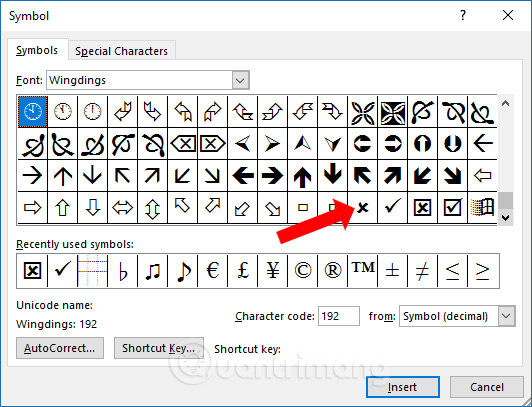
Step 2:
In the Symbol dialog box, the user finds the Wingdings font type . A list of symbols will appear; scroll down and you will find a row of checkmark symbols. The user selects the desired checkmark style, depending on the document's requirements.
Select the desired checkmark style and then click the Insert button below.
The checkmark will appear at the location where the cursor was placed, as shown below.
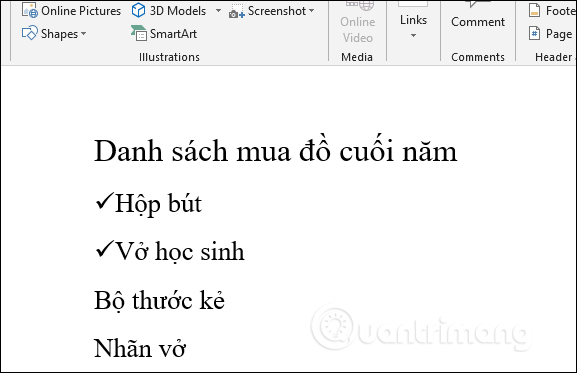
Alternatively, you can insert a checkmark in the square box in Word as shown below.
This method only applies to printed documents. For online documents where viewers manually click the checkmark, please refer to the instructions below.
3. Create checkboxes in Word
This method uses the Developer tool in Word. This tool needs to be enabled in Word Options. For instructions on creating checkboxes in Word, please refer to the article " How to create checkboxes in Word" .
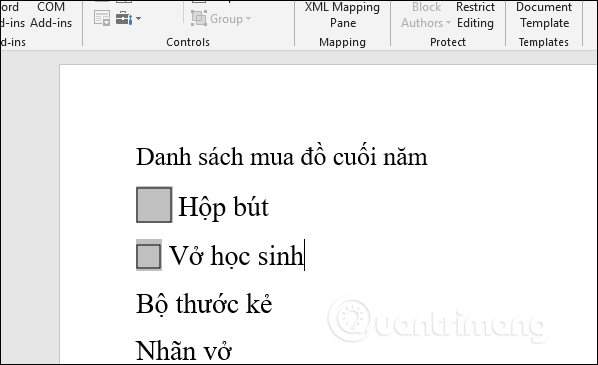
The result will be displayed in a checkbox in Word, as shown below.

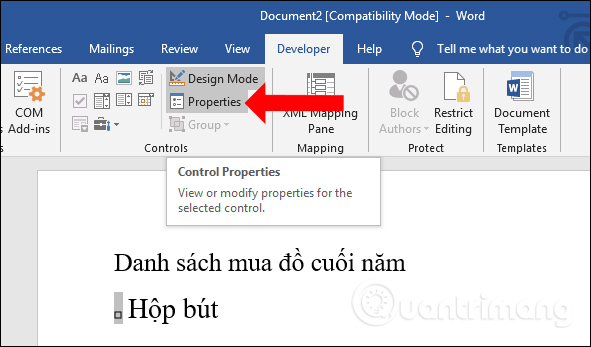
After creating the checkbox, if you want to change the size of the checkbox without changing the font size, click on the checkbox and then click on Properties .
In the Check box size section, users click the Exactly button and then select the size for the checkbox inserted into the Word document.
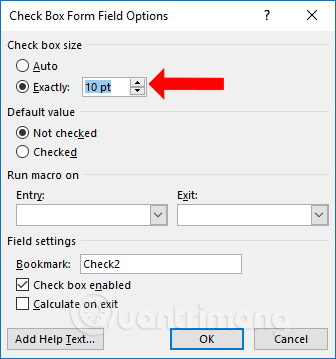
The size of the checkbox will change while the font size remains the same.
Above are two ways to create checkmarks in Word: using the built-in Symbols or through the Developer Tools. Users can choose the appropriate checkmark style depending on their document requirements.