How to hide personal information on Windows 10 login screen?
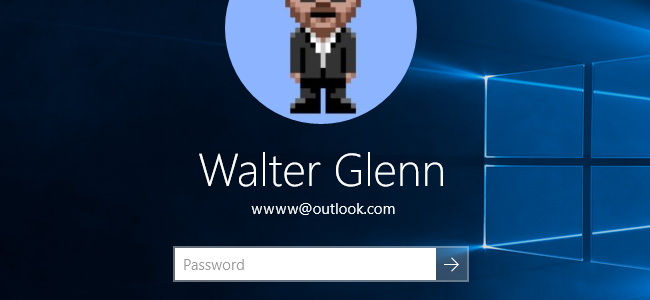
When you log on to a Windows 10 computer using a Microsoft account, on the Windows 10 login screen will display the name and email address of the latest login user. However, if you use a public computer, or when someone borrowed your computer for use, all your personal information, especially Microsoft accounts, will not be secured.
So how to hide personal information on the Windows 10 login screen? Please refer to the following article of Network Administrator.

1. Hide personal information on the login screen by editing the Registry
Note : This method applies to Windows 10 Home version. With Windows 10 Pro and Enterprise versions you use Group Policy Editor.
First open the Registry Editor by opening Start and then typing regedit and pressing Enter.
On the Registry Editor interface, in the list of items on the left pane, navigate to the following key:
In the list of right pane items, find the dontdisplaylastusername value, then double click on that value.

Set the value in the Value Data frame to 1 and then click OK .

Next create a new value in the System key. In the list of left frame items, right-click the System folder icon and select New => DWORD (32-bit) .
Name this value as DontDisplayLockedUserID .

Double-click the value DontDisplayLockedUserID that you just created and set the value in the Value Data frame to 3 .

Click OK , exit Registry Editor and proceed to restart your computer to apply the changes.
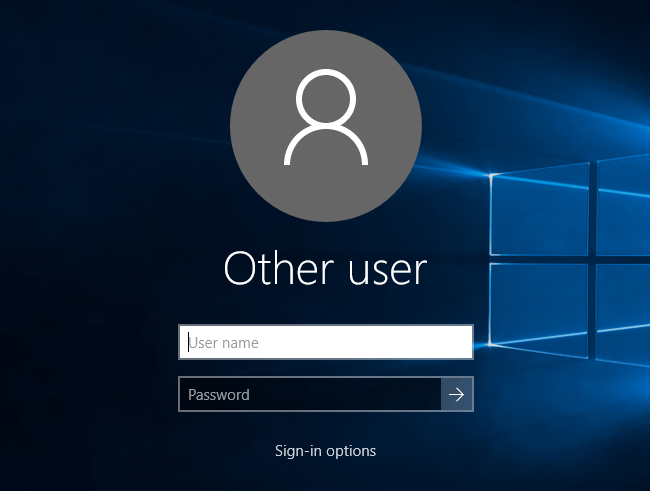
From now on every login you will no longer see the user name or user image on the login screen anymore.

If you want to display personal information on the login screen, follow the same steps. However, reset the dontdisplaylastusername value and DontDisplayLockedUserID to 0 .
2. Use the built-in Registry
If you are lazy to take steps to edit the Registry, you can use the built-in Registry.

Download Logon Screen Personal Info Hack to your device and install it here.
After downloading the Logon Screen Personal Info Hack to the computer, proceed to extract the ZIP file.
When extracting Logon Screen Personal Info Hack, you will see 2 files:
Hide Personal Info at Logon.reg: Hide personal information on the login screen.
Show Personal Info at Logon.reg: Show personal information on the login screen.
Double-click on one of the 2 files you want to make the request, then follow the steps as instructed and restart your computer.
3. Hide personal information on the screen logged in with Local Group Policy Editor (Windows 10 Pro and Enterprise)
If you are using Windows 10 Pro or Enterprise, the easiest way to hide personal information on the login screen is to use Local Group Policy Editor.
First, open Start, then enter gpedit.msc in Search box and press Enter to open Local Group Policy Editor.
On the Local Group Policy Editor interface, in the list of left pane items, expand Computer Configuration => Windows Settings => Security Settings => Local Policies => Security Options.
In the list of right frame options, look for Interactive Logon: Display user information when the session is locked and double-click on that option.

A drop-down menu will appear on the screen. In this menu, select Do not display user information and click OK .

Next go back to the Local Group Policy Editor interface, find and double-click the Interactive logon option : Do not display the last user name.

A new window appears, select Enable and then click OK .

Exit Local Group Policy Editor and proceed to restart your computer.
If you want to display personal information on the login screen, perform the same steps and change the above 2 options again.
Refer to some of the following articles:
-
Instructions for completely removing Onedrive application on Windows 10
-
Trick to speed up Windows 10 computers
-
Trick to speed up Start Menu on Windows 10
Good luck!
You should read it
- Displays the login information for the last time you log on to a Windows 10 computer
- Instructions on how to hide personal information on Facebook
- How to hide and show the recycle bin on Windows 11
- How to hide 6 folders in This PC on Windows 10
- How to hide the Taskbar on Windows 11
- How to hide Windows Update on Windows 10
- Tricks to hide files or folders on Windows, Mac OS X and Linux
- Hide the Windows folder in a professional way
May be interested
- How to run any application from the Ease of Access button on the Windows 10 login screen
 the ease of access button on the windows 10 login screen is designed to support, allowing users to access features that can access narrator, magnifier, high contrast mode, onscreen keyboard, sticky keys ... . when any incident occurs.
 - Customize the login screen background on Windows 7
 windows 7 allows you to change the login screen background - which appears when you start your computer - without any third-party software, but this setting is hidden. this article will guide you to enable this setting to customize the login screen background to your liking.
 - How to remove the Ease of Access button from the login screen in Windows 10
 as its name suggests, ease of access menu tries to make windows 10 system equally easy to use for all users. you can find ease of access options from the windows settings page as well as the user account login screen.
 - Instructions for automatic login on Mac
 to protect personal information, it is normal to use a password when using a mac. however, there are many people who want to log in right on the machine without entering a secure password.
 - How to hide computer IP
 how to hide computer ip. from the ip address, you can look up a lot of information such as: name, address, access port, etc. to limit the disclosure of personal information, you can hide your computer's ip address through simple ways. after.
 - How to hide friends on Facebook, hide the list of friends on Facebook
 how to hide friends on facebook, hide the list of friends on facebook. revealing personal information like your friends list can make it easy for nosy people to find information about your friends. the protection of his information is essential to
 - Tips for opening apps from the Windows login screen
 accessing the apps and programs you want directly from the login screen can save time, and here's how to do it,
 - How to bypass Windows 10 login screen
 you feel uncomfortable and annoying every time you log in to the computer to enter the password. so how do i skip the windows 10 login step? how to turn on the computer directly to windows desktop. all will be tipsmake.com guide you through this article.
 - How to hide information in photos on Xiaomi phones
 on xiaomi phones, there is a personal information masking tool to protect your privacy, without us needing other image editing applications.
 - Change Windows 10 login wallpaper
 have you tired of the default login background image of windows 10 so i want to replace the windows login wallpaper with other nicer wallpapers. if you do not know how to change the login screen (lockscreen) of windows 10, you can refer to the article


 How to add Web links to Start menu on Windows 10
 How to turn off feedback inquiry on Windows 10
 Instructions for setting up Windows Hello face recognition on Windows 10
 How to delete Wifi saved on Windows 10?
 Instructions for setting up and managing Network Bridge on Windows 10