How to Fix Windows Shutdown Problems
Part 1 of 6:
General Fixes
-
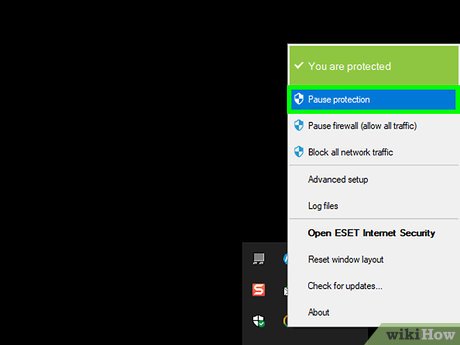
 Make sure you don't have any third-party antivirus programs installed. Any antivirus program other than Windows Defender is technically a third-party program. Having any third-party antivirus program running on your computer is likely to keep your computer from shutting down, so uninstall any third-party antivirus programs.
 -
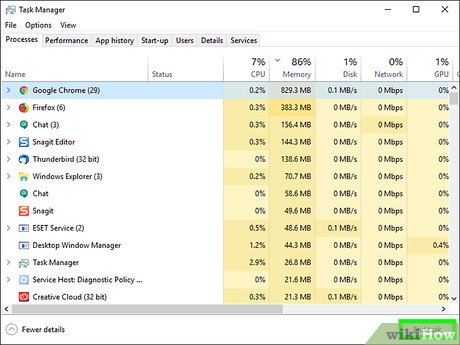
 Close any open programs. Running programs can interfere with your computer's shutdown process, so exit any open programs and apps.
- You can close programs that won't close by using Task Manager.
-
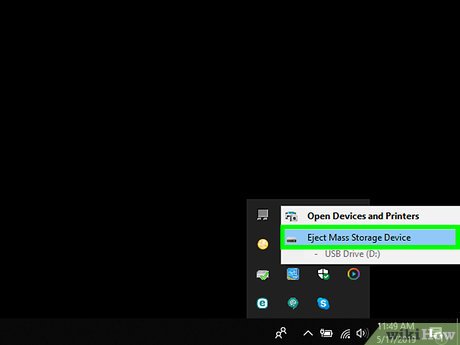
 Remove any attached devices. USB drives, mice, controllers, SD cards, and anything else you may have plugged into your PC may be preventing your computer from shutting down properly. Eject and remove these items before continuing.
- Failing to eject attached devices before removing them may cause problems with the drivers or information on the devices later.
-
 Update your computer. Your computer's operating system version, outdated drivers, or a combination thereof can easily cause problems when you try to shut down. To update your computer's operating system and drivers:
- Open Start.
- Click the Settings gear.
- Click Update & security.
- Click Check for updates.
- Wait for your computer to update.
-
 Disable your PC's wireless connections before shutting down. Disconnecting your computer from all wireless networks (including Bluetooth) may fix the shutdown problem; if it does, you're likely encountering a network issue. Placing your computer in Airplane Mode is the easiest way to disconnect your computer:
- Click the Notification box in the bottom-right corner of the taskbar.
- Click the Airplane Mode box.
- If you're on a wired (Ethernet) network, unplug the Ethernet cable from your computer as well.
Part 2 of 6:
Troubleshooting Your Windows Update
-
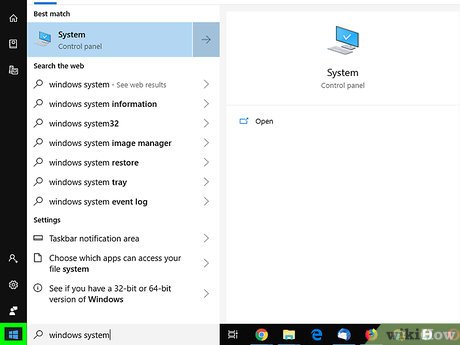
 Open Start. Click the Windows logo in the bottom-left corner of the screen.
- You must be using an account with administrator privileges in order to troubleshoot the windows update.
-
 Scroll down and click Windows System. It's a folder in the "W" section of the Start menu.
 -
 Click Control Panel. It's near the middle of the Windows System folder.
 -
 Click Troubleshooting. This icon resembles a blue computer monitor inside of a computer window.
- If you don't see this option, click the option next to "View by:" in the top-right corner of the window and select Large icons or Small icons.
-
 Click Fix problems with Windows Update. This link is below the "System and Security" heading.
 -
 Click Next. It's in the bottom-right corner of the window.
 -
 Click Try troubleshooting as an administrator. This option will appear at the top of the window. If you aren't using an administrator account, you won't be able to complete this process.
 -
 Follow the on-screen instructions. If there are any problems with your Windows update, follow the instructions provided to fix them.
- In most cases, you'll click Apply fix when prompted and wait for the fix to be applied.
- You may need to reboot your computer for the changes to take effect, which means you'll have to hold down your computer's power button to turn it off.
Part 3 of 6:
Troubleshooting Your Power Settings
-
 Open Start. Click the Windows logo in the bottom-left corner of the screen.
-
 Click Settings. This icon is in the lower-left corner of the Start window.
-
 Click Update & security. It's an icon of a circular arrow.
 -
 Click Troubleshoot. This tab is on the left side of the window.
 -
 Scroll down and click Power. It's toward the bottom of the page.
 -
 Click Run the troubleshooter. This button will appear below and to the right of the Power option. Clicking it will start the troubleshooting process.
 -
 Wait for an error to appear. Common power issues include errors related to battery life and screen brightness.
- If no errors appear and the process completes, your power settings aren't responsible for your computer failing to shut down.
-
 Click Apply this fix. You'll do this for each problem that Windows comes across.
- If you see something listed as a problem that you don't care to fix, click Skip this fix instead.
-
 Try to shut down your computer. If the computer successfully shuts down, the problem was resolved. If not, proceed to the next part.
Part 4 of 6:
Changing Power Button Properties
-
 Open Start. Click the Windows logo in the bottom-left corner of the screen.
-
 Click Settings. This icon is in the lower-left corner of the Start window.
-
 Click System. This icon resembles a laptop.
 -
 Click Power & sleep. It's on the left side of the System page.
 -
 Click Additional power settings. This option is in the top-right side of the page.
 -
 Click Choose what the power buttons do. You'll find this link in the top-left corner of the window.
 -
 Change the "On battery" and "Plugged in" boxes to "Shut down". Click the drop-down box right of "When I press the power button" and beneath "On battery", click Shut down, and repeat for the "Plugged in" column. This will ensure that pressing your computer's power button will shut down your computer.
 -
 Try to shut down your computer by pressing the power button. If the computer successfully shuts down, the problem was resolved. If not, proceed to the next part.
Part 5 of 6:
Scanning with Windows Defender
-
 Open Start. Click the Windows logo in the bottom-left corner of the screen.
-
 Scroll down and click Windows Defender Security Center. It's in the "W" section of the Start menu.
 -
 Click ☰. It's in the top-left corner of the window.
 -
 Click Virus & threat protection. It's in the upper-left section of the Windows Defender window.
 -
 Click Advanced scan. This link is below the Quick scan button in the middle of the page.
 -
 Make sure "Full scan" is checked. If not, click the circle to the left of "Full scan" at the top of the page.
 -
 Click Scan now. It's in the middle of the page. Doing so will begin scanning your computer for disruptive programs.
 -
 Wait for the scan to complete. If anything malicious turns up during the scan, Windows Defender will alert you. You should allow Windows Defender to remove the dangerous items.
- If this scan doesn't find anything, repeat the scan with "Windows Defender Offline scan" checked instead of "Full scan" checked.
-
 Try to shut down your computer. If the computer successfully shuts down after the scan is complete, the problem was resolved. If not, proceed to the next part.
Part 6 of 6:
Disabling Startup Programs
-
 Open Start. Click the Windows logo in the bottom-left corner of the screen.
-
 Scroll down and click Windows System. It's a folder in the "W" section of the Start menu.
 -
 Click Task Manager. This option is toward the bottom of the Windows System folder.
 -
 Click Startup. This tab is at the top of the Task Manager window.
 -
 Select a program, then click Disable. This will prevent the program from starting automatically when you turn on your computer. Too many programs attempting to start at once can cause your computer to crash, so doing this may fix related problems.
 -
 Disable any non-Windows startup programs. Any third-party programs such as antivirus utilities, chat rooms, or other apps should be disabled when you're through.
- Don't disable Windows processes such as the graphics card or Windows Defender.
-
 Try to shut down your computer. If the computer successfully shuts down, the problem was resolved. If not, you'll likely need to bring your computer into your local tech department.
Share by
Kareem Winters
Update 04 March 2020


