How to fix not seeing computers in Workgroup
How to fix not seeing computers in Workgroup. LAN connection is one of the common and fast connections, enabling us to share files, share printers ... with fast speed and good security. The connection is not always smooth and sometimes we will encounter the error can not find other computers in a LAN Workgroup.
Table of Contents
In the article below, let's find out some solutions to fix the error of not finding a computer in Workgroup below.
1. Check the Workgroup name
Each workgroup creates an identifier for the visitors to access and not be confused with other workgroups.
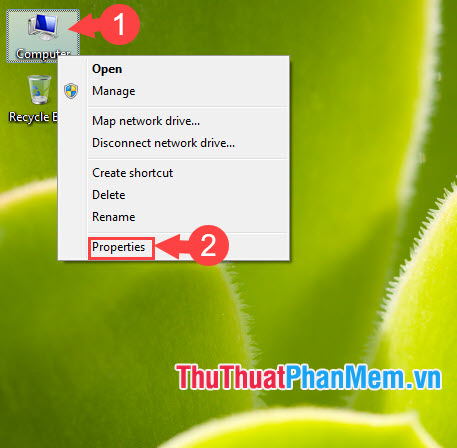
Step 1: Right-click Computer / This PC (1) => Properties (2) .
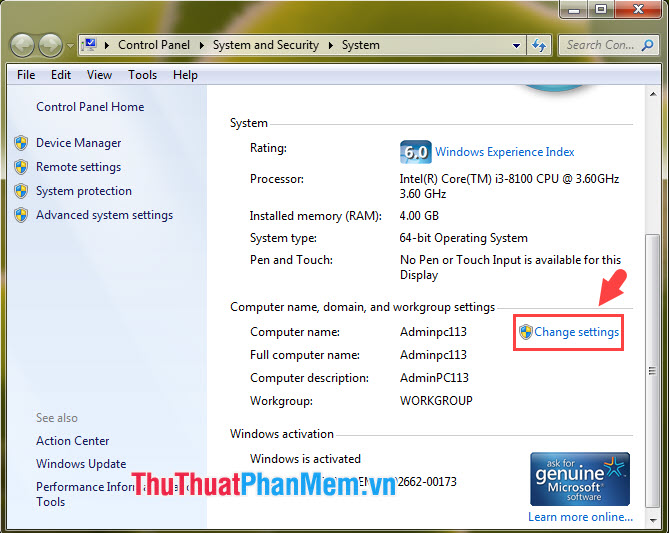
Step 2: Click Change settings in the Computer name, domain, and workgroup settings section .
Step 3: Click on Network ID .

Step 4: Select the line This computer is part of a business network; I use it to connect to other computers at work (1) => Next (2) .

Step 5: Choose My company uses a network without a domain (1) => Next (2) .

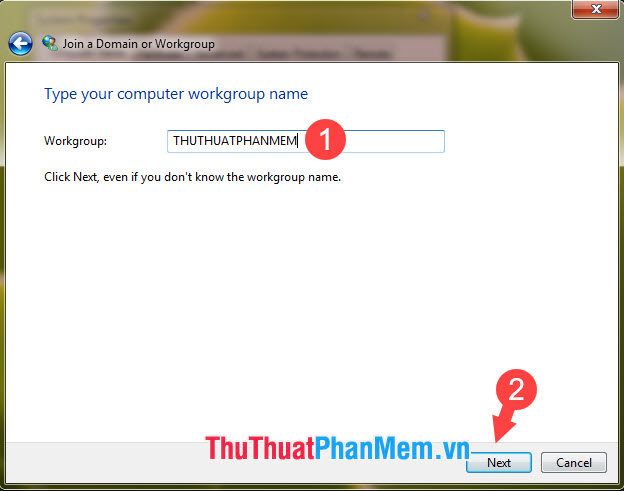
Step 6: Enter the name of Workgroup (1) to join and click Next (2) .
Step 7: Click on Finish and restart the computer.

2. Turn on network services in Services
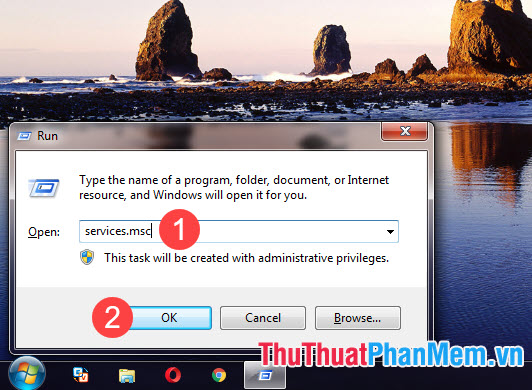
Step 1: You press the key combination Windows + R and enter services.msc (1) => OK (2) .
Step 2: Right-click on the TCP / IP service name NetBIOS Helper Service (1) => Start (2) .

Step 3: Find and right-click Function Discovery Provider Host (1) => Start (2) .

In addition, please check the following services in the Services section has started yet and proceed to turn on.
- Computer Browser Service
- COM + Event System
- DNS Client
- DHCP Client
- Function Discovery Resource Publication
- HomeGroup Provider
- HomeGroup Listener
- Network Connections
- Network Location Awareness
- Peer Networking Grouping
- TCP / IP NetBIOS Helper Service
- Remote Procedure Call (RPC)
- Server
- SSDP Discovery
- UPnP Device Host
- Workstation
3. Set up Network Discovery and File Sharing
On Windows 7
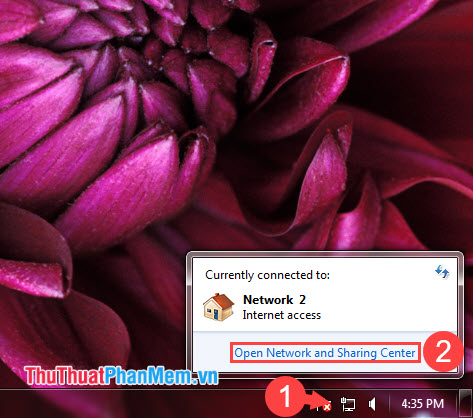
Step 1: Click on Network (1) => Open Network and Sharing Center (2) .
Step 2: Click on Change advanced sharing settings .

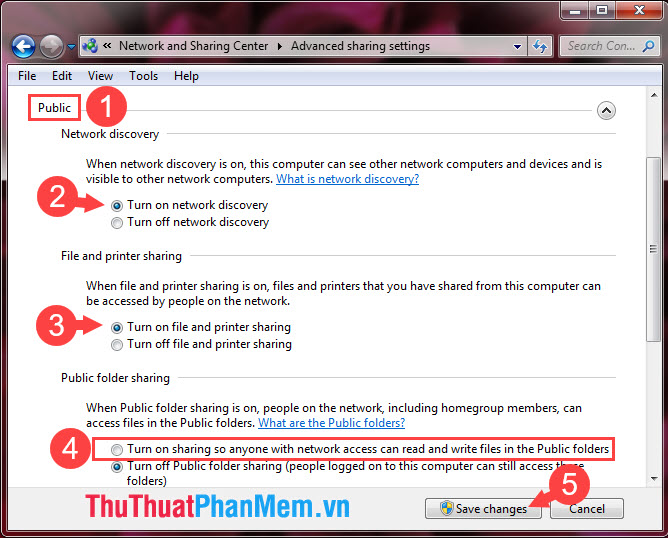
Step 3: Select the Home or Work network (1) = > select Turn on netword discovery (2) => Turn on file and printer sharing (3) => Turn on sharing so anyone with network . (4) => Save Changes (5) .

Step 4: Go to the Public section and do the same as the above step.
On Windows 10
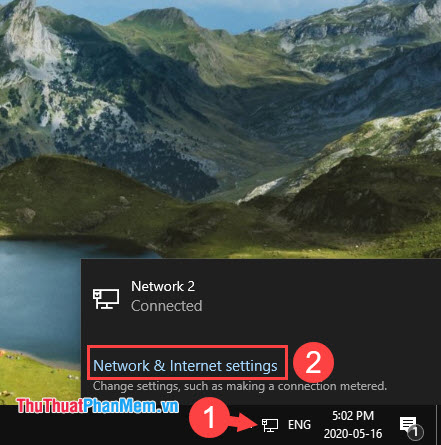
Step 1: Click the Network icon (1) => Network & Internet settings (2) .
Step 2: Click on Sharing options .

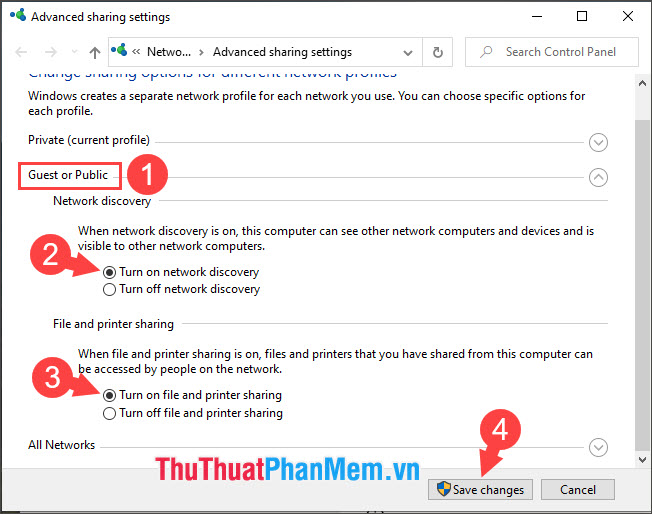
Step 3: Choose Private => Turn on network discovery (1) => Turn on file and printer sharing (2) => Save changes (3) .

Step 4: Go to the Public section and do the same step above.
With the instructions in the article, you can see other computers in the LAN Workgroup easily. Good luck!
Was this article helpful?
Your feedback helps us improve.
Related Articles
 3 How to change workgroup on Windows 105 minutes read
 Deny access when managing Hyper-V remote server in Workgroup3 minutes read
 Add Mac to the Workgroup Windows network9 minutes read
 Access data in HomeGroup from Vista and XP10 minutes read
 Microsoft has just free Teams team software, and these are features to be aware of4 minutes read
 Map the drive in Windows 77 minutes read
Reader Comments 0
Sign in with email or Google to join the discussion.