Table of Contents
This updated guide explains how to Fix Google Chrome Errors Ram, Hang: Step-by-Step through clear steps, practical examples, and important checks that help prevent common errors.
1. Check and Turn Off the Tasks, Utilities That Consume RAM in Chrome
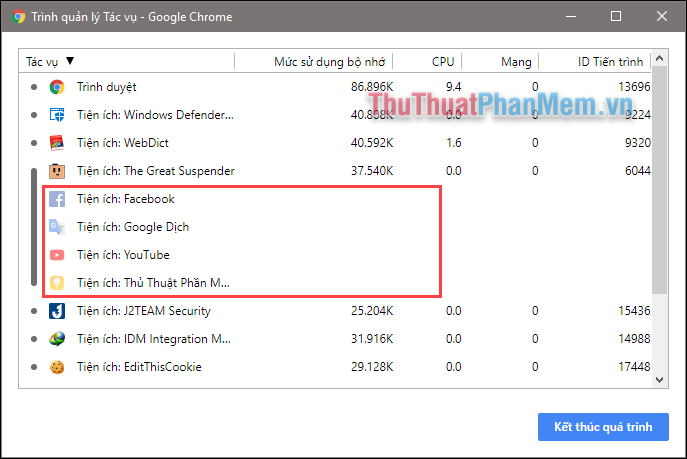
First, open up Chrome and use it as usual, then press Shift + Esc to open Chrome task manager.
In this window, you should pay attention to the Memory Usage column to see which tasks, utilities use the most RAM.

Normally Facebook tabs always use the most RAM memory, so I recommend that when surfing Facebook, you should turn off the facebook tab. Avoid consuming memory and affecting other applications.
In addition, utilities such as ad blocking are also quite Ram. If you find any utilities or tasks are not necessary, you should turn them off by clicking the End process button as shown below.

2. Use the Google Chrome Ram Fix Utility
Here to fix Ram errors on Chrome browser we will use a utility called The Great Suspender . This utility automatically deactivates the browsing tabs you do not use after a period of time you install. This will help reduce Chrome's RAM usage.
To download the utility you go to the following link:
https://chrome. google. com/webstore/detail/the-great-suspender/klbibkeccnjlkjkiokjodocebajanakg? utm_source=chrome-ntp-icon
After accessing the link, you press the Add to Chrome button to install the extension.

After installing successfully, the extension's icon will appear on the browser corner. click the icon to see the utility's functions.
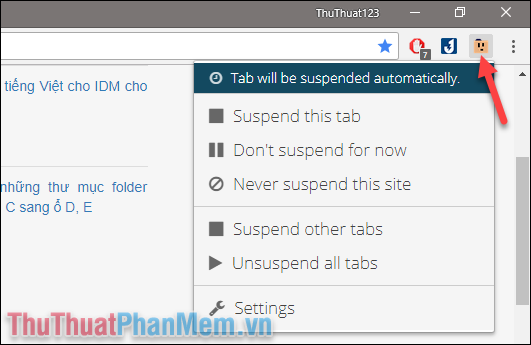
The features of the utility are as follows:
- Tab will be suspended automatically : This tab will be closed automatically if you do not use it in a certain period of time (this period is selected and installed by us).
- Suspend this tab : Pause this tab.
- Don't suspend for now : Do not pause the tab now.
- Never suspend this site : Never make a pause on this site.
- Suspend other tabs : Suspend all other tabs but do not pause open tabs.
- Unsuspend all tabs : Unpause with all tabs.
- Settings: Settings
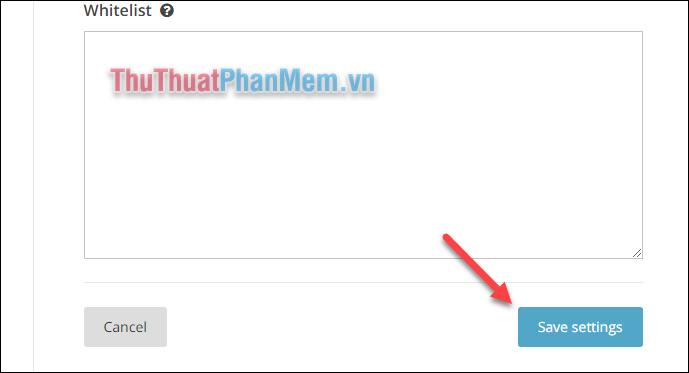
Next, go to the Settings section of the utility, in the settings window you can choose the time the tab automatically stops at the Automatically suspend tabs after section:

Also some other settings you should note:

After installation, remember to click the Save settings button below to save the settings.
Tabs that are stopped will have a blur effect to make them easy to identify:

And you can see that the Ram consumption has dropped significantly:
Above are some simple tips to help you fix Google Chrome browser errors that consume a lot of RAM, hope you will find the article useful. Good luck!
FAQ
What is the easiest way to Fix Google Chrome Errors Ram, Hang: Step-by-Step?
Start with the requirements in this guide, then follow each step in order. Check the result after every major change so problems are easier to identify.
Can beginners follow these instructions?
Yes. The process is organized into practical steps, and you can repeat any step before moving forward.
What should I check if the method does not work?
Confirm your software or device version, permissions, settings, file format, and internet connection when the task depends on online services.
Related Articles
 Instructions to Fix Basic Errors on Google Chrome9 minutes read
 The Latest Ways to Fix Faulty Google Chrome 202212 minutes read
 Quick Fix Google Chrome Kill Pages Errors5 minutes read
 How Does Google Chrome Run Faster?3 minutes read
 Google Released Google Chrome 263 minutes read
 How to Fix Flash Plugin Error on Google Chrome, Coc Coc, Firefox8 minutes read
Reader Comments 0
Sign in with email or Google to join the discussion.