How to enable TPM 2.0 to fix 'This PC Can't Run Windows 11' error
Leaving aside the Windows 11 minimum configuration issues for the time being, you'll likely need to enable TPM and Secure Boot on your PC to install Windows 11. Here's how.

What is Secure Boot and TPM?
Secure Boot is a UEFI feature that only allows signed operating systems to work, which can help protect you from malware. In addition to checking the BIOS, you can check System Information in Settings to see if your system supports Secure Boot.
Similarly, TPM (short for 'Trusted Platform Module') helps with security by providing data encryption thanks to a special chip inside the computer. Most PCs released after 2016 are equipped with the TPM 2.0 chip required to run Windows 11.
Windows 11 requires TPM 2.0 and Secure Boot
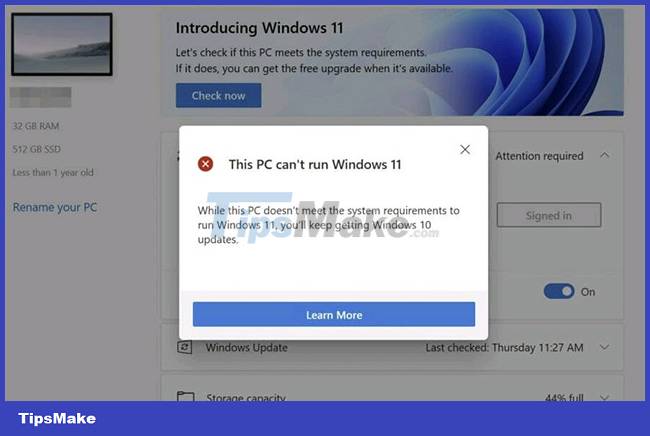
For some PC systems, the root of the "This PC Can't Run Windows 11" error problem in PC Health Check is Secure Boot and TPM in UEFI has been disabled. This is the basic system that allows the operating system to work seamlessly with your PC's hardware. Many people are still in the habit of calling UEFI 'BIOS', even though that term technically refers to an older standard.
After enabling TPM and Secure Boot, it is possible that your PC will pass the Windows 11 'compatibility test' if it meets all other system requirements.
How to Enable TPM and Secure Boot in UEFI
To enable TPM and Secure Boot in UEFI, you need to completely turn off your device first. When you turn it back on, there will be a special key or button that you need to press at the right time to access the system's UEFI settings screen.
The exact key you need to press will depend on the device you're using, so you'll need to consult your device's manual or do a web search query regarding the name of your device along with keywords like 'BIOS key' or 'UEFI key'. On some motherboards (especially self-built ones), you may see a small message on the screen at startup, telling you which key to press to enter the BIOS settings.
For example, on the Acer Spin 3 laptop we have here, you can access the UEFI configuration menu by powering on the device, then pressing F2 on your keyboard when you see a screen with the 'Acer' logo. appear.
Once in the UEFI setup screen, the instructions on exactly how to enable Secure Boot and TPM will also vary considerably from device to device/manufacturer. But in general, what we are looking for are 'Security' or 'Boot' options.
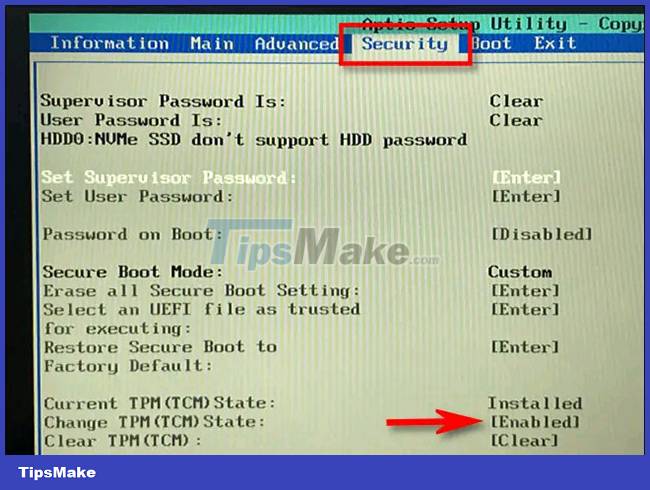
In this 'Setup Utility by American Megatrends' example (your setup may look different) you can find the TPM options under the 'Security' tab. Look for 'TPM' and make sure it's enabled. If not, change the setting in your specific UEFI to enable it.

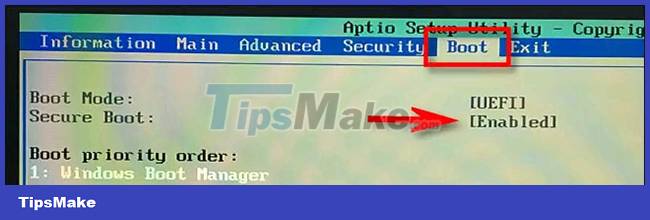
Similarly, in this example, the option to install Secure Boot can be found under the 'Boot' tab. Navigate to the 'Secure Boot' option and make sure it's turned on.

Then make sure you've saved the changes you've made to UEFI before exiting the configuration utility (usually select 'save and exit').
(Note: If you don't see TPM or Secure Boot options on your computer's UEFI or BIOS settings screen, your PC may be too old to have these features, and of course can't. running Windows 11).
After exiting UEFI, your PC will reboot and Windows will load as normal. Run PC Health Check again and hopefully everything is fixed. If your PC still doesn't pass the test, there is a good chance that there is another reason why the system is not compatible with Windows 11. Now you can use WhynotWin11 to check, this is a better alternative for PC Health Check.
Install Windows 11 in case the PC does not meet the minimum requirements
Like any other new version of Windows, Windows 11 will also come with a few minimum hardware requirements that the PC system needs to meet in order to function properly.
In short, if you intend to try Windows 11, your PC will need to meet the minimum specifications below:
- 1Ghz dual core 64 bit processor
- RAM 4GB
- Memory 64GB
- 9-inch screen (1366x768 resolution)
- UEFI, Secure Boot
- TPM 2.0
- DirectX 12/WDDM 2.x . compatible graphics

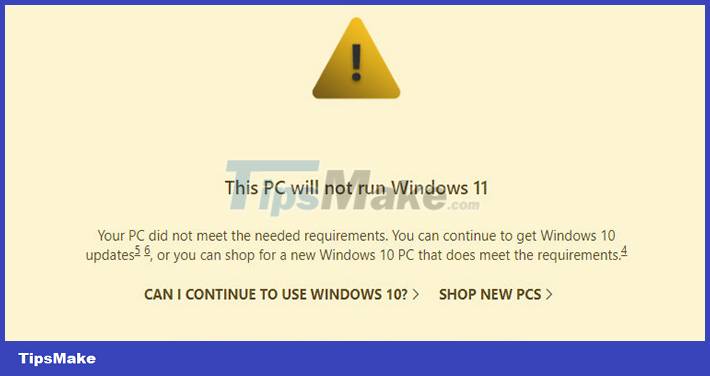
If you see the above message when running the Windows PC Health Check application, or in other words, your PC does not meet one of the minimum requirements above, there is a way to still get Windows 11 next week when it is released to Insiders users, that is to join the Windows Insiders Dev channel in Windows 10. You will now automatically receive the build when it is released.
To enroll in the Windows Insiders program, simply navigate to All settings > Update & Security > Windows Insider Program (you may be recommended to enable Optional Diagnostic & Feedback), and click Get started. Then, click on the Dev channel (Dev channel) (you may have to restart Windows to switch channels).
The entire process has also been shared by Microsoft in a post on the Windows Insider Blog Windows, which includes the following important announcement:
'All Windows Insiders users who have installed builds from the Dev Channel on their PCs through June 24, 2021 will be allowed to continue installing Windows 11 Insider Preview builds even if their PC does not meet the minimum hardware requirements'.
However, Microsoft also warned that those who choose to receive Windows 11 Insider builds even though their devices are not eligible may face irreparable compatibility errors. For example, those people may be 'flagged' as running an incompatible device when they send an error message to Microsoft.

Also, if you have a problem and decide to reinstall Windows by resetting your PC, the device will immediately be 'out' from Windows 11 Insider Preview builds, and will also not be able to upgrade to Windows 11 Microsoft notes that these devices will then be treated as new PCs, and that the minimum hardware requirements for installing Windows 11 will apply.
You should read it
- ★ How to check Secure Boot has been enabled on your computer or not?
- ★ Windows 8 security feature prevents dual booting with Linux
- ★ Steps to install Windows 7 on Mac using Boot Camp
- ★ How to create UEFI standard USB BOOT - GPT containing the Win 7/8 / 10 installer
- ★ How to convert Legacy BIOS to UEFI in Windows 10