How to enable automatic turn off the touch mouse when connecting a mouse to a laptop
So in today's article, let's learn how to automatically disable the touchpad every time you connect a mouse to a laptop very simple!
In the article there will be 3 ways that you can perform to turn off the Touchpad automatically when connecting a mouse, but I encourage you to use method 1 because this is the easiest way to do it. If you can't do method 1, you should try method 2 and 3!
1. Turn on in Devices Settings
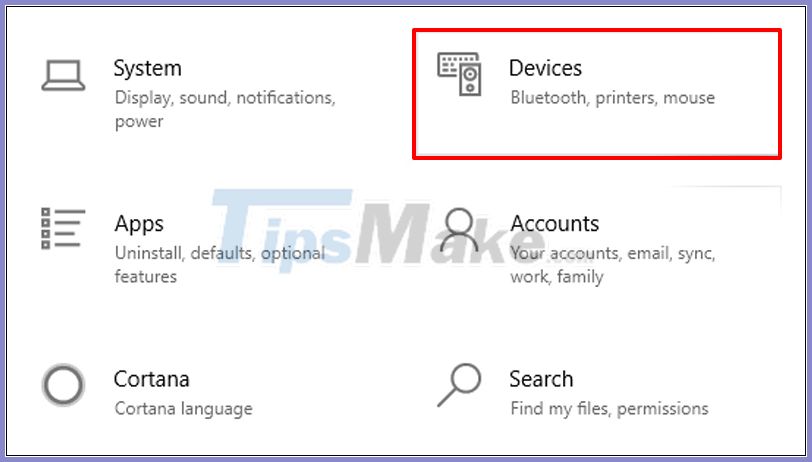
- Step 1: Click the Start button> Settings (gear icon)> Devices.
Or you can also quickly open Settings using the Windows + I key combination.

- Step 2: In Devices, choose Touchpad> Tick, uncheck Leave touchpad on when a mouse is connected.

2. Use Control Panel
Note: This method is only applicable when your laptop has installed touchpad driver like Synaptics or Elan. If you don't use the settings then skip this method and follow the instructions in section 3 below!
- Step 1: Type "control panel" in the search field (the magnifying glass icon) on the taskbar> Open Control Panel.

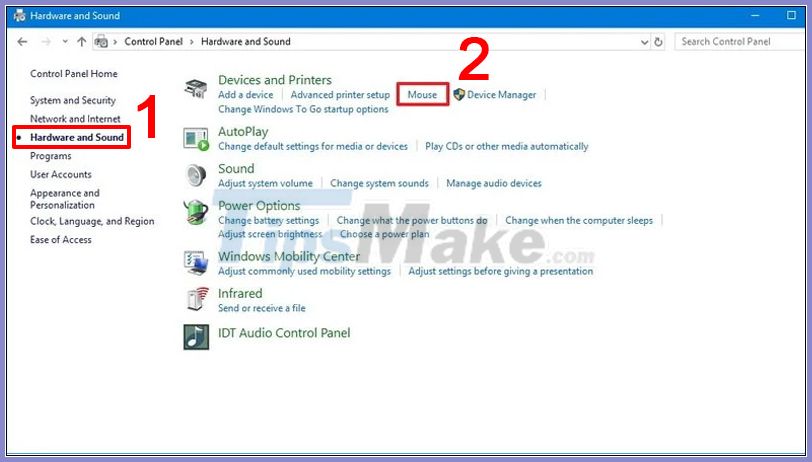
- Step 2: In Control Panel, choose Hardware and Sound> Select Mouse in Devices and Printers.

- Step 3: In the Device Settings tab, click to uncheck the option Disable internal pointing device when external USB pointing device is attached.

However, you should note that with different laptop brands, the location of the option to turn off the touch mouse is also different. If you don't see an option as in the instructions, you can try searching for this option in the touchpad-enabled applications on your device.
3. Interfering and editing the Registry
Windows Registry is a database, used to store information, options, settings and some other values on all versions of Windows operating systems.
In case you have tried both of the above methods and still have not enabled automatic shutdown of touch mouse, you can use the Registry as below instructions.
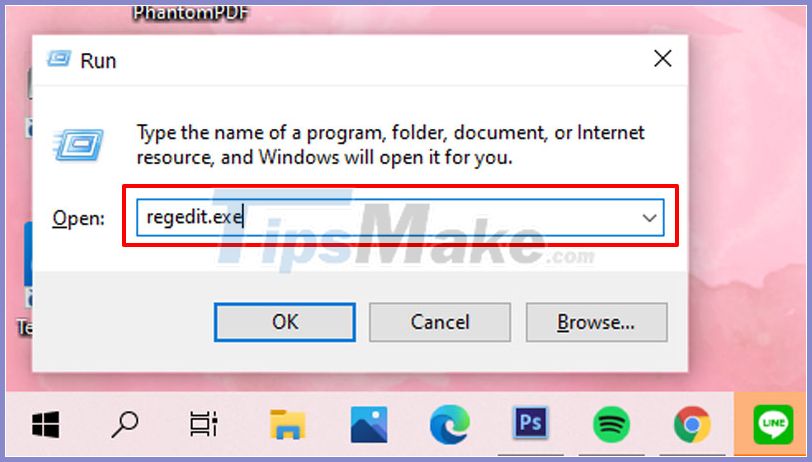
Note: To limit the loss of Registry data, before making changes, you should back up the Registry by: Press the key combination Start + R> Enter "regedit.exe" in the box Open> Enter.

In Registry Editor choose File> Export> Enter a name and select a backup location> Save.
- Step 1: Press the key combination Start + R> Enter "regedit" in the box Open> Enter.
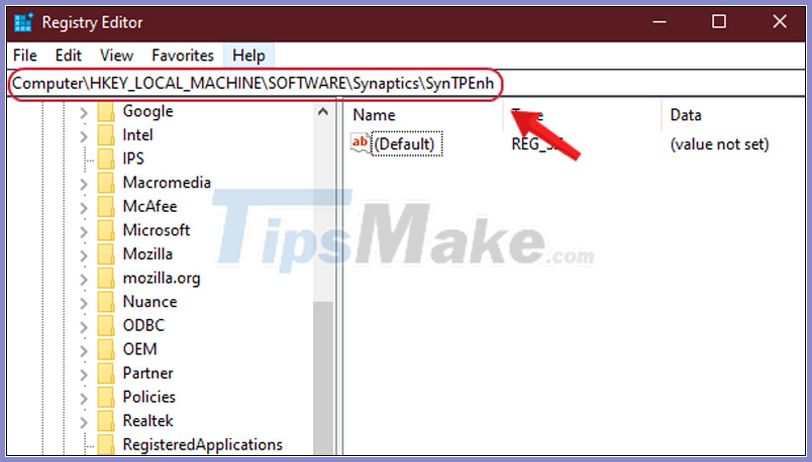
- Step 2: You access the address HKEY_LOCAL_MACHINESOFTWARESynapticsSynTPEnh.

- Step 3: Right-click on the key SynTPEnh> Key> DWORD> Name it DisableIntPDFeature for the newly created key.
- Step 4: Double-click the key DisableIntPDFeature just created> Change the value in the Value box to 33> OK.
After completing the above steps, please Restart the machine to apply the changes!
Recently, there are 3 ways to automatically turn off the touchpad when connecting a mouse to a laptop that you can apply. Hope the article is useful to you. Hope you are succesful.