Table of Contents
GIMP creates an animated GIF by treating each image layer as a frame. Load the frames in order, give them consistent dimensions, set the delay and disposal behavior, preview the sequence, and export the file with As animation enabled.
Prepare GIMP and the source images
Download GIMP only from the official GIMP website. It is free, open-source software for Windows, macOS, and Linux.
Before importing, crop or resize the source images to the same width and height. GIF supports a limited color palette, so gradients and photographs may show banding; short graphics with relatively few colors usually work best.
Load each frame as a layer
- Open GIMP and select File > Open as Layers.
- Select the images that will become animation frames.
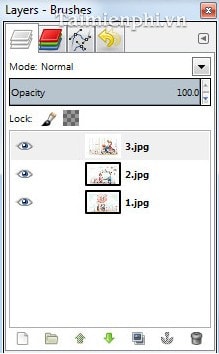
- Use the Layers panel to arrange them in playback order. Each layer represents one frame.
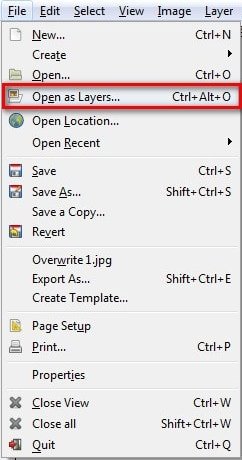
Save an editable XCF copy before export. The XCF retains layers so you can change timing or artwork later.
Set frame timing and disposal
GIMP can read animation instructions from each layer name. Rename a layer with a delay in milliseconds and a disposal mode, for example:
Frame 1 (300 ms) (replace)
- (replace) removes the previous frame before displaying the next one. Use it when every layer contains a complete frame.
- (combine) overlays only the visible pixels on the previous frame. It can reduce file size when each layer contains only the changed area.
If you do not set these values in layer names, you can specify a default delay and disposal method in the GIF export dialog.
Optional: create transition frames
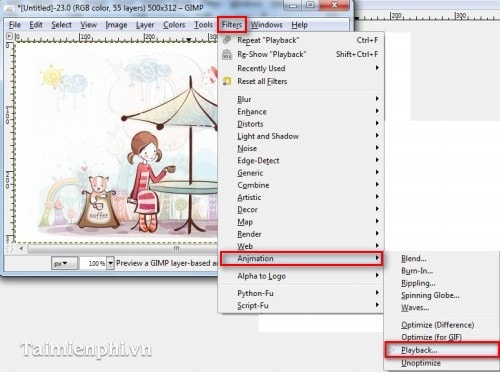
The older interface shown below includes animation filters such as Blend, Burn-In, Rippling, Spinning Globe, and Waves. Availability and names can vary by GIMP version and installed plug-ins. You do not need an effect filter to make a GIF; manually prepared layers are enough.
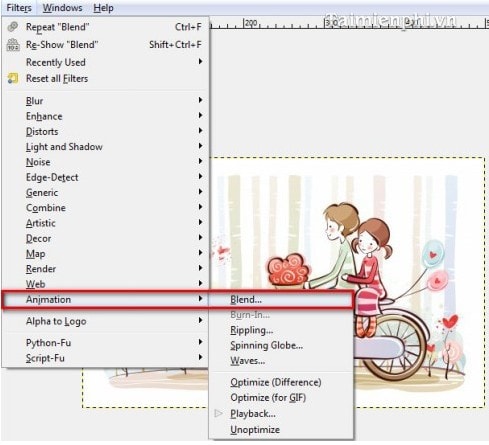
The legacy Blend filter creates intermediate frames between layers. In the illustrated workflow, three source layers are prepared and the filter opens a Script-Fu dialog.
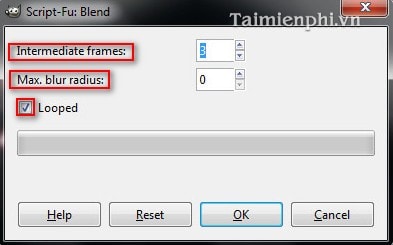
- Intermediate frames controls how many transition frames are generated. More frames create a smoother transition but increase file size and total duration.
- Max blur radius changes the blur used during the transition.
- Looped prepares the generated sequence to repeat.
Run the filter only on a saved copy, because it may create many layers and make later editing harder.
Preview the animation
- Select Filters > Animation > Playback.
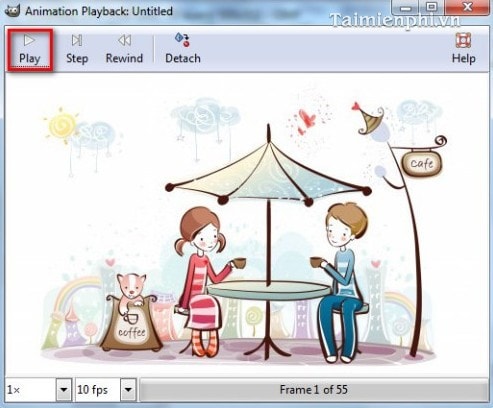
- Click Play and check order, speed, transparency, and any visual jump between frames.
- Close Playback, edit the layers or delays, and preview again until the motion is clear.
Export the animated GIF
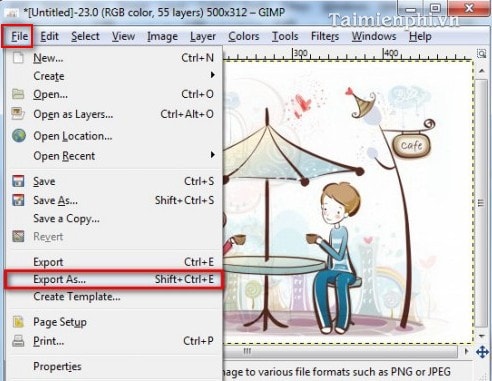
- Select File > Export As.
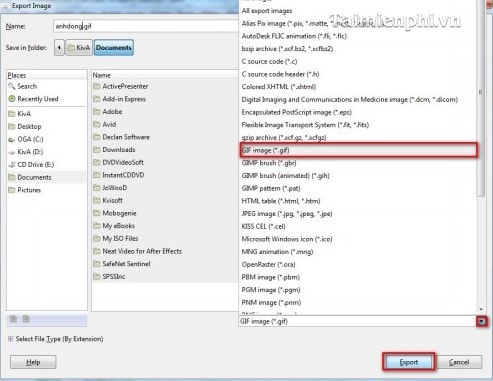
- Enter a filename ending in
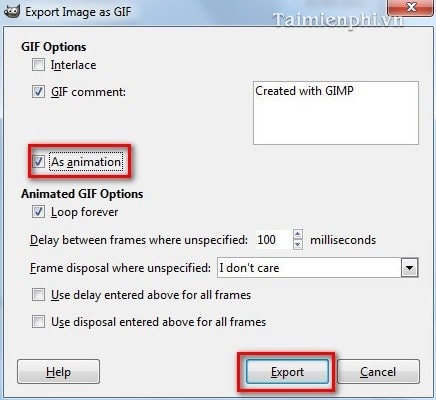
.gif, choose a destination, and click Export. - In the GIF dialog, enable As animation.
- Enable Loop forever when the animation should repeat continuously, or set a specific number of repeats where the current dialog provides that option.
- Choose a default delay and frame disposal mode if they are not already set in layer names.
- Click Export and open the result in a browser to verify playback.

GIMP's official GIF export documentation notes that animated GIF export does not support layer groups. Keep animation frames as ordinary top-level layers.
Reduce a large GIF
- Scale the image to the dimensions at which it will actually be displayed.
- Delete duplicate or unnecessary frames.
- Increase delays instead of repeating identical frames.
- Try Filters > Animation > Optimize (for GIF) on a copy.
- Use WebP or video for long, detailed motion; both are often more efficient than GIF.
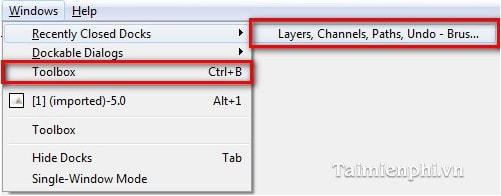
The old screenshot below shows GIMP's toolbox and docks. Exact placement changes by version, but the Layers panel remains the important part of this workflow.
For a faster capture-based workflow, see how to record a GIF with GifCam. To compare more applications, read TipsMake's list of GIF creation software.
Related Articles
 How to Create Animations and Gifs Using GIMP on PC4 minutes read
 Create Ghosts in Photoshop or GIMP7 minutes read
 How to Create Animated Images (GIF): Practical Guide10 minutes read
 Don't Miss Out on These 11 Beautiful Free Brushes for GIMP8 minutes read
 How to Create X-Ray Effects in GIMP6 minutes read
 Advanced User Interface for Applications with Animations6 minutes read
Reader Comments 0
Sign in with email or Google to join the discussion.