How to delete frames and borders in Word
Typically when writing documents or downloading sample documents online, Word documents will appear with frames and borders on each page. In this article, TipsMake.com would like to show you how to delete frames and borders in Word quickly and accurately.

For Word 2016 and Word 2013
Step 1 : You open the text containing the frame, border up.
(1) On the toolbar, select Design .
(2) Next select Page Borders .

Step 2 : In the new window Borders and Shading

For Word 2010 and Word 2007
You also perform almost similar steps:
(1) On the toolbar, select Page Layout .
(2) Select Page Borders .

Then do the same as Step 2 of Word 2016.
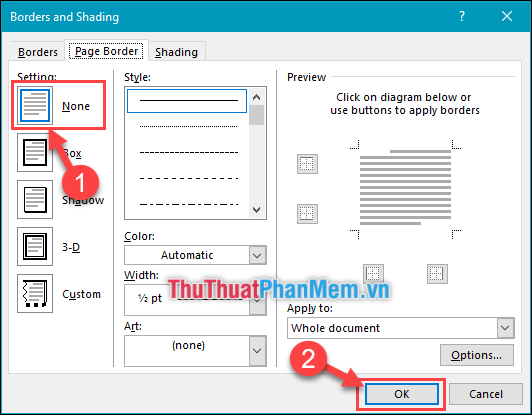
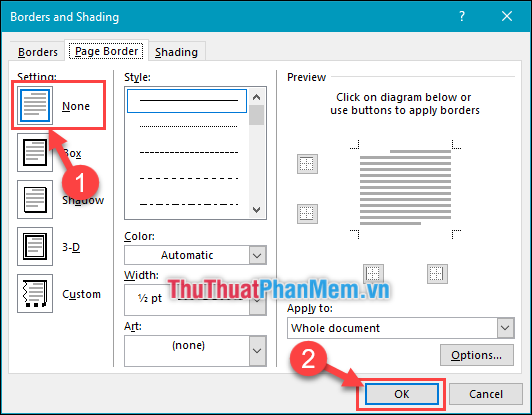
In the new window Borders and Shading
(1) You select the Settings section is None .
(2) Then select OK to finish.

In addition, some of you also have Word cases with borders on each line. Now select the File tool in the left corner of the software and select Options .
(1) Select the Advanced tab .
(2) Uncheck the Show text boundaries line .
(3) Select OK .

That's it, delete the borders and borders in Word. I wish you successful implementation!