Table of Contents
This updated guide examines How to Create Subtasks for Reminders on iOS and macOS and organizes the essential facts, background, and practical takeaways in clear American English.
You may feel that having an app reminds you of unnecessary things, but once you've tried them, you'll change your mind. However, starting to deploy this application is not easy, so let TipsMake.com consider how this Reminders application works.
Use iPhone or iPad
The first method
1. Not surprisingly, the first step is to open the Reminders application and select a list to start working on.
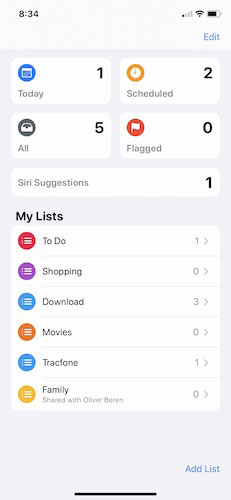
2. Once in a list, tap 'New reminder' and enter any item or action you want to add.

3. Touch anywhere on that item and search for the 'i' icon to display. It looks like an 'i' placed in a circle.

4. Scroll down and search for an option labeled 'Subtasks' and click on it.
5. The app will ask you to add a reminder ( Add reminder ), go ahead, click it and add a reminder. As you type each reminder, you'll see the 'Add reminder' button continue to be pushed down, allowing you to enter countless subtasks.

6. After you have entered all the related tasks, click 'Details' in the upper left corner and then click 'Done'.
7. Really very simple. You can even press and hold on each subtask and move them around to rearrange.
The second method
If the first method doesn't work for you, the good news is that there is a second way to create subtasks in Apple's Reminder app.
1. Open Reminders the same way you did in the above option and create a new task, acting as the main reminder.
2. Unlike the first method, you will now create a second new task, which acts as a subtask for the item you wrote in step 1.
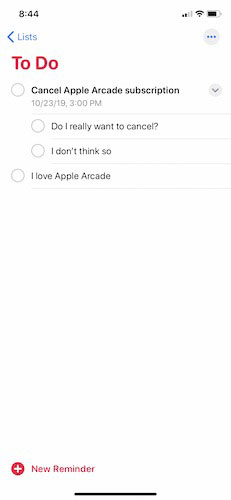
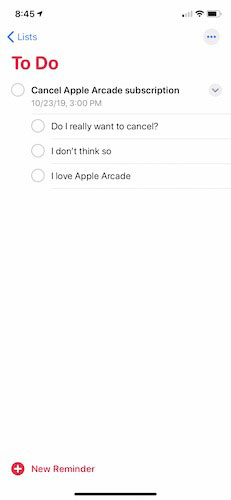
3. This is the point that makes these 2 methods different, as you'll need to press and hold on the second task. If you encounter any problems with this step, it is important to make sure the cursor is not working on this line.
4. Drag the second task down below the first task and it will automatically turn into a subtask.
Use macOS
The first method
As with iOS, creating subtasks in the Reminders app on macOS is simple and straightforward. Like the typical Apple, there's more than one way to achieve goals, so let's take a look at both methods.
1. First, open the Reminders application on the Mac.
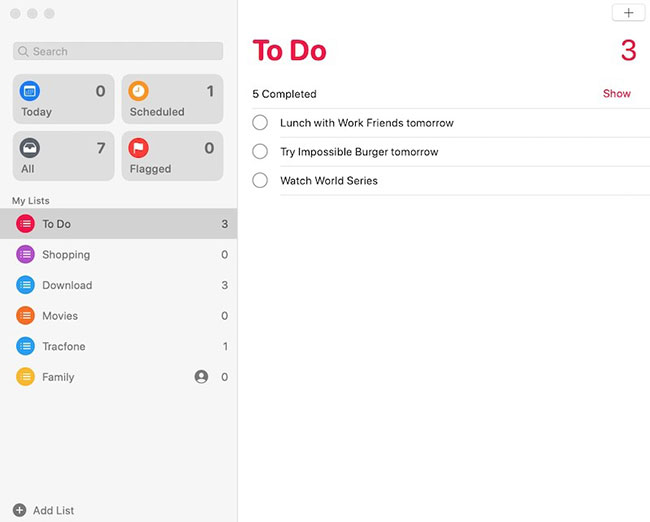
2. Enter the first task you want to turn into a main task.
3. Add a second task that you want to use as a subtask.
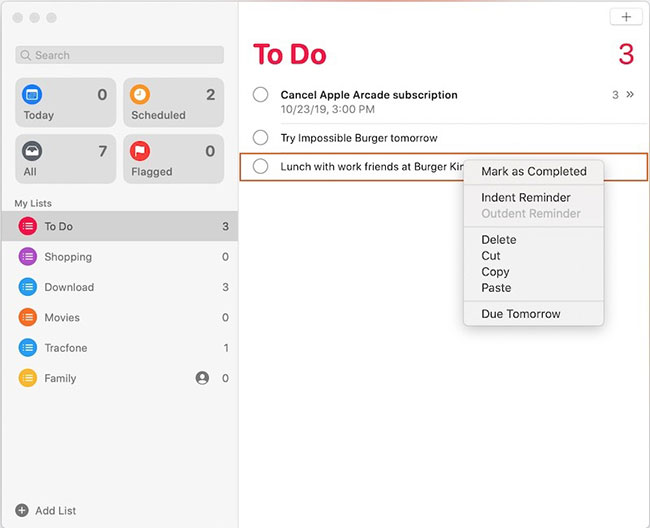
4. The difference with iOS is here. Because you will need to right click with the mouse or trackpad. After right-clicking, click the option labeled 'Indent Reminder'.
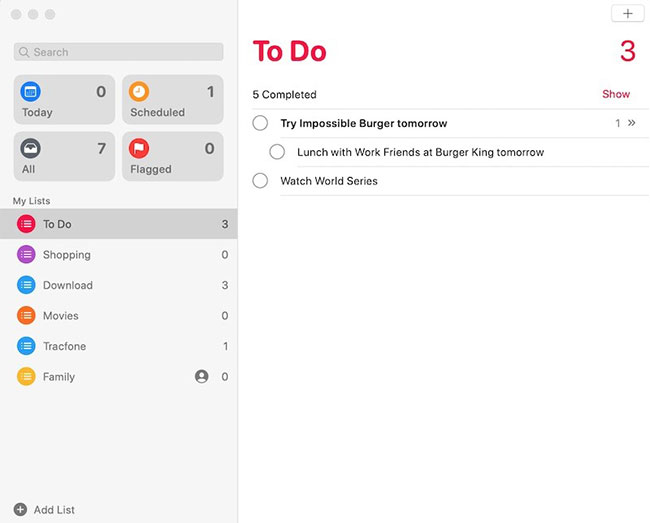
5. Immediately upon clicking 'IndentReminder' , the selected task will automatically switch to the sub-task position.
The second method
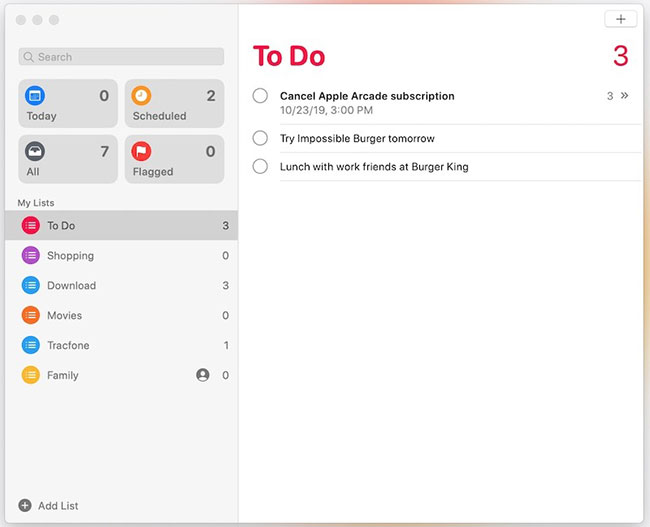
1. For this method to work, create two main tasks, then drag one of the new tasks below the task you want to set as the main task.
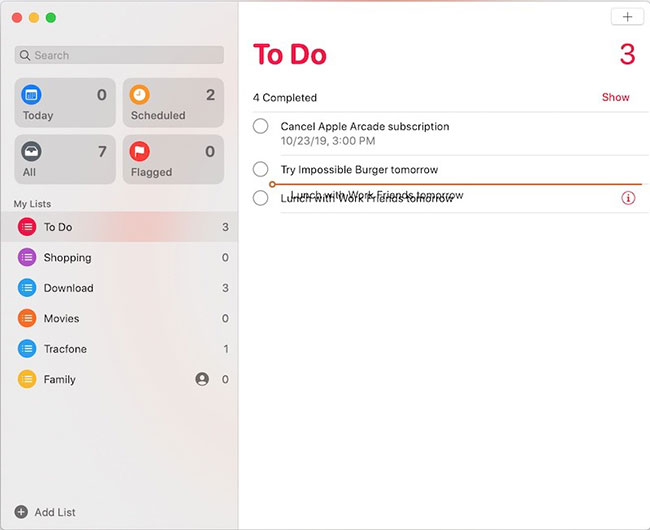
2. When a color line appears, release the mouse or trackpad. The task automatically moves below the main task and becomes a subtask.
There is a lot of competition for being the best to-do and reminder app. Sometimes, the easiest option is the one that comes pre-installed on your device. The release of iOS 13 and macOS Catalina has made an excellent application like Reminders even better. The ability to add subtasks is just one reason why this app deserves a fixed position on the home screen.
Hope you are succesful.
FAQ
What is How to Create Subtasks for Reminders on iOS and macOS about?
It provides a structured overview of Reminders, explains the main context, and highlights practical takeaways for readers.
Why does this topic matter?
Understanding the main concepts helps readers evaluate the issue, avoid common mistakes, and make better-informed decisions.
How should readers use this information?
Use the guidance as a practical starting point, confirm details that may have changed, and follow current product, safety, or security recommendations.
Related Articles
 How to Create and Group Reminders Lists on macOS4 minutes read
 How to Organize the List in the Reminders App on Iphone and Ipad3 minutes read
 Mac Reminders Doesn't Have Quick Entry: Here's the Workaround!9 minutes read
 How to Create Location Based Reminders with Iphone3 minutes read
 How to Set Up Early Notifications for Reminders on iOS 173 minutes read
 How to Create Reminders Based on Messages on Iphone3 minutes read
Reader Comments 0
Sign in with email or Google to join the discussion.