Table of Contents
This article examines Create presentations in Google slides and explains the main developments, practical implications, and context readers should understand.
Google Slides is a free, online, presentation-replacement application for PowerPoint. It is a great program that allows you to create everything from presentations to cookbooks. The only requirement is that you need a Google account.
Although it's great, there are very few people using Google Slides. To rule out user prejudices about Google Slides, here's how to create a basic presentation on this application.
Step 1: Set up the Document

The first thing you need to do is open the Google Slides application. If you do not have an account, you should create a Google account following the instructions in the article How to sign up for Gmail, create and create a Google account.
If you're in the Google Drive interface, click New> Google Slides> From a template. You can use an empty presentation if you want, but in this tutorial we will use an existing design and adjust it to suit your intended use. This way will be faster when creating presentations from scratch.
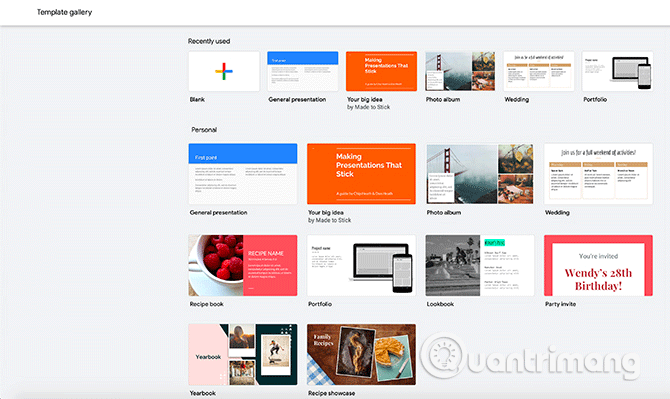
Click From a template to open the sample library. Like Canva, Google groups these templates according to their intended use. In this presentation we will select samples for general use.
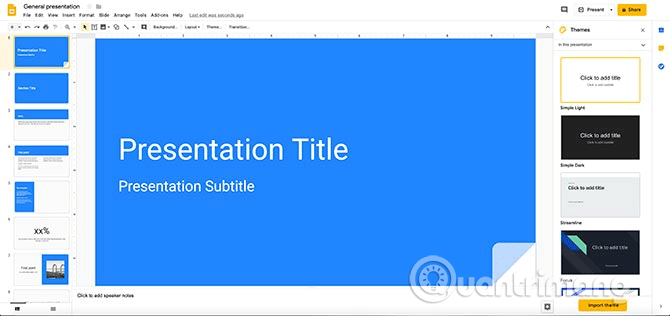
When opening the template, you will see a screen that looks very similar to the screen above. At the top are the navigation bars, on the left are the slide thumbnails of the template, the middle is the slide enlargement you choose and on the right is another drop-down menu called Themes.
Step 2: Options in the Navigation Bar
One of the important things to create presentations on Google Slides is to capture the top navigation bar and what each drop-down menu does.
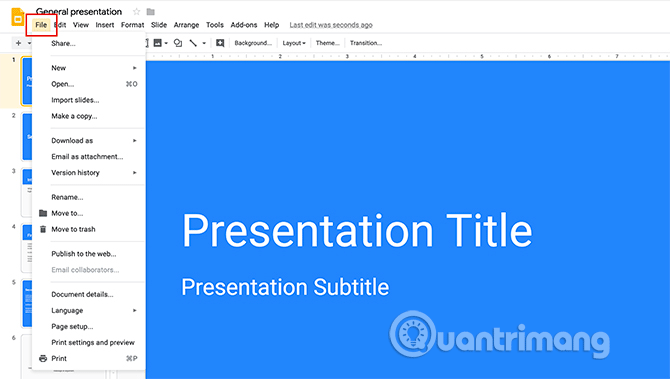
In the File, you will see the basic options for controlling Google Slides presentations such as sharing, importing slides, downloading slides, setting up basic pages, printing settings and languages. In the Edit menu, you will see basic tools for controlling individual pages such as undo actions, cut, copy and paste.
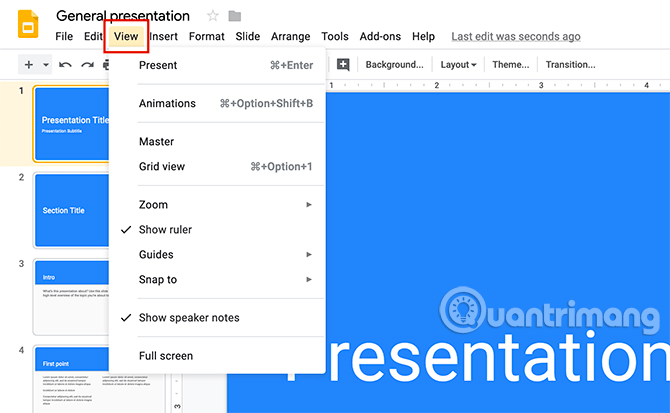
In the View menu, you can see different ways to view presentations and effects.
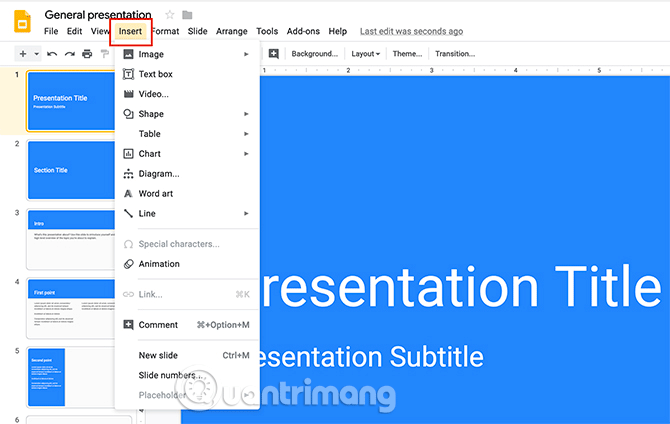
Click on the Insert menu, you will see different options for the content in the presentation. In the Format menu are tools for editing text, font style and margin format.
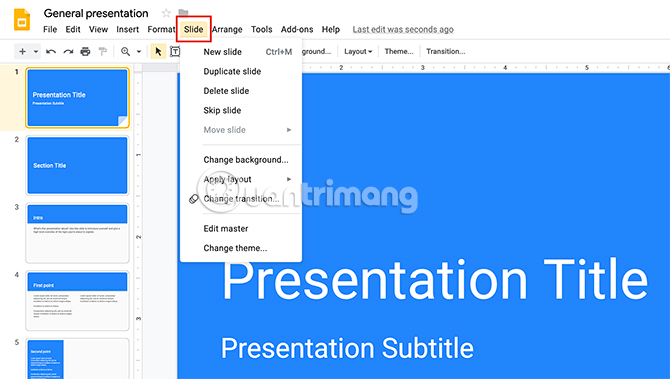
Slide menu allows you to make major changes to the overall presentation. Arrange menu allows users to organize sections on individual pages.
If you want to correct spelling errors, look up dictionaries and add accessibility options to the presentation, you can use the options in the Tools menu. The Add-ons menu is a shortcut to special features you can add to Google Slides.
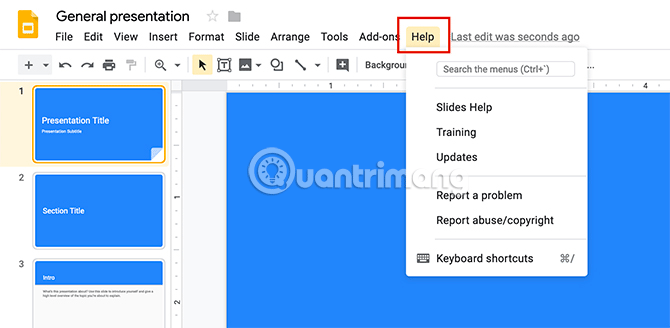
Finally the Help menu, click on this menu to get help or search for updates.
Step 3: Change the Theme
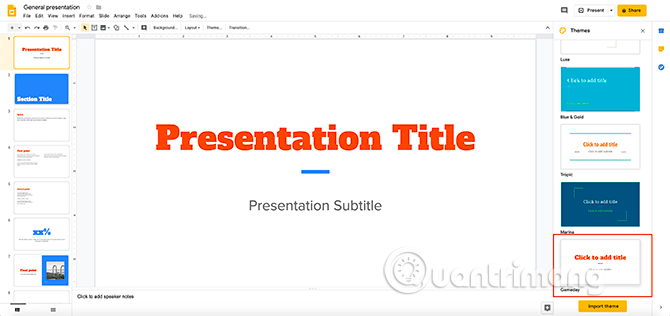
Once you've grasped the functions of each menu, you'll start editing the presentation. Now you need to change the theme if you don't like the old theme. As mentioned earlier, Google Slides groups presentations by purpose of use. In each group, you will find themes used for the presentation.
The theme will include specific fonts, certain colors and styles, making your presentation consistent. To change the theme, scroll through the options on the right and click on the theme that suits your purpose.
Step 4: Change the Font
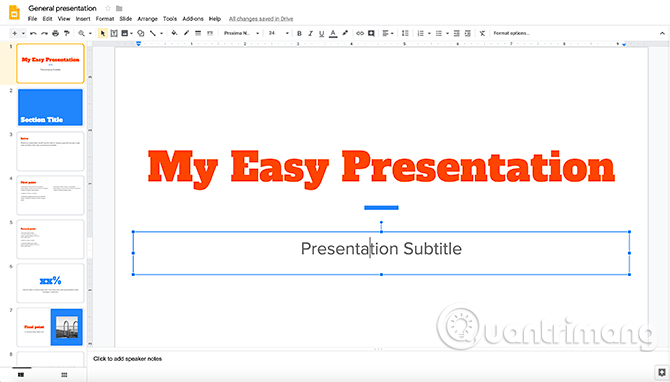
After selecting the theme, you will enter your information into the slideshow. To change the text in the cell, simply click on each cell and start typing. You can change the font, color if you want.
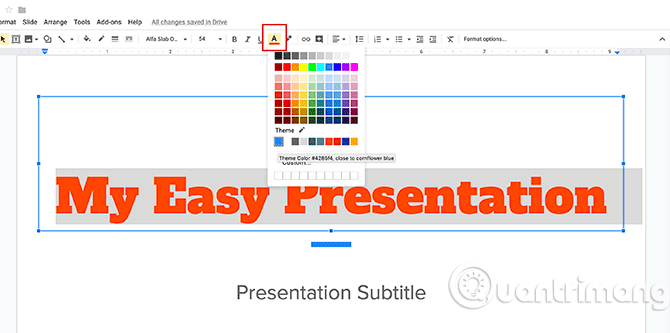
To change colors, make sure to select the font you want to change, then click on the font color option. A drop-down color menu appears, choose the color you prefer. If you cannot select the color you want, you can create a completely new color by clicking Custom.
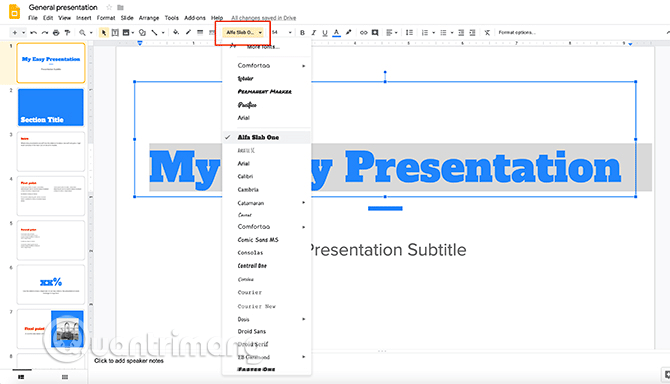
If you want to change the font, click on the drop-down menu, choose the font you want.
Note: You should choose a font that is easy to see so that people sitting far away can see clearly.
Step 5: Change the Background
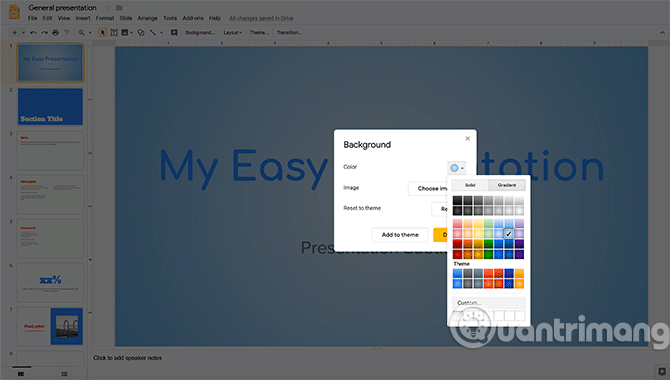
If the presentation's background is quite boring, you can change it by right-clicking on the slide page. When doing this, make sure the text on the page is not selected, then select Change Background.
On the new dialog box that appears, you can change the background color, add an image or return to the previous background. In the Color section, you can choose a monochrome or gradient color for the background. Here you can also choose custom colors and gradients if you want.
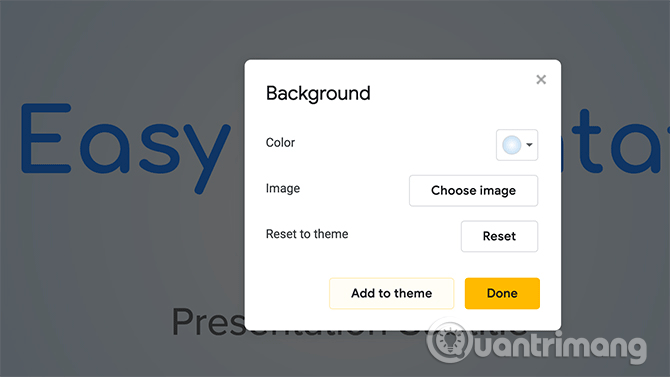
Once completed, select Done or Add to theme. When applying this background to a theme, all the pages in your presentation will have the same background.
Step 6: Replace the Image
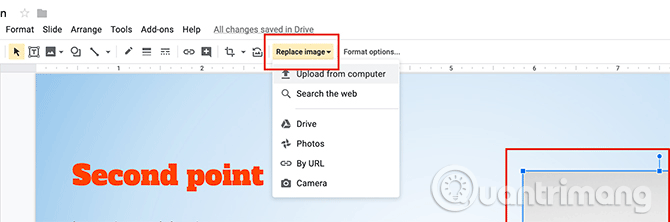
If you want to replace the image on the page, select it (you'll see the blue box surrounded), then click Replace Image. You can choose to download photos from your computer, search the web or insert images via the URL.
Note: You should make sure you have the right to use these photos. If you have difficulty finding images, here is a list of free photo search sites.
Step 7: Delete the Slide

If you don't use all the pages in the template, you can delete it. To delete, right-click a thumbnail of the slide you want to delete and select Delete.
Step 8: Move the Slide
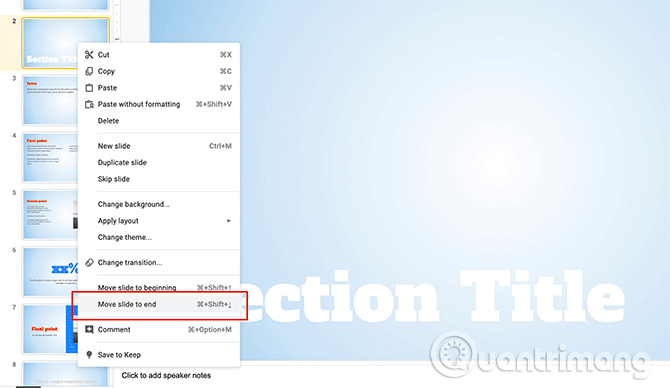
In the template with slides you like the layout but in the wrong position in the presentation, you can move it by right-clicking and the slide thumbnail on the left and selecting Move slide to end to go down or Move. Top slide to top.
Step 9: Add Effects to the Slide
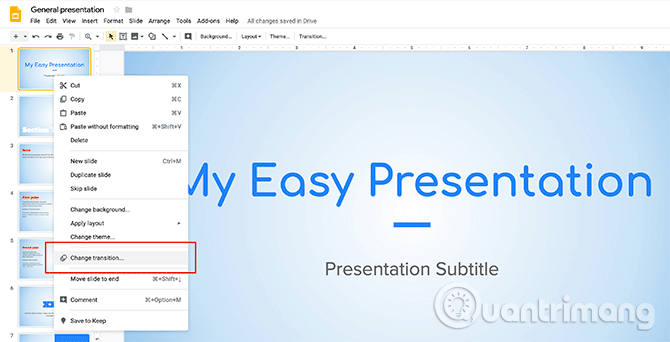
To add effects to a presentation, right click on the slide you want to add and select Change Transition.
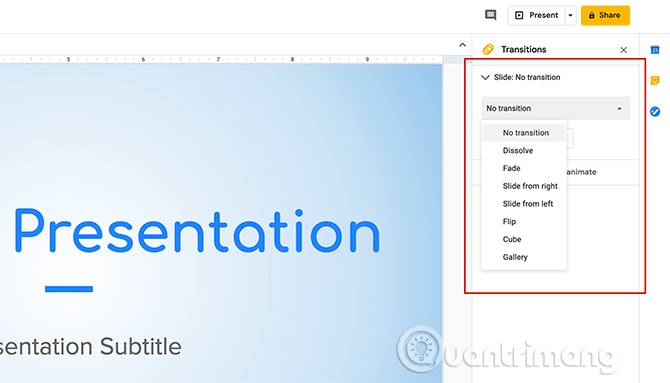
When you do this, you'll see new options on the right toolbar, select the effect you want to use from the drop-down menu. You can choose to use that effect for the entire presentation or just in a certain slide.
So you've created a simple presentation in Google Slides. I wish you all success!
FAQ
How does Create presentations in Google slides work?
This article examines Create presentations in Google slides and explains the main developments, practical implications, and context readers should understand.
What should you prepare before using this method?
Google Slides is a free, online, presentation-replacement application for PowerPoint.
What should you do if the process does not work as expected?
It is a great program that allows you to create everything from presentations to cookbooks.
Related Articles
 Powerful Support Utilities for Google Slides5 minutes read
 How to Create Google Slides Slide Links3 minutes read
 Gemini in Google Slides: Create Slides, Infographics, and More6 minutes read
 How to Create a Diagram with Google Slides6 minutes read
 How to Create Professional Presentations in Canva11 minutes read
 Why People Use Google Slides More Than PowerPoint7 minutes read
Reader Comments 0
Sign in with email or Google to join the discussion.