How to Create Color Editable Elements for Canva Using Adobe Illustrator
Normally, you can't edit your own vectors once you've uploaded them to Canva, but in fact, there's a way to edit the colors of your own elements in Canva.
Canva is a great tool for quickly creating designs for social media or more. Canva elements, such as graphics, linework (using lines to create an image), or logos, really elevate your designs. But sometimes you want to upload your own elements that you have drawn yourself.
Normally, you can't edit your own vectors once you've uploaded them to Canva, but in fact, there's a way to edit the colors of your own elements in Canva. The following article will show you how to do it using Adobe Illustrator.
Step 1: Draw your element
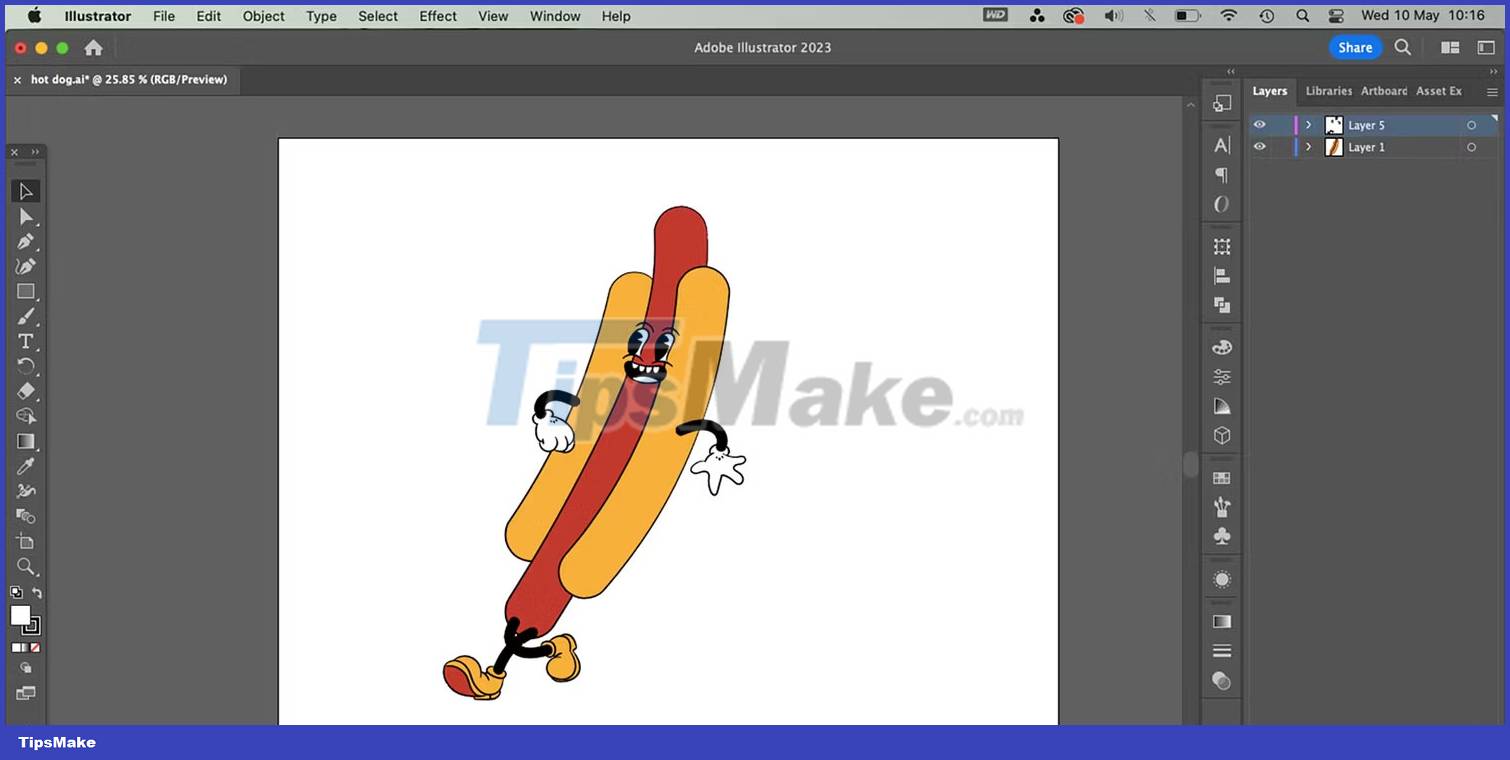
This tutorial focuses on using Adobe Illustrator to help create color-editable Canva components, but you can use other software with similar features. Whether you draw your image directly in Illustrator or Procreate and vectorize in Illustrator or any other method, just have the element drawn.
You can also download the available vector graphics from any online website. There are many places to find free SVG files, or you can buy them from Etsy or Creative Fabrica. If you drew an element in another program or downloaded an element, include it in Illustrator as a PNG.
Paint or create your image in multiple colors so you get the full benefit of this color change tutorial. No need to be too complicated. It should be a small, fun image like any image you would normally use on Canva.
Step 2: Convert the drawing in Adobe Illustrator
Once you've finished your drawing, use Adobe Illustrator to transform your drawing into the right graphic.
Option 1: Expand the lines to fill the shape
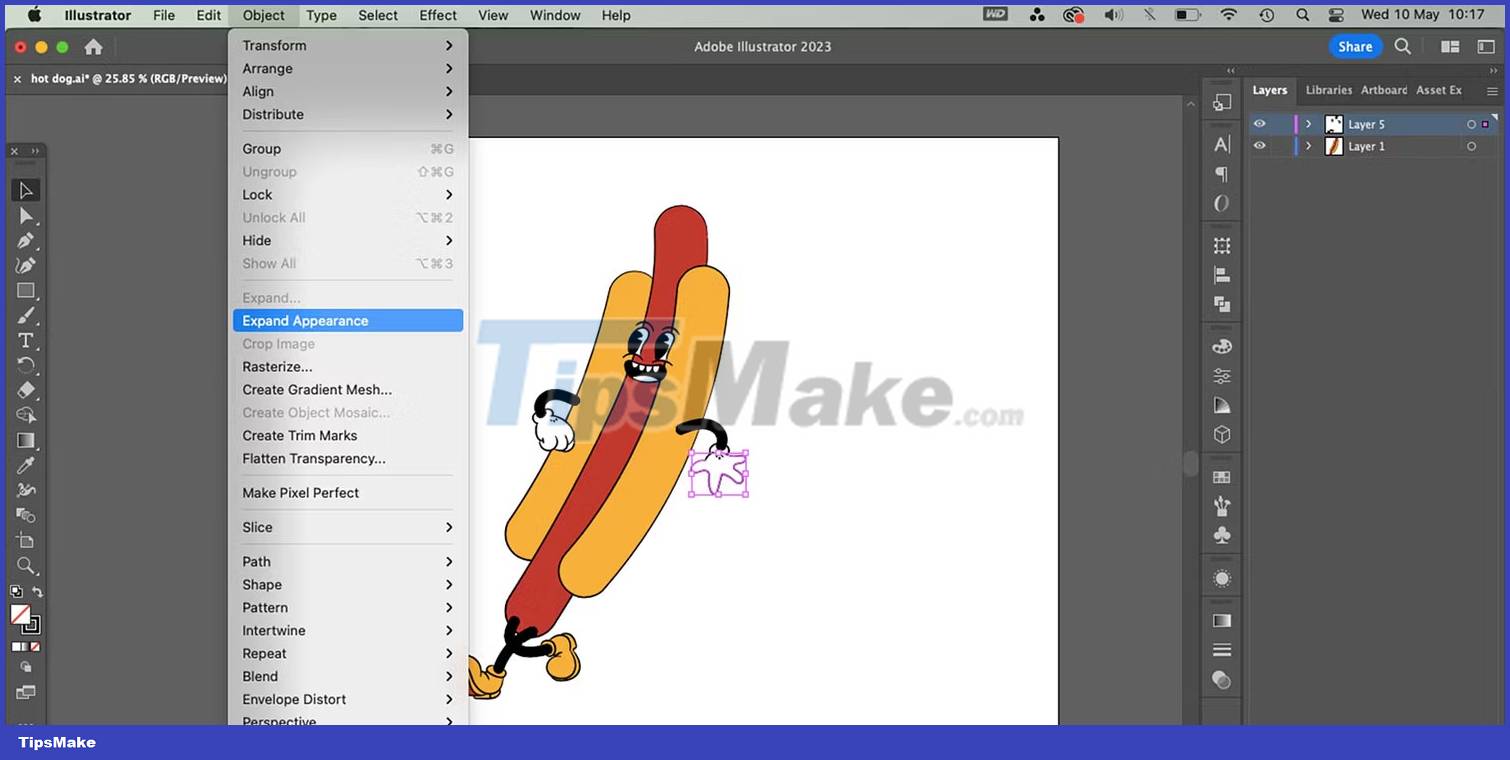
If your graphic has sections created with only lines, you need to convert them to fill the shape.
To do this, select the entire graphic with the Selection tool (V). Click and drag the pointer over the image to select it, then go to Object > Expand Appearance .
Go back to Object > Expand . Then right click on the image and select Ungroup.
Check if it works by selecting an individual part of your graphic - especially the part before it was a line - and the color will appear on the Fill swatch, not the Stroke swatch under the toolbar. tool.
Option 2: Use the Image Trace option
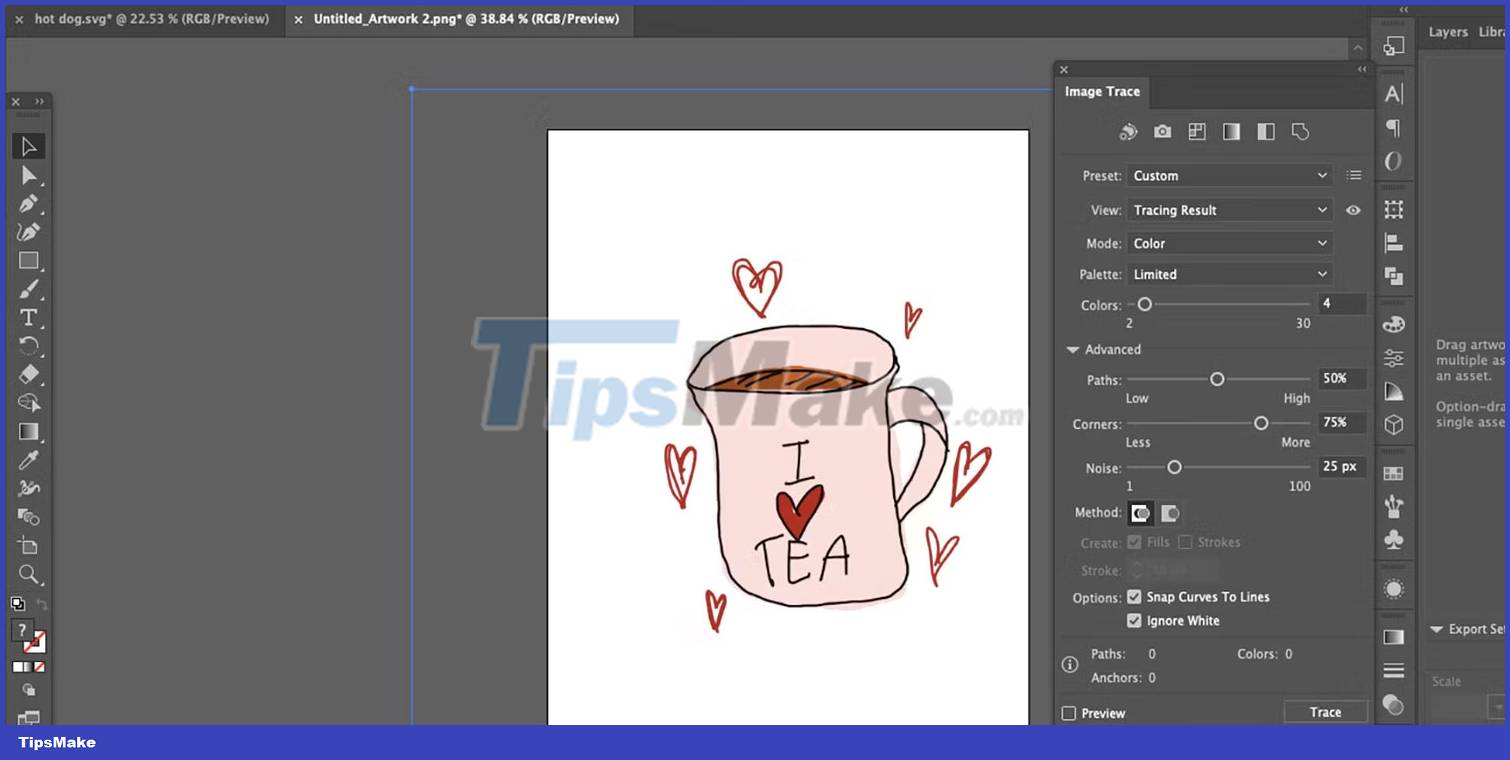
If you drew your graphic with a raster-based program- or by hand, then scanned it- you will need to convert it to vector for this program to work. This involves using Illustrator's Image Trace function.
You can follow TipsMake.com.com's brief tutorial to vectorize raster images in Adobe Illustrator. You'll get the best results with simplified preset settings; try to use a preset with the same amount of color as your original work.
Step 3: Export or save SVG file
There are two ways you can export or save SVG files in Illustrator. If you are creating an SVG from a file that has only one image on it, you can save it directly. If your drawing contains multiple graphics that you want to save individually, we recommend exporting each graphic as SVG content.
Option 1: How to save SVG files in Illustrator
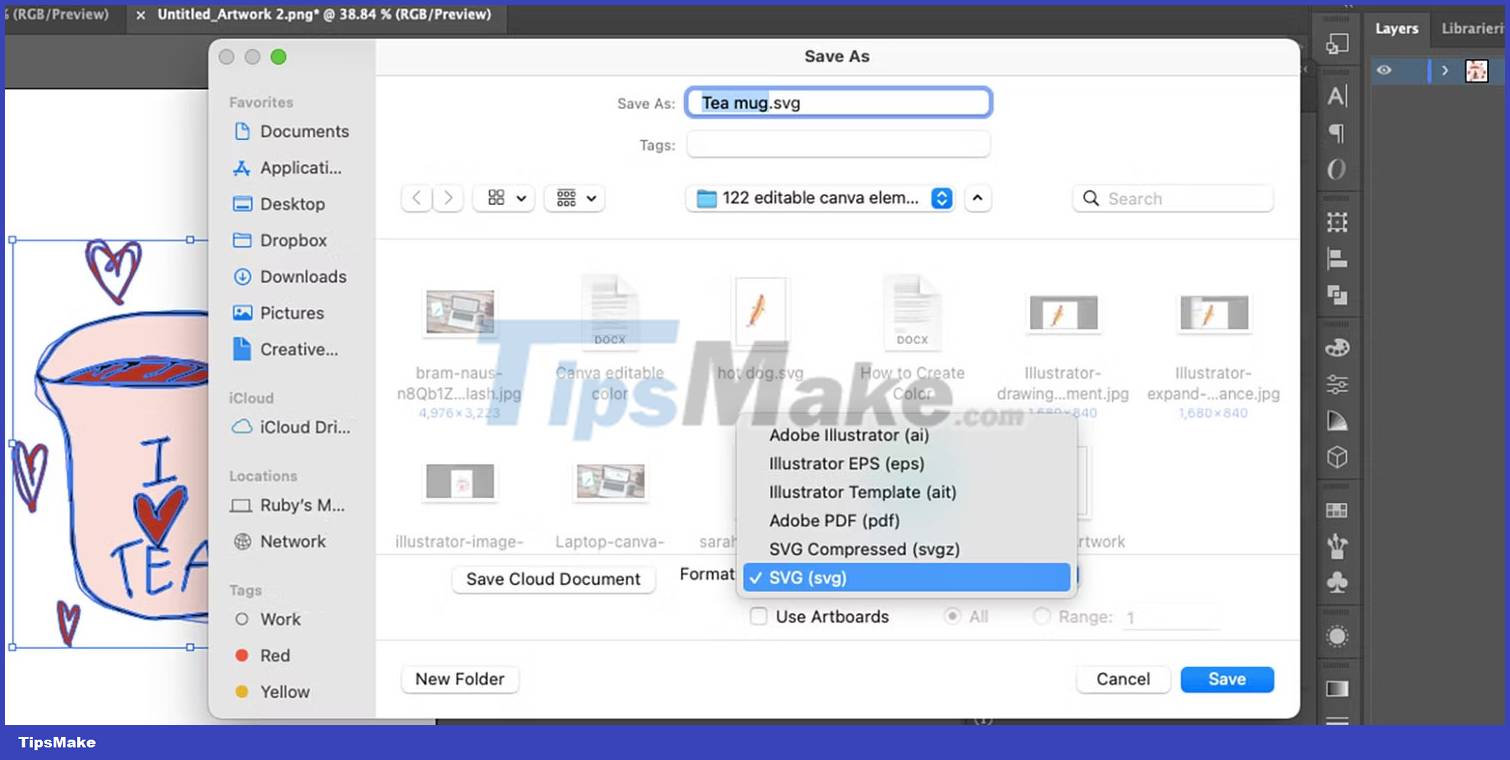
If your entire drawing includes a graphic that becomes a Canva element, you can save the file as-is. First, make sure that the drawing has no background.
Using the Selection tool (V) , click and drag across the entire graphic to select it. Right click and select Group . If your artwork is created on multiple layers, this will merge them all into one layer.
To save the file as SVG, go to File > Save As and select SVG (svg) on the Format drop-down menu . Unchecking the Use Artboards box will clip the SVG along the edge of the work. However, if you like the empty space around your work, check the Use Artboards box and you'll have a transparent background around your graphic.
Select Save > OK on the next window.
Option 2: How to export SVG content in Illustrator
You can use this technique if there's only one image on your artboard, but it's more useful if you've created multiple images on your artboard or Illustrator file. You can easily export each individual graphic without saving them all as SVG if not needed.
With the Selection tool (V) selected, click and drag your cursor over the entire image to select them all. Then right click on the graphic and select Group . Do this individually for any graphics you want to export.

Next to the Layers panel, you'll find a tab called Asset Export . If you don't see the tab title, go to Window > Asset Export and it should appear next to Layers.
Click and drag your grouped element into the Asset Export box and drop it. If you have a lot of graphics, as long as they are grouped separately, you can drag them all at once into the box to create individual assets. Each asset is numbered in the Asset Export box.
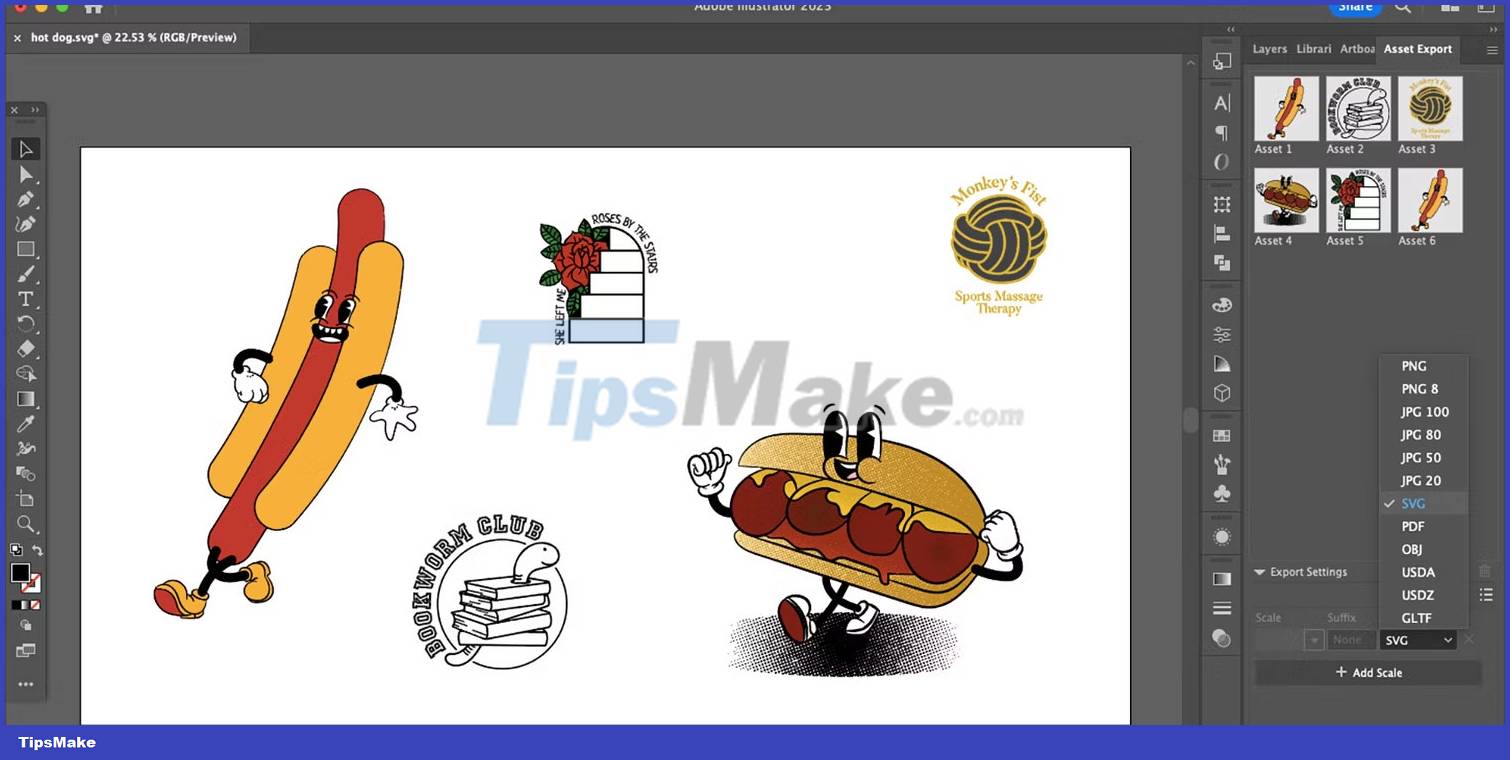
In Export Settings , select SVG in the Format drop-down menu .
If you need your element in any other format, you can choose Add Scale to export in other formats simultaneously.
Select the numbered content you want to export, then select Export and navigate to where you want to save the content; select Choose to save it. You will export your content to SVG and any other format you have chosen.
If you use Adobe Firefly's vector recolor tool, those graphics will also be saved as SVG once you've made your recoloring options. You can upload them to Canva and apply the same color change process.
Step 4: Upload the element to Canva
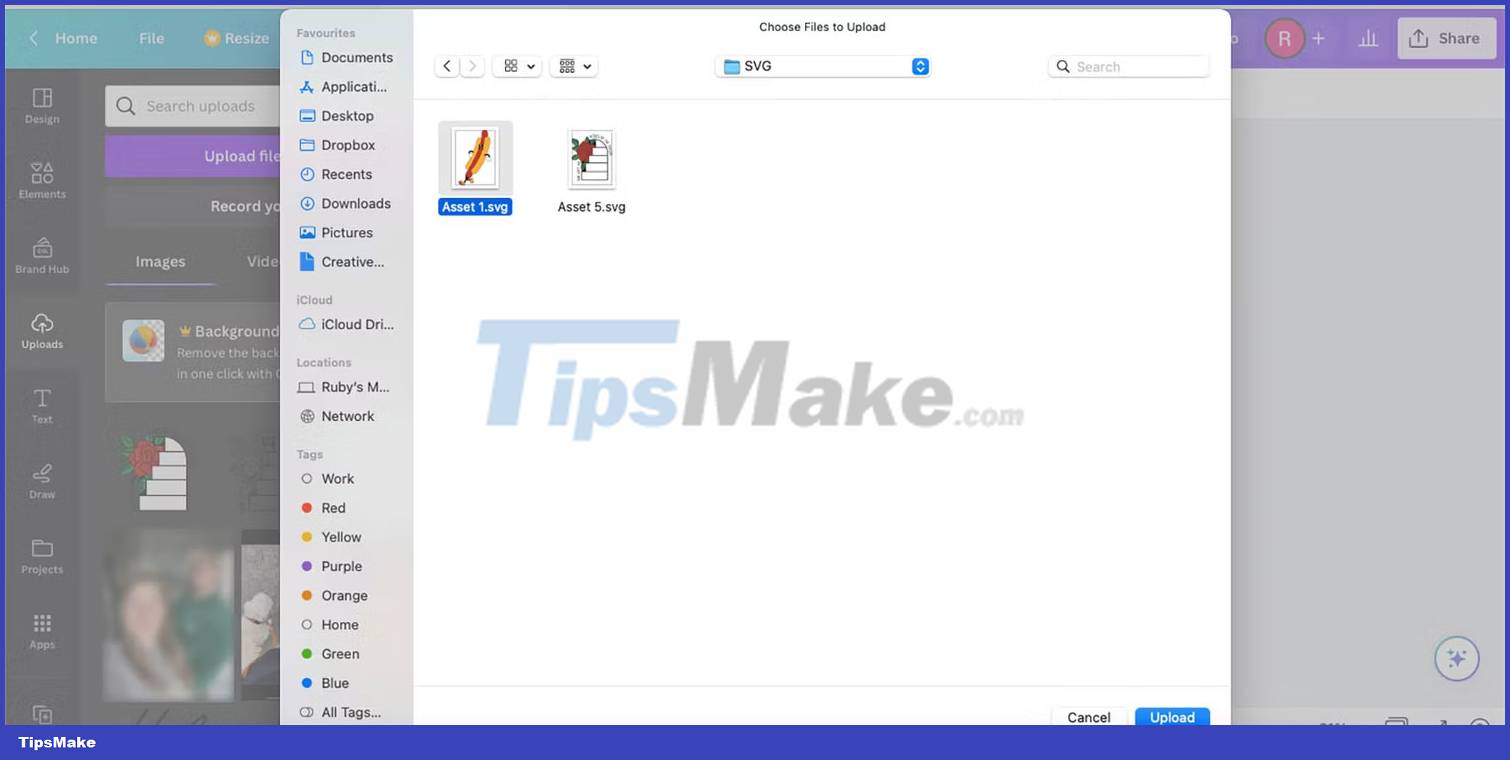
After creating the SVG graphic, go to Canva. You can upload your own elements with a free Canva account, which is a great way to get the most out of this amazing software.
First, you need to upload your element to a new, blank design instead of using a template. Once you've uploaded your element to a new design, you'll also be able to access it and edit colors on any template you design.
Select Create a design . Once the canvas is open, select the Uploads tab on the left and select Upload files . Navigate to SVG in your system and select it, then press Upload . Your SVGs will be in a separate folder labeled SVG wherever you choose to export to.
Step 5: Edit Element Color in Canva
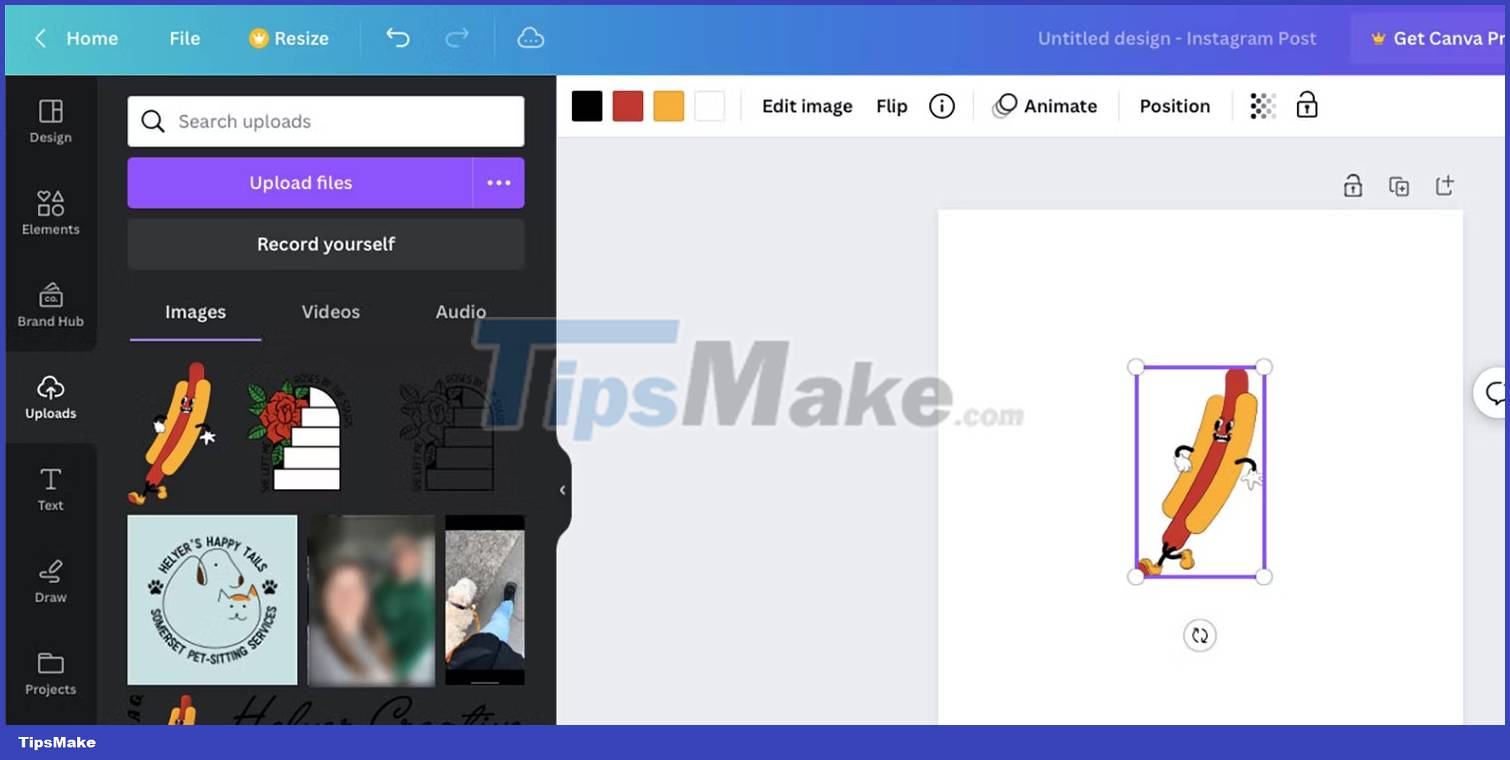
Once uploaded to Canva, you can select or drag your element onto the canvas to add it to your project. It will always appear with the original color you created. When selected, you'll see square swatches above the canvas with the colors included in your graphic; each color in a square.
Select any swatch square to change the color. The Color tab will open allowing you to choose any color, enter a name, or use a HEX value. If you've used Canva's Brand Kit feature, you'll see your brand colors here. This is a great feature to keep all the graphics and colored illustrations in line with your brand.
To change other colors in the graphic, select a different color from the original swatches above the canvas and the Color tab will also be available for that swatch.
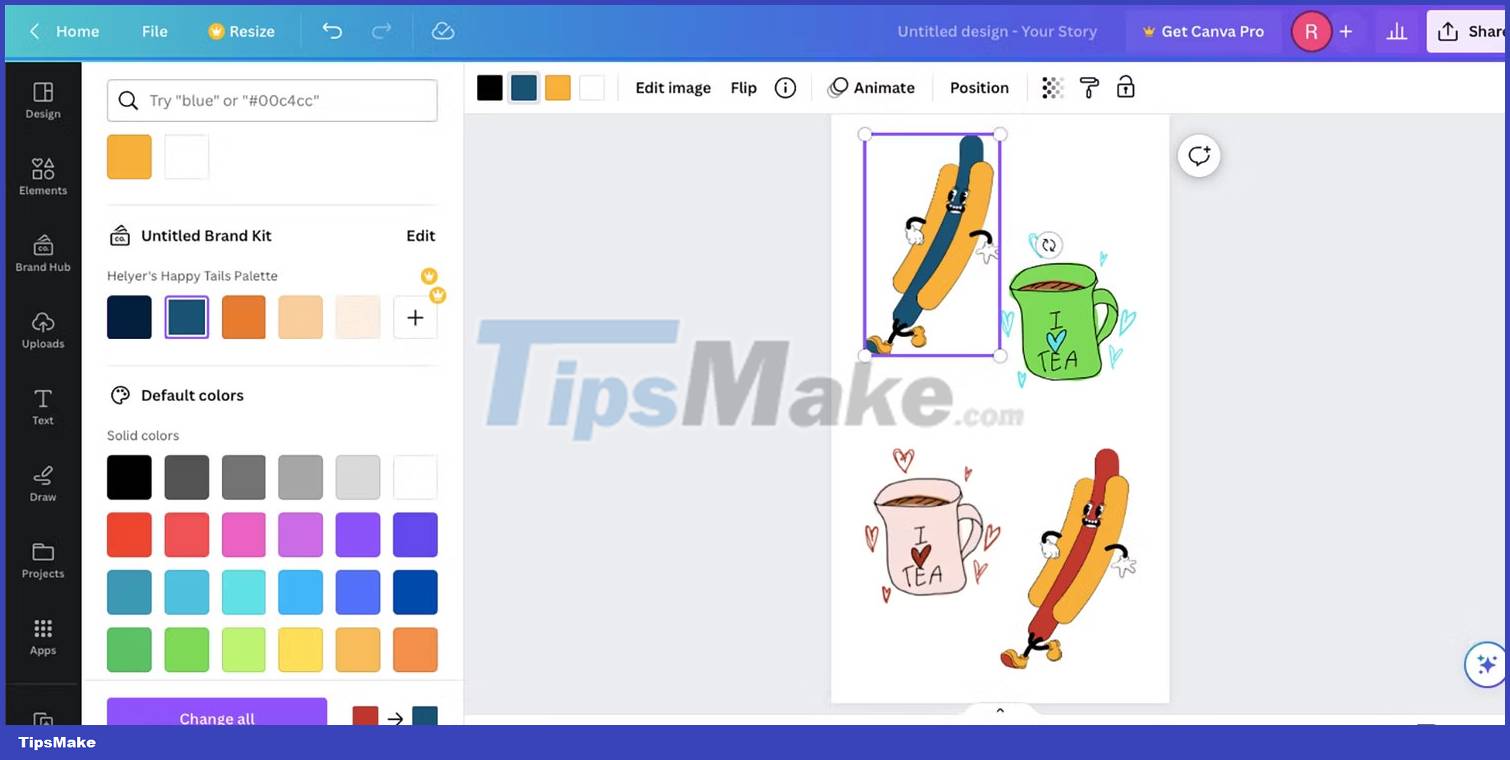
You can now open elements from the Uploads folder on any Canva project. It's easy to tweak the colors to suit your project for complete harmony in your Canva designs. Why not add animation to your new Canva graphic to really customize your design?


 Instructions to block ads on Smart TV
  Kutools for Excel Download, install and use instructions for new users
  How to blur images in Word
  How to delete notes, comments in Excel
  How to create a crossword game on PowerPoint
  How to circle answers in Word, Excel, PowerPoint