Table of Contents
This updated guide examines How to Create a Virtual Email on Nada Temp Mail and organizes the essential facts, background, and practical takeaways in clear American English.
Nada Temp Mail provides users with a lot of virtual domain names to use. We just need to choose the domain name and enter the name for the email address is done. Virtual emails created on Nada Temp Mail can read and download attachments. The following article will guide you how to use Nada Temp Mail to create virtual email addresses.
- How to use AltMails to create unlimited virtual emails
- How to create virtual emails on IdBloc
- How to create virtual email with Temp Mail on your phone
- How to use Mailspre to send anonymous emails
Instructions for creating virtual emails on Nada Temp Mail
Step 1:
First, visit the link below to go to the Nada Temp Mail homepage.
https://getnada.com/Now the site has created a virtual email address for you at the top of the line Temp mail such as tepa@getnada.com as in the picture. This email address is not fixed and changes as soon as you reload the page.
We can click the copy icon to immediately copy the email address to use as online account registration.

Step 2:
If users want to create their own email, then click Add Inbox .

Now display the interface to choose a domain name for email and set a name for email to use. Email domain name is selected in the list provided by Nada. Click Accept to agree to the choice of this newly created virtual email address.

So we have 2 emails to use, one that you randomly generated and the one you choose. We continue to perform the above operations to create new emails. If you do not want to use this email, then click on the trash can icon to delete that email address.

Step 3:
When the email comes we will see the name display as shown below. Click on the name of the email sent to view the content.

Step 4:
At this time display the email content. If there are attachments, we are informed the number of files. You just need to click to download the attachment to your computer.

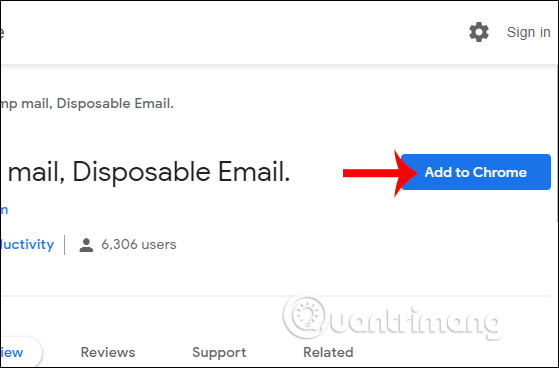
In addition to the internet-based Nada Temp Mail, we can use the additional Nada Temp Mail utility on Chrome. Click on the link below to install the Nada Temp Mail utility.
- Download the Nada Temp Mail Chrome extension
When clicking on the utility icon, you will see 3 icons including Change to change the email address, Copy to copy the email and Open to open the email when an email arrives. With the Chrome browser version, users do not have the option to create emails, but only 1 random email generated by the utility.

Creating a virtual email will help you a lot when you only need an email to register for an account, not for work or other important communication needs. Nada Temp Mail still supports us to read email as usual or download attachments if any.
I wish you successful implementation!
FAQ
What is How to Create a Virtual Email on Nada Temp Mail about?
It provides a structured overview of Create virtual email, explains the main context, and highlights practical takeaways for readers.
Why does this topic matter?
Understanding the main concepts helps readers evaluate the issue, avoid common mistakes, and make better-informed decisions.
How should readers use this information?
Use the guidance as a practical starting point, confirm details that may have changed, and follow current product, safety, or security recommendations.
Related Articles
 How to Create a Virtual Email Using Temp Mail on Your Phone6 minutes read
 Here's How to Create a Virtual Email Address Quickly7 minutes read
 How to Create Virtual Email on Idbloc5 minutes read
 How to Use Firefox Relay to Create Virtual Email3 minutes read
 How to Use Inboxen to Create Unlimited Temporary Emails6 minutes read
 Core Temp - Computer CPU Temperature Monitoring Tool6 minutes read
Reader Comments 0
Sign in with email or Google to join the discussion.