How to Create a Stadium in Google SketchUp
Google SketchUp is a 3D modeling tool that allows you to quickly build simple 3D models. It was designed to be used in conjunction with Google Maps, and local stadiums are a popular model for beginners. You can quickly create a stadium....
Part 1 of 5:
Making the Shape of the Stadium
-
 Launch Google SketchUp. After opening it, a dialog box will open asking you to choose a template with different metrics in meters, millimeters, and feet. Select what you want to use and create a new document.
- The interface will have a set of tools in the top side and the main view in the middle. The main view contains a space with three different axes and a human figure for scale. You can always delete the human figure by selecting it and pressing 'Delete.'
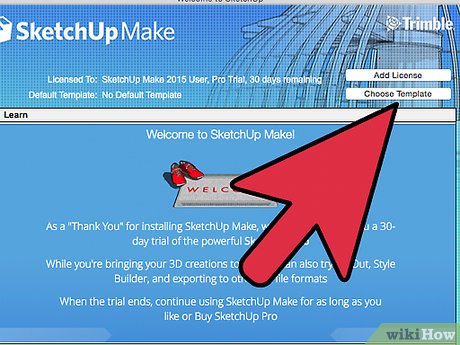
- The interface will have a set of tools in the top side and the main view in the middle. The main view contains a space with three different axes and a human figure for scale. You can always delete the human figure by selecting it and pressing 'Delete.'
-
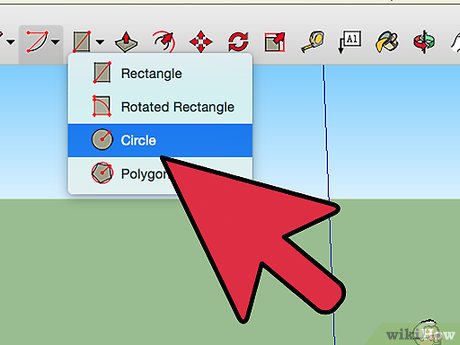 Click the 'Circle' tool from the left toolbar. The cursor will change into a circular pointer.
 -
 View the model in two-dimension at the top. Click the 'Camera' menu and select 'Standard Views'. Click 'Top' to get a two-dimension view of the model from above.
 -
 Create an ellipse. Do this by right-clicking the mouse and drawing it along the diameter. A good stadium model will be around 20-30m in diameter. Select 'Scale' from the toolbar, then grab and drag a point on the circle to distort it into an ellipse.
- You can also keep it as a circle to create a circular stadium instead.
Part 2 of 5:
Creating the Walls
-
 Click the 'Offset' tool. The Offset tool contains two arches and an arrow as an icon.
 -
 Create the wall. Start in the center of the existing circle and create a new circle to define the floor area of the stadium. The distance between the outer and inner circle act as walls.
 -
 Create more circles for rows of the stadium. After creating the walls, make more circles using the same Offset tool for seating. Each circle will act as a row of seating.
Part 3 of 5:
Forming the Seats
-
 Select 'Push/Pull' from the toolbar. The button looks like a 3D rectangle with an arrow coming out of the top.
 -
 Pull up the gap between the outer and first inner circle. Click drag the mouse upwards along the blue axis of the gap. This will raise the walls of the stadium.
 -
 Pull up each row a little lower than the previous. Once you're done with the outer walls, pull the different distances between circles, descending down towards the center. Each row towards the center should be lower than the one behind it.
Part 4 of 5:
Making the Doors
-
 View the model from the front. Click the 'Camera' menu and select 'Standard Views'. Select 'Front.' to view the front of the model in two dimensions.
 -
 Draw a circle where you want the entrance. Select 'Circle' from the toolbar at the top, and draw a circle right on the façade of the stadium where you want the door.
 -
 Make the circle into an arch. Click the 'Arc' button and drag the edge of the circle upward to make it look an arch.
 -
 Complete the door. Use the 'Push' tool from the toolbar and push the door inwards to the arena. If you want a door on both sides, extend it to the other side.
Part 5 of 5:
Completing the Stadium
-
 Open the 'Intersect' tool. Click the 'Edit' menu and select 'Intersect'. The Intersect tool will allow you to delete unwanted lines from the model.
 -
 Remove unnecessary lines and surfaces. Choose 'Intersect with Model' from the list of options. Select all the surfaces and lines that you want to remove, along with the surfaces that are blocking the doors. Clicking a surface or line will remove it.
 - Save your work. Once you're satisfied with your stadium, click File →0 Export or File → Save to save it in a variety of different 3D model formats. You can save it as Skp (SketchUp) file, or export it as 3DS, OBJ, Collada, or CAD 2D format.
