How to Make a Glass Bowl with a Napkin in Blender
A glass bowl and a napkin seem to go well together, and this is also a creative project. If you want to make it look extra-nice, why not do it in Blender? Just follow the steps below. Be sure to switch to the Cycles rendering engine. By...
Table of Contents
Part 1 of 3:
Making the Bowl
-
 Be sure to switch to the Cycles rendering engine. By default Blender uses its internal rendering engine which is old. The newer Cycles renderer is better and allows use of Graphics card to help render. In the top Menu Bar, you should see a drop-down menu. Click it to switch from "Blender Internal" rendering engine to the "Cycles" engine.
 - If you don't have the default cube on your screen, go to File >> New >> Reload Start-Up File (CTRL + N).

- Be sure the cube is selected and delete it. Select the cube by right clicking it, and press "X" and click Yes to delete it.
-
 Go to Add >> Mesh >> UV Sphere. This will put a sphere in the middle of your screen. If it is not in the middle it means your 3D cursor is not in the middle. If that's the case then press Shift + s and choose cursor to center. Then Select your Sphere and again press Shift + s and choose selection to cursor.
 - Zoom in closer using your scroll wheel.
- Cut off the top of the sphere. To do this:

- Go to Object Mode >> Edit Mode. This will turn the sphere orange.

- Choose the 3D view that you want. It is the icon directly beside the Object Mode button.

- Change the perspective to orthographic. Go to View >> Persp/Ortho. This will change it to orthographic and make it easier to work with.
- Pressing the 5 on your number pad will change the perspective as well.
- Change the way you see it by pressing the 1 on your number keypad. You can change your view by pressing any of the keys shown here.

- Deselect the sphere by pressing A.
- Press the B key. This will bring up the selection pointer.
- Select the top few gridlines at the top of the sphere. From your perspective, it will appear to be three gridlines. In actuality, there is a 4th one at the very top that you can't see.

- Delete the vertices. Do this by selecting X and then Vertices. If something happens and you don't get all of the vertices, just repeat until the top of your sphere is leveled off.

- Go to Object Mode >> Edit Mode. This will turn the sphere orange.
- Flatten the bottom of your bowl.
- Press B and select the bottom few gridlines. Then select Scale in your Mesh Tools.
- Press Z. This will make it so that it can only be changed on the Z axis.

- Press 0 and then press Enter.
- B > Make selection > Scale > Z > 0 > Enter (It's that quick! A repeat of the prior two lines.)
-
 Check your progress.
 - Change the 3D view back to Solid and and then the Edit Mode back to Object Mode.
-
 Using your scroll key, press it down and swivel the bowl so that you can see in the top.
 -
 Select the Object Modifier Button (the wrench).
- Add a Modifier.
- Select Solidify.
- Change the thickness to 0.07.

- Increase the number of subdivisions in your bowl. This will give it a much smoother appearance.
- Add a Modifier.
- Select Subdivision Surface.
- Go to the Subdivision Surface (SubSurf) window. Change View and Render to 2.

- In your Object Tools, select Shading >> Smooth.

-
 Check your progress. This is what it should look like now.
 - Change the material of the glass. Click on the Material Modifier icon.

- Select the New bar that you see. This will open up the Material Modifier dialog box.

- If the dialog box doesn't look like this, go to the Render button and change it to Cycles Render. Then it will look like this.

-
- Go the Surface section >> Add Nodes >> Diffuse BSDF >> Glass BSDF.
Part 2 of 3:
Making a 'Table' for the Bowl
- Select Add >> Mesh >> Plane.
-
 Press Scale >> 5 (on the keypad) >> Enter. Then press 1. This will enlarge the surface and give you a front view so that you can move it to the right place on the cup. Move your image around to see if there are any gaps.
 -
 Click on the blue arrow and move the plane to just below the bowl.
 - Set the material for the plane.
- Be sure the Material Modifier is selected, then press New. You can make any changes that you want. For the purposes of this tutorial, the default Diffused BSDF and the color white are selected.
- Be sure to save your project if you haven't already.
Part 3 of 3:
Making the Napkin
- Select Add >> Mesh >> Plane.
- Press Scale >> 3 >> Enter. This will enlarge the napkin but not as large as the table.
- Press Rotate >> Z (restricting the movement to the Z axis), 45 (on the keypad) >> Enter. This will turn it diagonally to the bowl.
-
 Press Rotate >> X (X axis) >> 70 >> Enter.
 - Press 5 to change the view.
-
 Position the napkin over the cup.
 - Turn your project sideways by pressing 3.
-
 Use the green arrow to move the corner of the napkin just to the inside of the left lip of the bowl, as seen here. Since the napkin will be draped over the bowl, this will make it so that that corner falls inside of it.
 - Set the material of the napkin.
- Click on the Material Modifier >> Add. Then change Diffused BSDF to Glossy BSDF.
- Set the Roughness to 1.
- Choose the color. It can be whatever color you want.

- If you want to change your current view of the napkin, instead of waiting for the render, go to Settings >> Viewport color and change its color. Otherwise, just wait for the render.
- Start bending your cloth.
- Go from Object Mode to Edit mode.
- Be sure that your napkin is selected by pressing A. You will know it is selected if it is orange.
- Select Subdivide. Go to the Cuts option then 50 >> Enter.
- Go back to Object Mode.
- Add Modifiers. The order is very important.
- Click on the Wrench again >> Add Modifier >> Cloth.
- Add Modifier >> Solidify. Be sure the thickness is set to 0.01.
- Add Modifier >> Subdivision Surface. Set both of the View and Render values to 2.
- Go to Mesh Tools (on the left) >> Shading >> Smooth.
- Start making the adjustments for the cloth modifier.
- Select the Physics Modifier button. If you don't see it, then make the modifier panel wider.

- Start modifying the properties of the napkin.
- Select the Cotton Preset.
- Change the Steps to 10.
- Be sure that Cloth Collision is checked. This allows the cloth to interact with the bowl.

- Open up the Cloth Collision section and make sure that Self Collision is also marked. This allows the cloth to interact with itself.
- Right click on the bowl.
- Look at the panel on the right (you should still be in the Physics Modifier panel). Select Collision.
- Repeat the above process for the table surface.
- Select the right arrow in the animation toolbar and watch your napkin as it falls to the table. It will take a little while.
- Once it has completed, go through the animations, slide by slide, until you find an image that you like.
- Set up the light source.
- Zoom away until you can see the lamp. Right click on it to select it.

- Select View >> 1 (Keypad). This will give you a front view.
- Using the RED arrow, move the lamp so that it is centered over the bowl.

- Using the blue arrow, lower the lamp so that it is closer to the bowl.
- Change to a side view.
- Using the green arrow, move it so that it is just a little in front of the bowl.
-
- Set up the options for the light source. Click on the Object Data button.

- Select Point. It should be the default.
- Change the Size to 5.
- Change the Strength to 2000. (This can be altered, depending on your desired look).

- Select the background color. To do that, click on the World button.
- Change the background color by changing this color. You will notice that your options are darker than your normal color options. For the purposes of this tutorial, black will be used.

-
- Rotate the scene so that you can see it better. You want to be able to see into the bowl.
- Increase the size of the surface/table. You want it to fade to black in the final image. Increasing the size will do this.
- Be sure the surface is selected, then select Scale >> 20 >> Enter.
-
 Set up the camera view. Go to View >> Camera. As you can see here, the view is not what it should be.
 - Change the camera view properties. This will allow you to change what you see through that particular view.
- Go to View >> Properties.

- In the panel that comes up, select Lock Camera to View.

- Click on View >> Properties again, to hide the panel.
- From this viewpoint, move the bowl and napkin around until the surface that the bowl is on first appears on the horizon. From there, move the bowl and napkin the way you want it.

-
- Save your work. It's always a good idea to save your work before rendering, in case something goes wrong.
- Select the Render icon. Render with the default settings for now. This will take a while, so start it, and maybe take a break.

-
 Once 'complete', check out your first render and make sure it looks like you want it to.
 - Go to Samples, under Sampling and change it to a higher number. The number was changed to 2000 in this instance. The higher the number, the better the result. However, it will also take longer.

-
 Press render and allow it to render for the final result. This particular one took about 45 minutes on a laptop computer.
Was this article helpful?
Your feedback helps us improve.
Related Articles
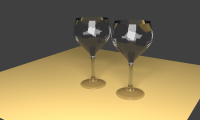 How to Make a Wine Glass in Blender9 minutes read
 Blender - Free and Powerful 3D Modeling Tool7 minutes read
 What's New in Blender 3.03 minutes read
 Common mistakes when using blender and how to fix it7 minutes read
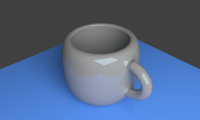 How to Make a Coffee Cup Using Blender15 minutes read
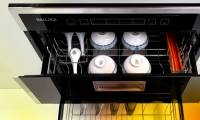 Things to note when buying a bowl dryer7 minutes read
Reader Comments 0
Sign in with email or Google to join the discussion.