How to Make Text Look Like Ice Using Blender
Blender can make all kinds of 3D 'stuff'. Here, you will see how to make text that looks like ice. Be sure that you have the Cycles Render option. Also, make sure that you have Default for the other option.
Table of Contents
Part 1 of 5:
Making the Text
-
 Be sure that you have the Cycles Render option. Also, make sure that you have Default for the other option.
 - Start with the default file, the cube. Then, delete the cube.
- Go to Add >> Mesh >> Text. This will add text to your scene, lying flat on the 'ground'.
- Press R >> X >> 90 >> Enter. This will have your text perfectly aligned.
-
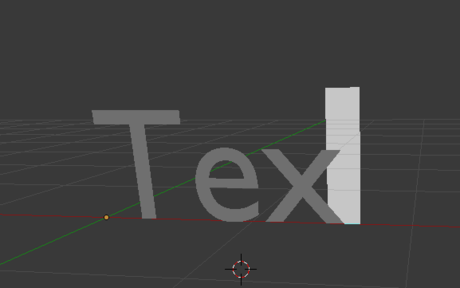 Change the text. You need to be in Edit Mode to do that. You can go to Edit Mode by pressing your Tab key. The large white area you see in the screenshot is your cursor. Delete the text and put in what you want.
 - Type in your text with one space between each letter.
- Switch back to Object Mode (Tab).
-
 Click on the F icon and then, in the Extrude option, type in 0.1 and then Enter.
 -
 Rotate your text so that it is at an angle to check your depth and dimensionality.
 - Still in the Geometry menu, under Bevel, change the Depth to 0.05 and your Resolution to 7. This will round out your text.
- Save your work. Your text is complete.
Part 2 of 5:
Making the Surface
- Go to Add >> Mesh >> Plane.
- Using your directional arrows, move it so that it is under your text.
- Enlarge it so that it will 'hold' the text. Press S >> 5 >> Enter. This will increase its size by 5 times.
-
 Press 5 (Num Pad) and then 1 (Num Pad). Then zoom in very closely so that you can have your text just above your surface. Use your directional arrows to make the adjustments.
Part 3 of 5:
Making the Container for Water
- Go to Add >> Mesh >> Cube.
- Change the Display Method to Wireframe so that you can see both the cube and the text.

- Using your directional arrows in Blender, move the cube until it is centered on your text.
- Press S >> 3 (You would put whatever works for your text. Because the word wikiHow is larger, the cube was scaled up 3 times.
-
 Center the box so that it is 'holding' your text using the directional arrows.
 - Hold down the Shift key while using the middle mouse button to move your objects more to the bottom of your screen. By now, it will probably be at the top.
Part 4 of 5:
Adding a Light Source
- Click right above the cube around your text to give you a point of origin.
- Go to Add >> Mesh >> Plane.
- Hold down the middle mouse button and rotate the view. You want to make sure your cube is around the text and the plane is centered above it.
- You might want to make your light source a little larger. Try something like 2.5 (if you used 3 before).
- Set the material for the light source.
- Double check that you have selected Cycles Render.
- Click on the material modifier, then New. Choose Emission from the options. That is because it will be emitting light. Set the Strength to 20.
Part 5 of 5:
Putting It All Together
- Right click on the bottom surface (table) that you created to select it.
- Select the Material Modifier icon and add New again. This time, leave it at default.
- Change the background colors.
- Click on the World icon.
-
 Locate the Surface dialog and change the color.
- Click on the muted color that you see there.
- Go to the Value bar (black and white stripe) and increase the values there. Instead of close to the bottom, put it about midway, as you see in the screenshot.
- Go to the color wheel and choose a blue, such as what you might see in ice.
-
 Turn your text into mesh.
- Right click on the text to select it.
- Press ALT + C. Then select Mesh from Curve/Meta/Surf/Text.
- Select the Physics icon.
- Choose the Physics for: Fluid option.
- Under the Type of Fluid, choose Fluid.
- Change the Physics of the box (container) to hold water.
- Right click on the box to select it.
- Choose the Physics for: Fluid option.
- Under the Type of Fluid, choose Domain. (Now it will hold water.)

- Change the Resolution to 100 and set the Time to End at 0.1.

- Below the Timeline, at the bottom of your screen, change the End number to 20.

- Click the Bake button (Under the Domain Type). Depending on your system, it could take a few seconds or a few minutes.
- Once it is complete, go to where you changed the Frame count to 20. Using the arrows, go through the Frames until you find one that is appearing to melt, but still legible.
- Right click on the text. This will select the original text, not the text you just 'melted'.
- Go to the upper right corner of your screen where your image layers are. Find the one that says Text. Click on the camera and the eye so that they are grayed out.

- Set the material for the Fluid text.
- Right click on the Fluid text to select it.
- Click on the Material modifier and then New.
- Select Glass BSDF for the surface material.
- Set up the camera view.
- Go to View >> Front.
- Hold down the Shift key and the middle mouse button and center your text in the screen.
- Zoom in to the bottom of the text. With the 'melting', the table will no longer be in contact with the text. Adjust this until they are almost touching again. Leave a small space between the two surfaces.
- Center your image again in your screen.
- Go to View >> Align View >> Align Active Camera to View.
- Go to View >> Properties. Select Lock Camera to View.
- Turn the Properties menu off by Selecting View >> Properties again.
- Move your text around until it looks like you want it to look, placement wise.
- Render your text.
- Click on the Camera and then press Render. For the initial run, leave it at default.

- If you want to get rid of the sharpness and angularity that you see here, press ESC and right click your text. Go to the Shading option on the left of your screen, and select Smooth. Click on the Render button again to try out that look.
- Go to the Sampling option further down. Change the Render to 500.
- Start the Render.
- Click on the Camera and then press Render. For the initial run, leave it at default.
- Wait for the render to be done.
- Once it is done rendering, if you like the way it looks, then, while holding the cursor over the text, press F3.
-
 Save it with an appropriate name. If you don't want it to be a PNG file, then, in the lower right hand part of the screen, you can change that.
Was this article helpful?
Your feedback helps us improve.
Related Articles
 Blender - Free and Powerful 3D Modeling Tool7 minutes read
 What's New in Blender 3.03 minutes read
 Common mistakes when using blender and how to fix it7 minutes read
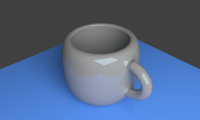 How to Make a Coffee Cup Using Blender15 minutes read
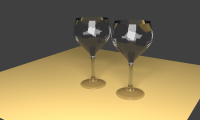 How to Make a Wine Glass in Blender9 minutes read
![[Review] Is the Osaka blender good?](/data/thumbs_200x120/[review]-is-the-osaka-blender-good_thumbs_200x120_5MHR2bTZg.jpg) [Review] Is the Osaka blender good?7 minutes read
[Review] Is the Osaka blender good?7 minutes read
Reader Comments 0
Sign in with email or Google to join the discussion.