Table of Contents
Learning how to change TP-LINK TL-WR940N Wi-Fi password simply doesn't have to be complicated. This updated guide presents a clear workflow, practical checks, and troubleshooting advice you can use while completing the process.
Key Takeaways
- Review instructions for changing TP-LINK TL-WR845N Wi-Fi password.
- Follow the recommended steps in order to avoid common mistakes with change TP-LINK TL-WR940N Wi-Fi password simply.
- Review compatibility, settings, or requirements before making changes.
Instructions for Changing TP-LINK TL-WR845N Wi-Fi Password
Step 1: Connect the device to the modem.
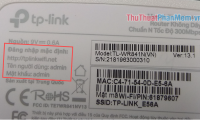
- If you use multiple modems, unplug the network cable and just connect your computer directly to the TP-LINK TL-WR845N using a cable. - If you don't remember the access address, check the back of the modem for the login information.

Step 2: Access the WiFi management page.
- Open a web browser, type 192.168.1.1 or 192.168.0.1 and press Enter. - Log in with the default account (admin/admin) or previously changed information.
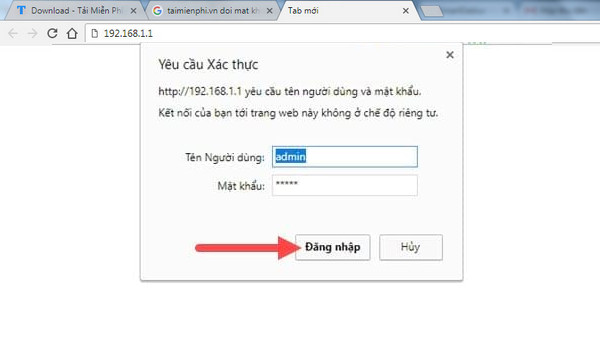
Step 3: Edit WiFi password
- Open Wireless => Select Wireless Security. - Select one of the security standards: - WPA2-PSK (recommended for high security). - WPA or WEP if you need to support older devices. - Enter a new password in the Password box and click Save.

In the Wireless Security section, you have 4 options, read carefully what these items do.
- Disable Security: If you use this mode, your WiFi will be completely free and without a password. - WEP: An old security standard, running on 256-bit WEP technology and is still one of the most widely used standards in the past. - WPA: Extremely secure WiFi security standard, allowing the use of a combination of characters and letters for your password. - WPA 2: The latest standard to upgrade the current WPA, the most popular and widely used with strong security capabilities, advanced protection algorithms and to date no one has been able to completely crack this system.
Then select 1 of the 4 standards and enter the password in the Password box and Save it.

Step 4: Restart the modem to apply the changes.
- Press Reboot and wait for the device to reboot. - After rebooting, reconnect to WiFi with the new password.
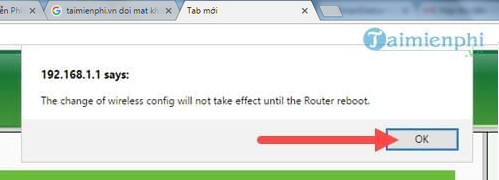
You have successfully changed the TP-LINK TL-WR940N Wifi password after the reboot process.
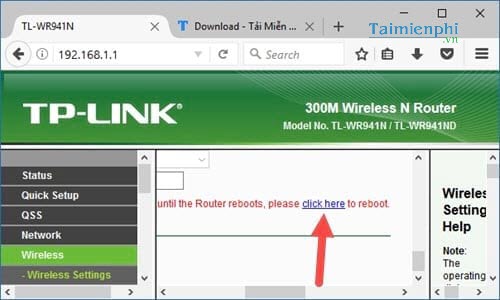
Changing the TP-LINK TL-WR940N WiFi password helps you better protect your network and limit unauthorized access. This is a popular device line, used by many people thanks to its stability and ease of installation. You can refer to the instructions for changing the TP-LINK TL-WR945N Wifi password if you are looking for other TP-Link products.
Final Thoughts
The most reliable way to handle change TP-LINK TL-WR940N Wi-Fi password simply is to follow the process in order, verify each important setting, and test the result before moving on. Use the guidance above as a practical reference, then adjust the details for your device, software version, or specific goal.
FAQ
What should I check before I change TP-LINK TL-WR940N Wi-Fi password simply?
Use the latest available software, confirm that your device meets the requirements, and make sure you have the necessary permissions, account access, or backup before changing anything.
Why might I be unable to change TP-LINK TL-WR940N Wi-Fi password simply?
Common causes include outdated software, missing permissions, incompatible settings, incomplete setup steps, or a temporary network problem. Recheck the process from the beginning and restart the app or device if needed.
Is it safe to change TP-LINK TL-WR940N Wi-Fi password simply?
It is generally safe when you use official tools, review every permission, and back up important data before making system-level or account-level changes.
Related Articles
 How to Change the Tp-link Wi-Fi Password?3 minutes read
 How to Change Wi-Fi Password, Change Wi-Fi Pass Vnpt, Fpt, Tenda7 minutes read
 How to Change Your Viettel Wi-Fi Password7 minutes read
 Change Wi-Fi Password: How to Change Vnpt Wi-Fi Password5 minutes read
 How to Change the TP-Link Wi-Fi Password: Step-by-Step Guide2 minutes read
 Change Wi-Fi Password: 2 Steps to Change Linksys Wi-Fi Password2 minutes read
Reader Comments 0
Sign in with email or Google to join the discussion.