How to change DNS on Windows 11 to increase Internet speed
Changing DNS on Windows 11 helps your computer increase Internet speed, especially during network fiber cable breaks. Below is how to change DNS on Windows 11 to increase Internet speed
Table of Contents
Changing DNS on Windows 11 helps your computer increase Internet speed, especially during network fiber cable breaks. In this article, TipsMake shares with you how to change DNS on Windows 11 to increase network speed.
1. What is DNS?
DNS (abbreviation: Domain Name System) is simply understood as a domain name resolution system. The way DNS works is like a map or directory for websites on the Internet. DNS helps users remember to replace names with complex numbers when they want to access a certain website address.

In Vietnam, Internet service providers (ISP - Internet Service Provider) have pre-set DNS for users (also known as default DNS). However, the ISP's default DNS is often very slow and unreliable because the ISP can completely track it. So your Internet connection is no longer private.
2. Does changing DNS on Windows 11 increase network speed?
Changing DNS means you will use another DNS service from famous providers in the world. Experiences when changing DNS on Windows 11 are specifically as follows:
- Increase Internet connection speed
- Enhance security and privacy when using the Internet
- Bypass censored websites, access any website in the world
3. List of high-speed, secure DNS codes
Before changing the DNS code on Windows 11, you need to know the list of the best DNS codes in the world today. Good DNS providers today include: Google, Cloudflare, OpenDNS.
3.1 Google DNS
DNS IPv4:
- Preferred DNS: 8.8.8.8
- Alternate DNS: 8.8.4.4
DNS IPv6:
- Preferred DNS: 2001:4860:4860::8888
- Alternate DNS: 2001:4860:4860::8844
3.2 Cloudflare DNS
DNS IPv4:
- Preferred DNS: 1.1.1.1
- Alternate DNS: 1.0.0.1
DNS IPv6:
- Preferred DNS: 2606:4700:4700::1111
- Alternate DNS: 2606:4700:4700::1001
3.3 DNS OpenDNS
DNS IPv4:
- Preferred DNS: 208.67.222.222
- Alternate DNS: 208.67.220.220
DNS IPv6:
- Preferred DNS: 2620:119:35::35
- Alternate DNS: 2620:119:53::53
4. How to change DNS on Windows 11 to increase Internet speed
On the Windows 11 operating system, users can change DNS according to personal needs to increase Internet connection speed. How to change DNS on Windows 11 is simple, anyone can do it.
4.1 Change DNS on Windows 11 through Settings
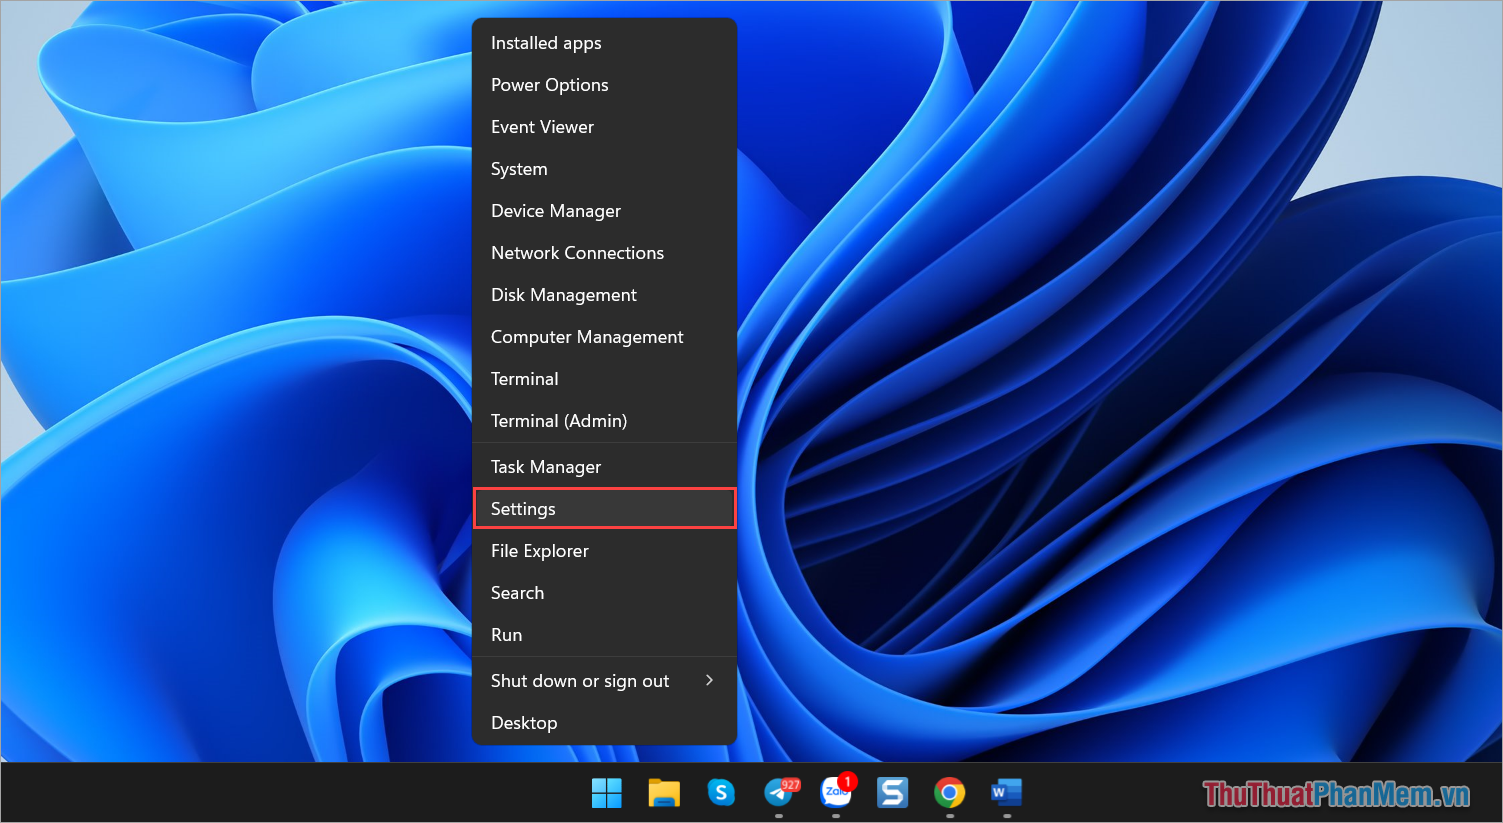
Step 1 : Right-click Start and select Settings (or press Windows + I) to open Settings on your computer.
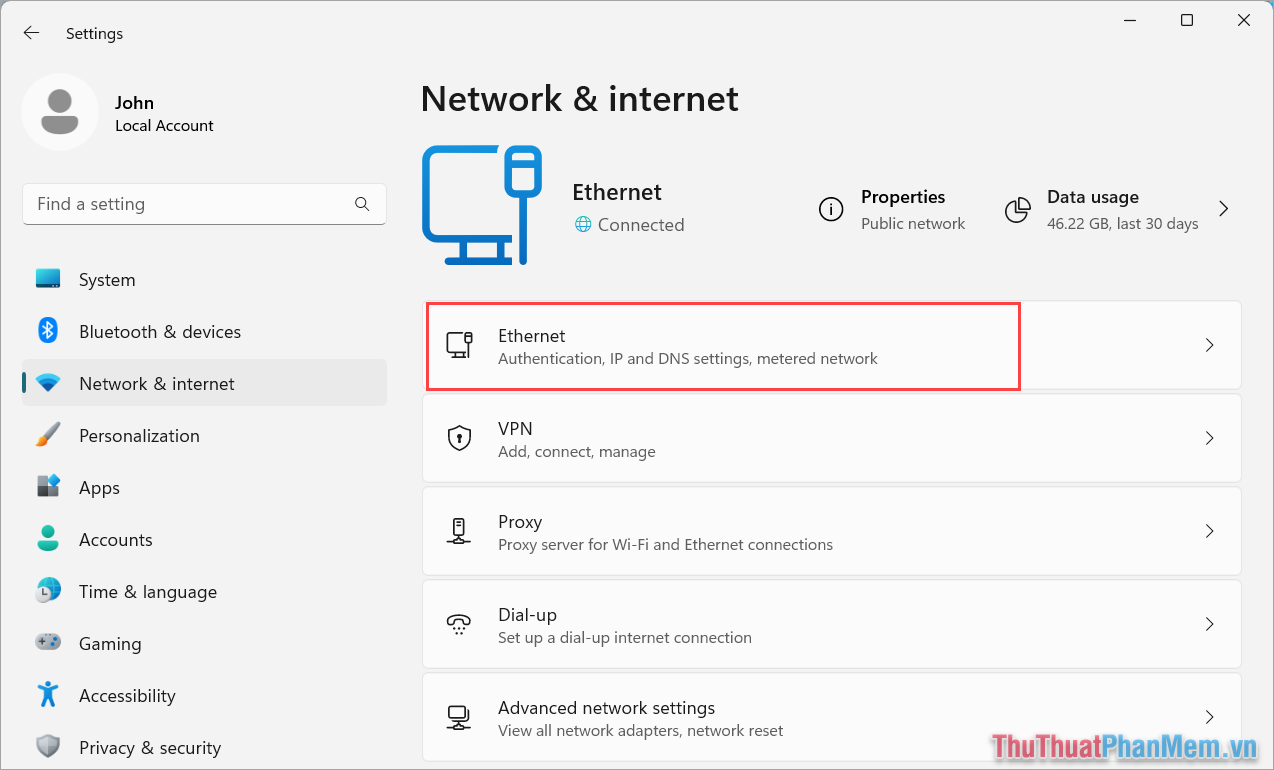
Step 2 : Then, select Ethernet to view Internet network settings.
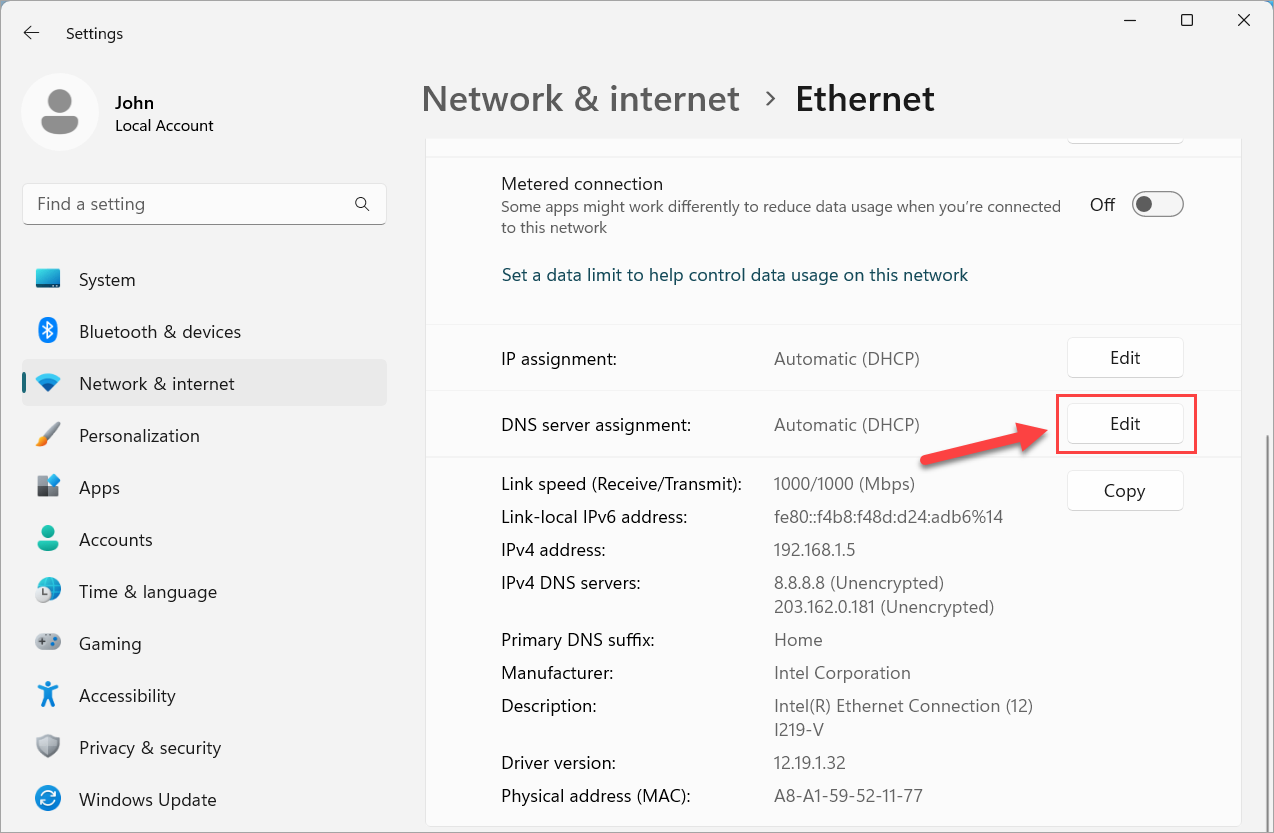
Step 3 : In the Ethernet setup section, find the DNS Server Assignment section and select Edit to set up DNS.
Step 4 : To set up DNS on Windows 11, switch DNS to Manual mode (1) and activate IPv4/IPv6 (2) depending on your needs.

Step 5 : Finally, enter the DNS code of Google, Cloudflare, OpenDNS into Preferred DNS and Alternate DNS to use.
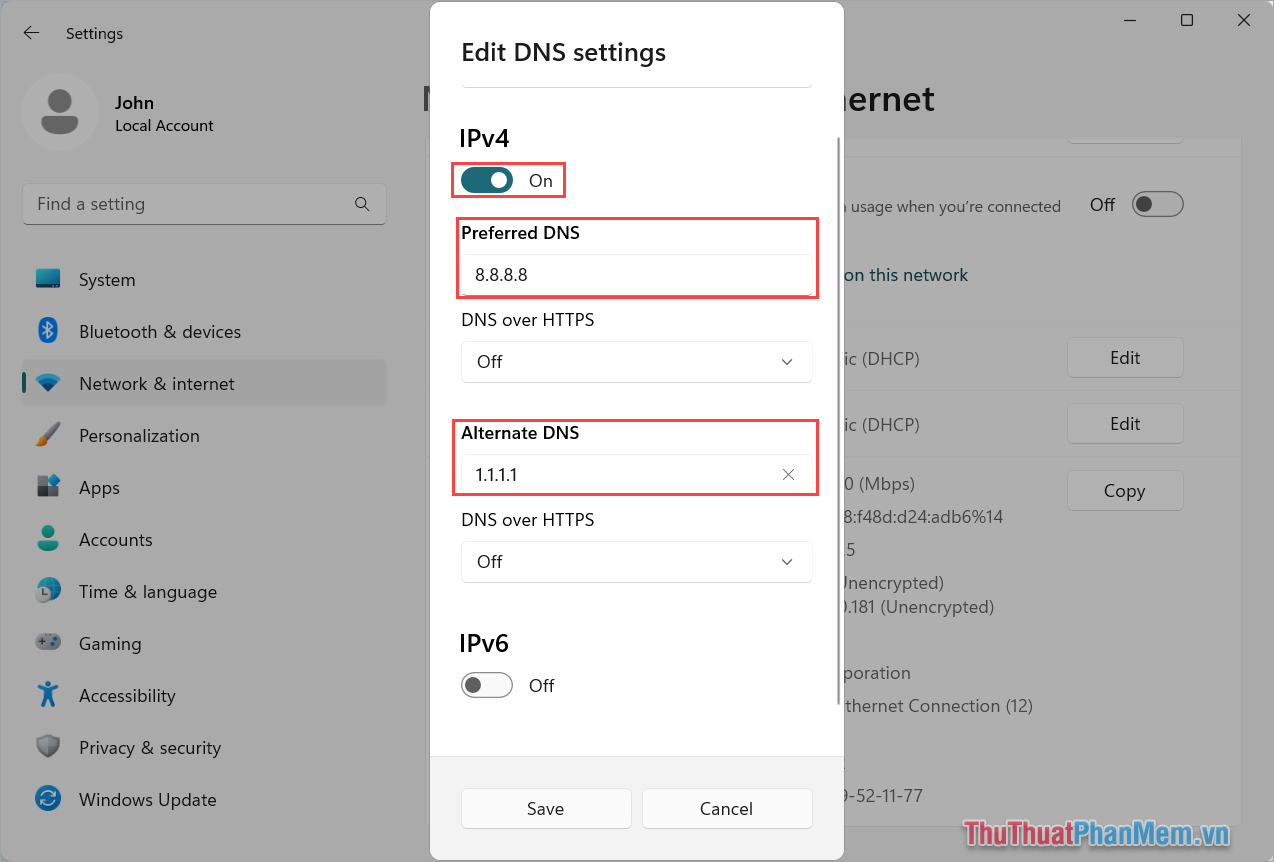
Step 6 : In case you want to use IPv6, you just need to activate and fill in the same DNS provided in the article.

4.2 Change DNS on Windows 11 through Control Panel
How to change DNS on Windows 11 through Control Panel will be closer to everyone because this is how to change DNS on Windows 10.
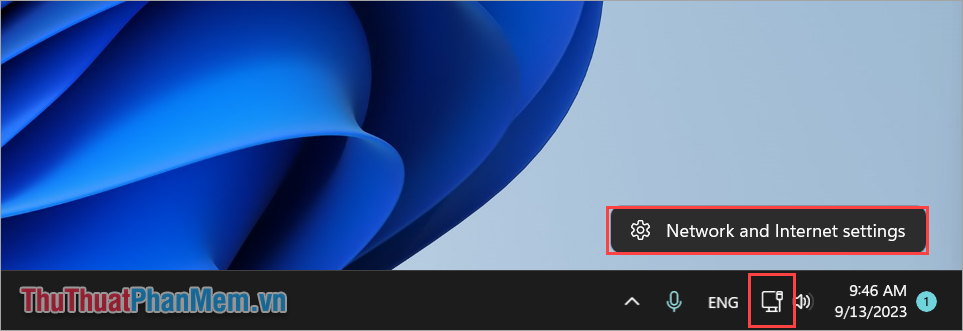
Step 1 : Right-click Network and select Network and Internet Settings .
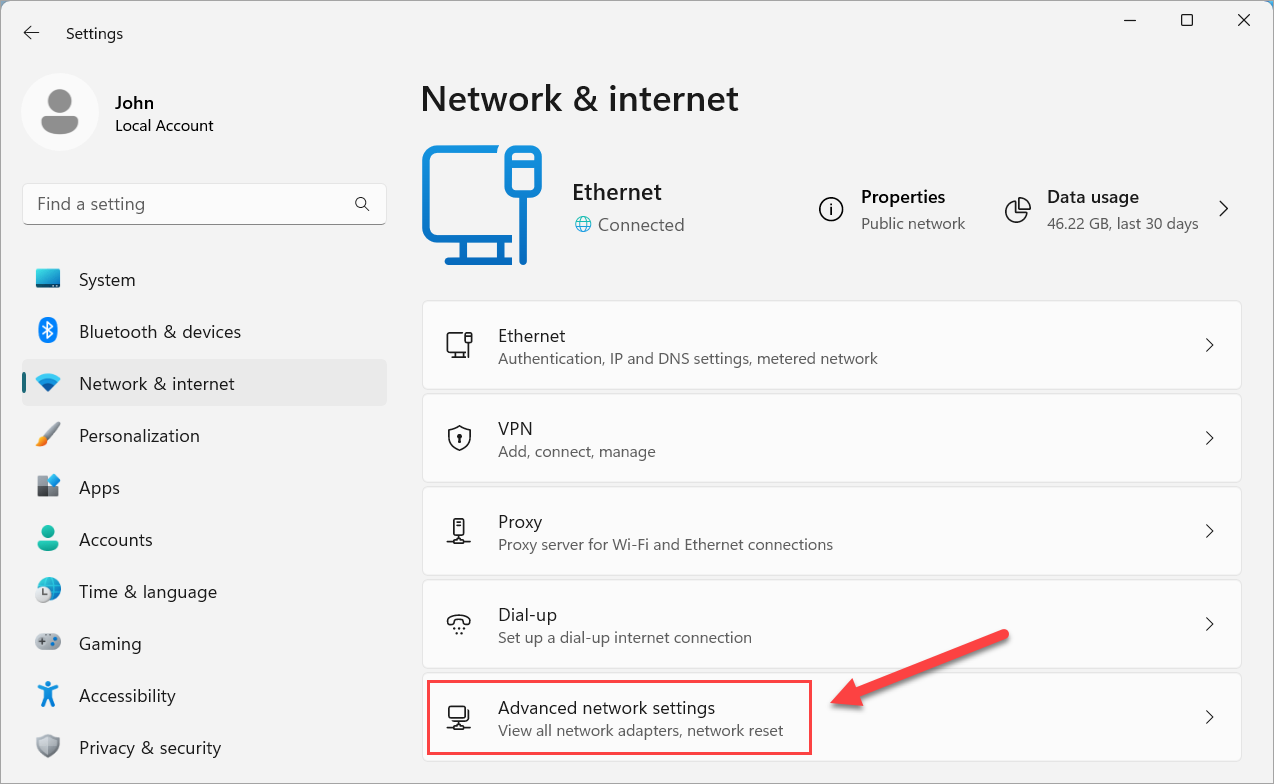
Step 2 : Then, select Advanced Network Settings .
Step 3 : Next, select More Network Adapter Options .

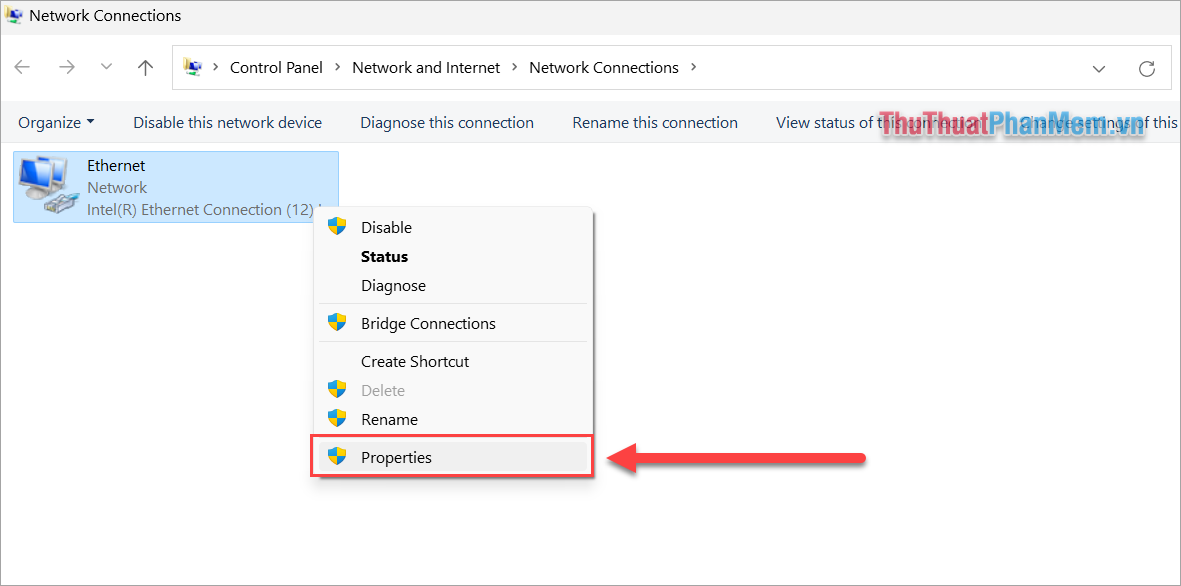
Step 4 : In the Network Connections window, right-click Ethernet and select Properties to set up the network.
Step 5 : To change IPv4 DNS, select Internet Protocol Version 4 (TCP/IPv4) and select Properties .

In case you want to change IPv6 DNS, select Internet Protocol Version 6 (TCP/IPv6) and select Properties.
Step 6 : Select Use the following DNS server addresses and enter DNS from Google, Cloudflare, OpenDNS into Preferred DNS and Alternate DNS to use.

In this article, TipsMake shared How to change DNS on Windows 11 to increase network speed quickly and effectively. Have a nice day!
Was this article helpful?
Your feedback helps us improve.
Related Articles
 Internet acceleration 20% faster in Windows2 minutes read
 Speed up Internet connection on Windows 10 computers5 minutes read
 How to change DNS to surf faster, speed up Internet18 minutes read
 How to Increase Internet Speed16 minutes read
 5 great ways to increase the speed of 3G Internet4 minutes read
 How to speed up internet on Windows 105 minutes read
Reader Comments 0
Sign in with email or Google to join the discussion.