How to cancel scheduled Chkdsk activity in Windows 10
Chkdsk is very helpful, but can be time consuming if it is scheduled automatically. In this tutorial, you will learn how to cancel scheduled chkdsk activities in Windows 10..
Chkdsk is an important Windows utility designed to fix errors in hard drives. You can sometimes use it on the FAT and NTFS file systems to check for disk errors. It can be accessed Windows Registry menus as well as the command line. Chkdsk is very useful, but can be time consuming if it is scheduled automatically.
Latest Windows 10 Update: Scheduled Chkdsk is no longer needed
If you are using an older version of Windows, scheduled chkdsk activities will be used to scan the drive and find file system errors. This is usually time consuming and has to be stopped manually.
However, the previous procedure has been completely terminated in the latest versions of Windows 10. This is because the latest Windows file system - Resilient File System (ReFS) - provides better data integrity by accurately detecting file errors and fixing them while you're online.
Now, all you have to do is type chkdsk into the Start menu and run it manually in admin mode whenever you want. Sit back and watch the process complete on its own without any intervention on your part. This whole process takes 20 minutes and you can run it while doing other activities on your Windows PC. This does not burden your system.
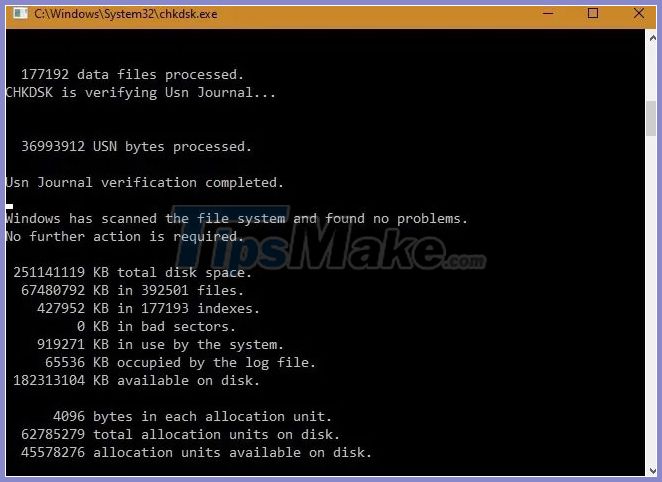
Operation chkdsk runs in Read mode. The whole process runs in 3 different phases, the purpose is to scan the computer for errors. If no error is found, it will proceed to the next stage. You will get the final summary message on the screen if there are no errors in the file system.
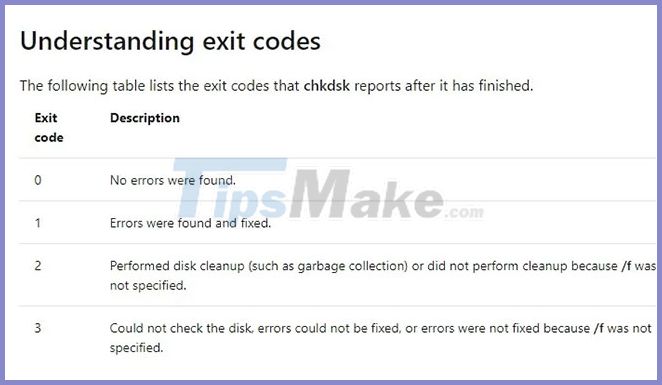
In case of any errors you should see exit code 2 and 3, which requires more advanced analysis. You can use a tool like Process Monitor to find the errors more advanced.
How to activate and cancel Chkdsk scheduled
Even though you should only run chkdsk manually as described above, the automatic scheduling option still exists.
Start Cmd with admin privileges and enter the following information to identify the file system. The / f parameter tells Windows to fix the error in drive C.
A message will tell you about scheduling chkdsk the next time the system reboots. Press Y to continue. As shown here, you receive an on-screen message that says' chkdsk has been scheduled manually to run on next reboot on volume C :. '( chkdsk was scheduled to run manually on the next reboot on volume C:) . As such, the automatic scheduling feature has been activated.
However, as discussed earlier, this automatic scheduling is not currently recommended, so the example will terminate the process using the / X parameter :
chkntfs /x c:
This means that chkdsk scheduled will be permanently canceled.
Cancel Chkdsk with Windows Registry
Besides using Command Prompt, you can also cancel scheduled chkdsk from the Windows Registry. This is very useful if you are having any problems with Command prompt.
To do this, enter regedit into the Start menu and run the Registry Editor application with admin privileges.
Here, navigate to the following key on the left side:
HKEY_LOCAL_MACHINESYSTEMCurrentControlSet001ControlSession Manager
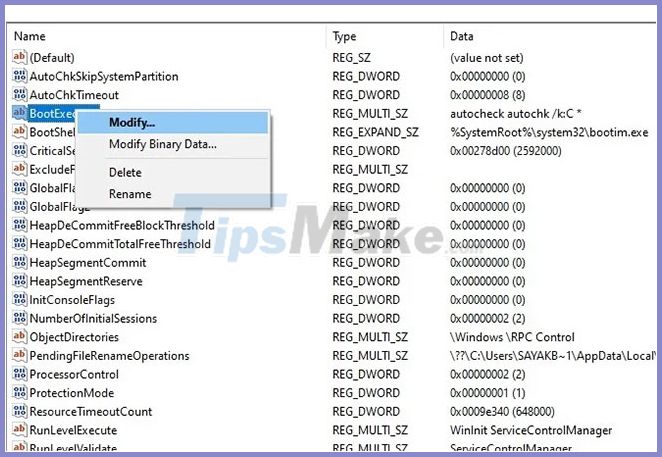
Right click on the Multi-String value 'BootExecute' and select 'Modify'.
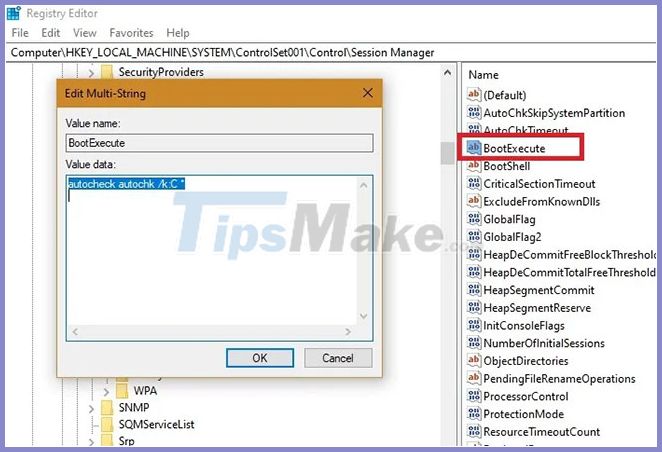
Make sure there is only the following string so that no automatic scheduling occurs in the future. In case you notice any errors, just fix the Boolean values as shown in the screenshot.
autocheck autochk /k:C*
As this guide shows, the file system integrity check is no longer a time-consuming procedure in Windows 10. In fact, it's very easy to execute, all you really need to remember is how to run Chkdsk in the Start menu.
On the other hand, if you are having memory or CPU issues with your Windows, here are some tutorials that show how to fix high CPU and memory usage.