Table of Contents
To schedule sending messages on iPhone with scheduled successfully, begin with the right preparation and follow each step carefully. The guide also covers common issues you may encounter.
Sometimes it is too busy with work that you accidentally forget to make the necessary call or message to a business partner, family, or friend. If so, Scheduled application on iOS device will help users not to forget important messages, with the ability to remind messages.
Scheduled application will schedule you to send a message, according to the reminder schedule set by you. Special, Scheduled can be applied to many messaging applications on devices including iMessage / SMS, Facebook Messenger, WhatsApp, Email,. You just need to choose the time, reminder content and application will perform the task of prompting the scheduled appointment. Note to users , Scheduled does not automatically perform the process of sending previously scheduled messages, but only reminds you to send messages only.
Step 1
Click the link below to proceed Scheduled application download on iOS device.
- Download the Scheduled iOS app
Click the app icon to start. In the first interface, click Continue To start using. Next, the app will ask you to turn on notifications to receive reminders from the app, click Enable notifications . Click Allow again In the next interface.


Switch to the new interface. Now that you are using your free Scheduled application, some features will not be available. To unlock all features, it is necessary to upgrade the app to the Premium version at a cheap price of USD 0.99 (VND 22,000). Finally click Create Message To switch to the form setting interface and schedule a reminder to send the message.


Step 2
The Scheduled application will give you the option to set up a reminder to send a message, including:
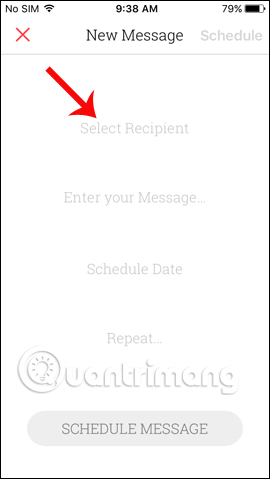
- Select Recipient: select the contact to remind the schedule to send the message.
- Enter your Message: enter the text to send.
- Select Times: set the time to send a message.
- Repeat: schedule a reminder to send the message if needed.
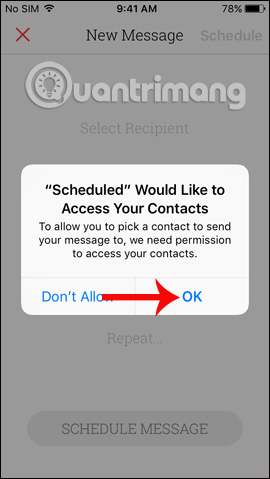
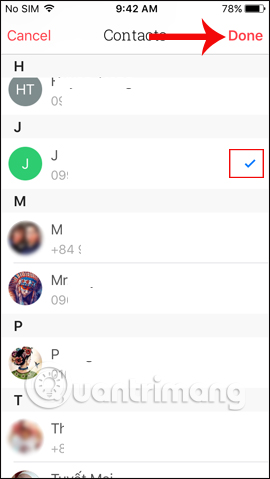
When you click Select Recipient , the app will ask users to allow the app To access the contacts To get the contact, press OK . Select the person to send the message to and Click Done At the top to save it.
Step 3
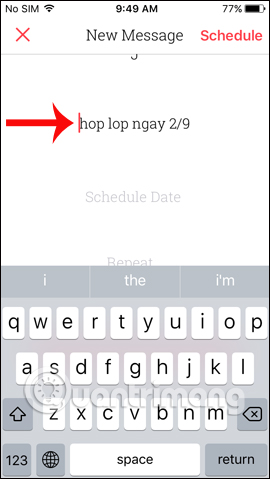
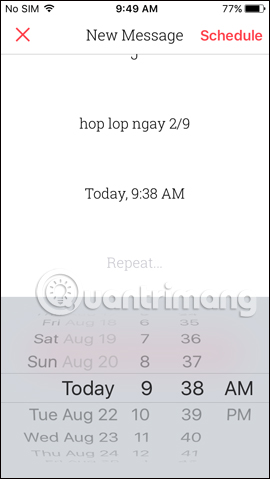
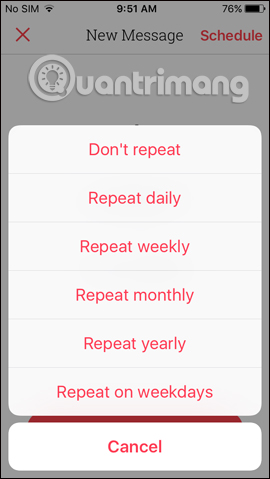
Next, press Enter your Message To enter the content of the message to send. click the Select Times Section and select the time to schedule a message to be sent, select the date and choose the time at the list below the interface. Finally, click Repeat And select the repeating schedule, prompt to send the message if needed.
Step 4
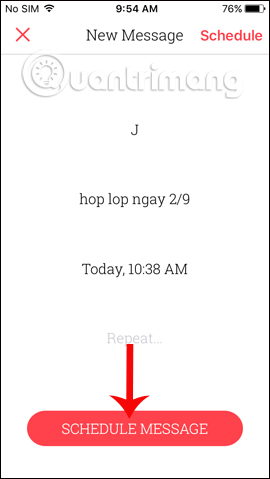
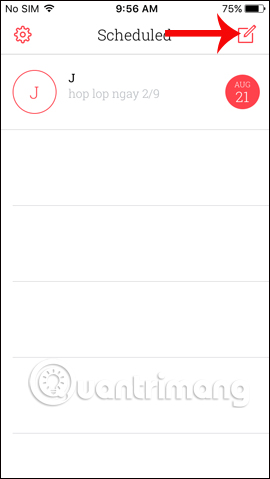
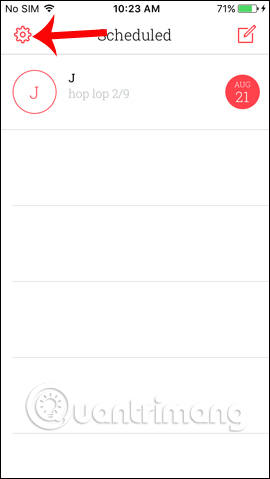
After setting the reminder to send the message, press the Schedule Message Button to apply the reminder calendar. In the Scheduled interface, when needed to Add A new message sending Schedule , click the Pen icon Tool in the top right corner of the screen.
Step 5
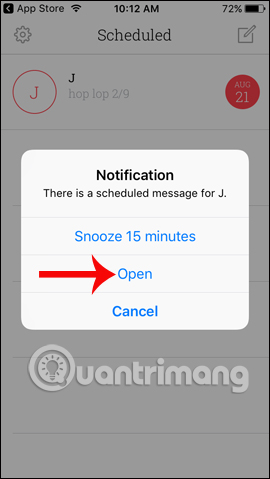
When it is time to schedule a reminder that users has set up, the app appears A Notification dialog box , with a notice There is a scheduled message for. Users will have 3 options Snooze 15 minutes (repeat after 15 minutes), Open (open the app list to send the message) and Cancel (cancel). Click Open To select the app to send the message to.
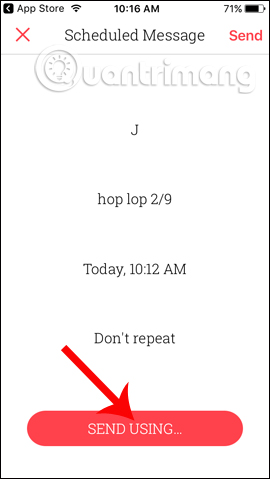
In this interface, click the Send using Button . Below.
Step 6
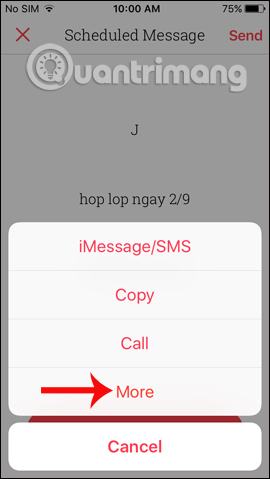
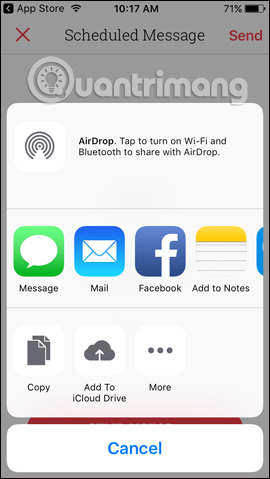
In the app list, choose to send iMessage / SMS messages, or Click More To open more messaging applications. Now just choose to send messages on Facebook, Zalo, Mail, etc.
Step 7
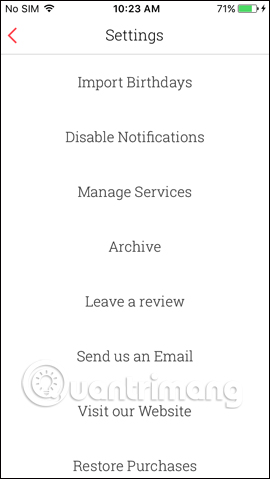
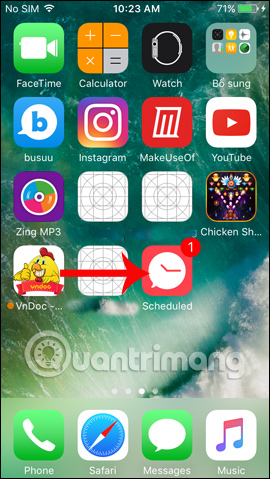
Also when clicking on The gear icon , we will switch to the Settings Settings interface for the app. When you exit the main screen, the app will display the Number of reminders that send the scheduled message .
So with the Scheduled application for iOS devices, you will have a reminder tool to send IMessage / SMS, or other messaging applications. A reminder message appears on the screen so that users do not forget to send a message.
I wish you all success!
FAQ
What should I prepare before I schedule sending messages on iPhone with scheduled?
Review the requirements in the guide, confirm that your device or software is compatible, and save important work before changing settings related to schedule sending messages on iPhone with scheduled.
Why might schedule sending messages on iPhone with scheduled not work as expected?
The most common causes are incompatible versions, missing permissions, incorrect settings, or an interrupted internet connection. Recheck each step and restart the app or device when appropriate.
Can beginners follow these schedule sending messages on iPhone with scheduled steps?
Yes. Follow the steps in order, avoid skipping confirmation screens, and compare your interface with the screenshots because labels may differ slightly between versions.
Related Articles
 How to Schedule Sending Messages on iPhone5 minutes read
 Schedule Android Messages: How to Schedule Sending Sms on Android9 minutes read
 How to Schedule Messages on Instagram3 minutes read
 How to Schedule, Schedule Sending Whatsapp Messages on Android with4 minutes read
 How to Turn Off Sending SMS Messages on iPhone3 minutes read
 How to Timer Display YouTube Notifications on Iphone and Android4 minutes read
Reader Comments 0
Sign in with email or Google to join the discussion.