How to add videos to iOS devices in macOS Catalina
With the launch of macOS Catalina, it's time to officially say goodbye to iTunes, at least for Apple laptops. First released in the world in 2001, iTunes has become the cornerstone of the iPod, iPhone and iPad ecosystem.
Currently, Apple has released 3 separate applications for Catalina users to replace iTunes. One of these applications is the TV software that now handles all content purchased and rented, as well as streaming or uploaded content. While previous iOS users could upload content directly through iTunes, that was no longer a problem. Admittedly, Apple has made things a little confusing, but rest assured, by the end of this article, you will become an expert.
Use the TV application
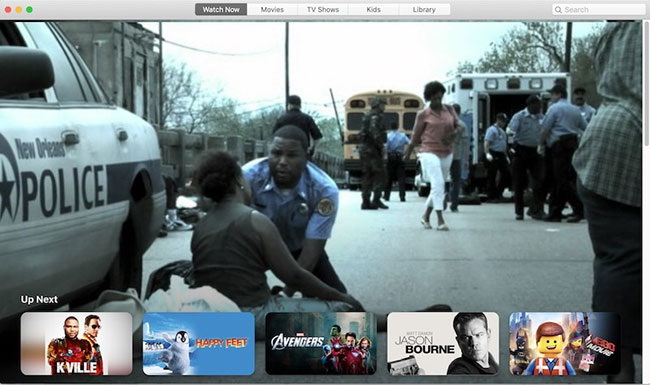
Home to all video content, the TV app also includes all videos on Mac. Fortunately, adding videos to this app is as simple as drag and drop. At the top of the application is a list of 5 menu options, including a tab labeled 'Library'.
When you click on that tab, you will see a complete list of all video content. Adding more content to this tab is as easy as selecting one or more videos from the Finder application and dragging it to the TV application. After a minute or two of uploading, the video will appear.
It is important to note that any video uploaded to the TV application can only be played on the TV application. If you want to use a third party video solution like VLC, you'll need to open it with that particular application.
Add videos
Historically, when a movie or TV show was added to iTunes, you also uploaded it to your connected iOS device via iTunes. Now, Apple has allowed synchronization of movies and TV shows through Finder. The steps below are very simple and after adding the video a few times, you will get used to every operation.
1. Start with the basics and open the Finder application from the Mac dock.
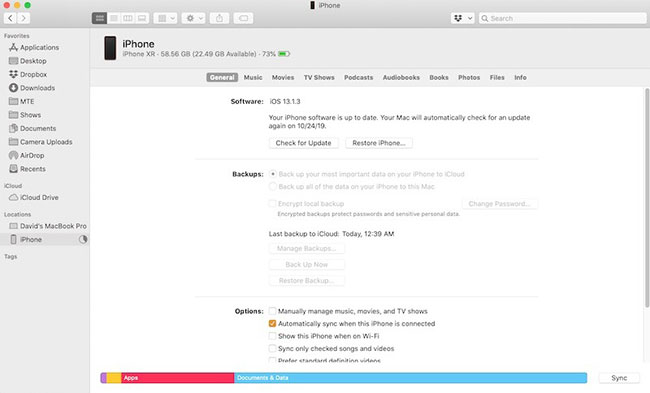
2. Connect your iOS device to a desktop computer or laptop. To ensure the device will connect properly, make sure the device is unlocked if you have a password protected.
3. Locate the device in Finder. It will be listed under Locations on the left, possibly under the name of your laptop or desktop.
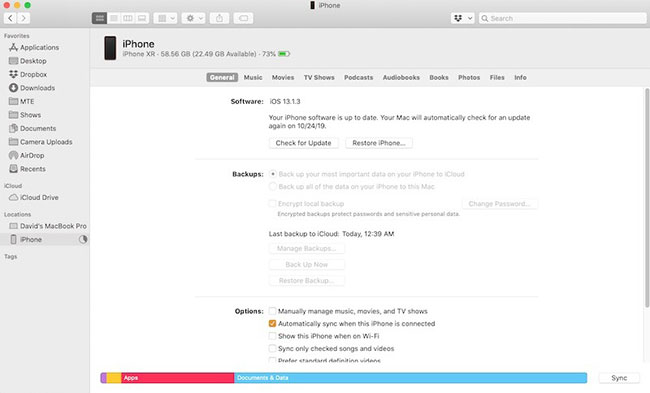
4. The next screen and the related tabs series will look familiar to anyone who has previously used iTunes. Find the 'Movies' tab and click it with your mouse.
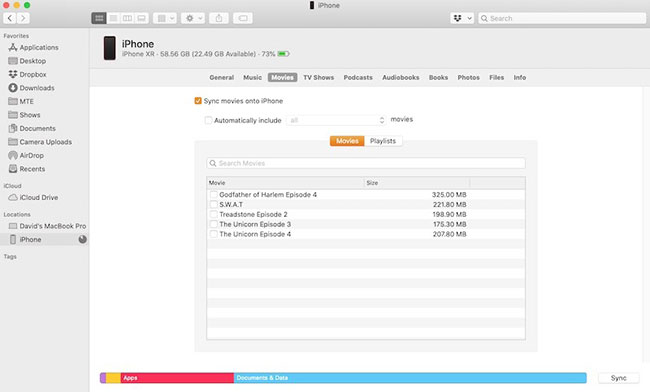
5. Next, check the box labeled 'Sync movies onto (device name)' . After performing this step, movie syncing will be allowed. For the purposes of this step, both TV shows and movies are considered movies.
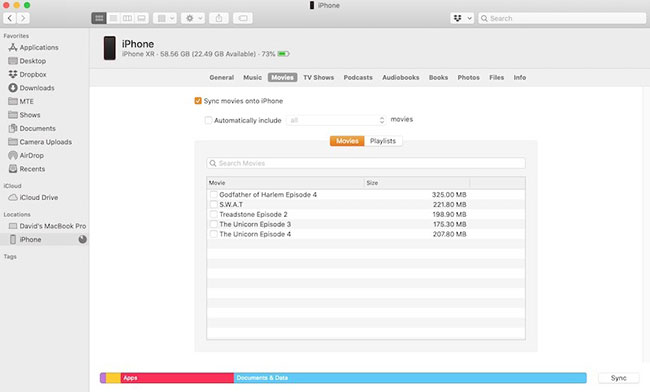
6. In the box below, there is a list of movies and video content available to sync. Select each movie by clicking on the box available. Alternatively, you can tick 'Automatically include all' and upload all available video content.

7. When you are confident that you have selected all the desired video content on your iOS device, click 'Apply' and then 'Sync', at the bottom right of the Finder window.
Add content purchased
Add content purchased from Apple quite similar to your own video content. The only other step is to open the 'TV Shows' tab in the Finder, next to the 'Movies' tab used for the video content above. The exact same steps take place no matter which tab you are in.
1. Click on the box labeled 'Sync TV Shows' to enable TV program synchronization.
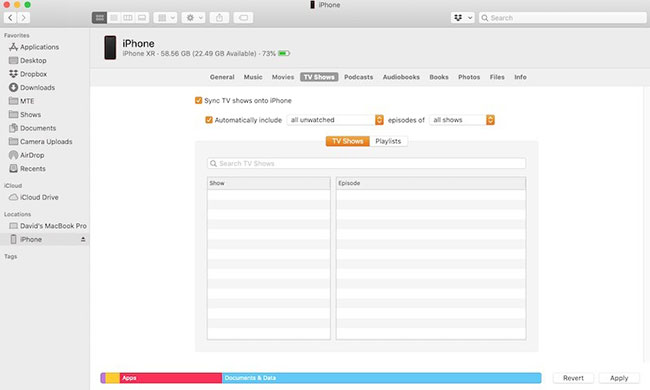
2. Check the box of 'Automatically include' , if you want to automatically include the entire list or manually select which programs to upload.
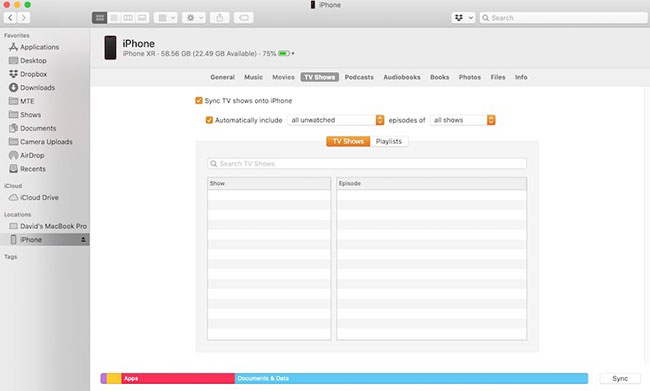
3. Click Apply and then select Sync to start the upload process to your iPhone or iPad.
While millions of people will mourn the departure of iTunes, Apple has really helped macOS Catalina users. Users may not like the idea of these 3 new applications instead of a single software as before, but it's all done. In the process of separating podcast, music and video content, Apple has made it much easier to manage user-owned or purchased video material. If it's a trade-off to say goodbye to iTunes forever, then be happy to accept reality.
Hope you are succesful.