How to activate Copilot on Windows 10
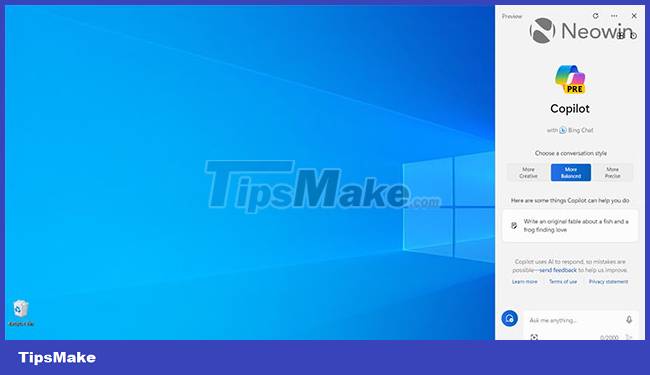
Earlier this week, Microsoft made a surprising move when announcing plans to add its general AI assistant Copilot to the Windows 10 platform (version 22H2). Copilot will be included in both Home and Pro versions of Windows 10. The release date for this update has not yet been announced as everything is still being tested and perfected, but it is expected to happen. in the near future, most likely this year.
While waiting for Microsoft to officially bring Copilot to Windows 10, you can experience this AI chatbot service early by using third-party tools like ViveTool. Let's find out right below.

Enable Copilot in Windows 10 using ViveTool
ViveTool is a third-party software that can help enable hidden or limited features for some Windows users, such as Windows Copilot.
Before proceeding, please note that activating Copilot on Windows 10 currently requires you to register for the Windows Insiders Program, modify the system registry, and make system adjustments. Operate using a third-party application. This process may contain some unwanted risks to the system. Although Windows 10 is a stable operating system, and updates rarely cause errors, it's best to be careful. Additionally, always back up important data on the system before any testing.
Step 1: Download and install Windows 10 build 19045.3754 or newer. At the time of writing, build 19045.3754 is only available in the Release Preview Channel.
Step 2: Update Microsoft Edge to the latest version. Go to edge://settings/help and install available updates.
Step 3: Download ViVeTool from GitHub and extract the archive into a convenient folder.
Step 4: Open Command Prompt as Administrator and navigate to the folder containing the ViVeTool file using the CD command. For example: CD C:Vive.
( Note: If confused about where to place ViveTool's extracted content, the most convenient way is to choose C:/ViveTool ).
Step 5: Enter vivetool /enable /id:46686174,47530616,4475501 9 and press Enter.
Step 6: Restart your computer.
Step 7: Press Win + R and type regedit to launch Windows Register Editor .
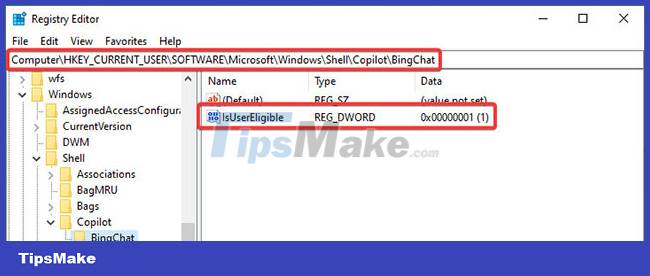
Step 8: Navigate to ComputerHKEY_CURRENT_USERSOFTWAREMicrosoftWindowsShellCopilotBingChat and double-click the IsUserEligible value .
Step 9: Change the value data from 0 to 1 . Note: you must sign in to Windows with your Microsoft Account; otherwise, the value will reset from 1 to 0 after each system reboot.

Step 10: Restart your computer.
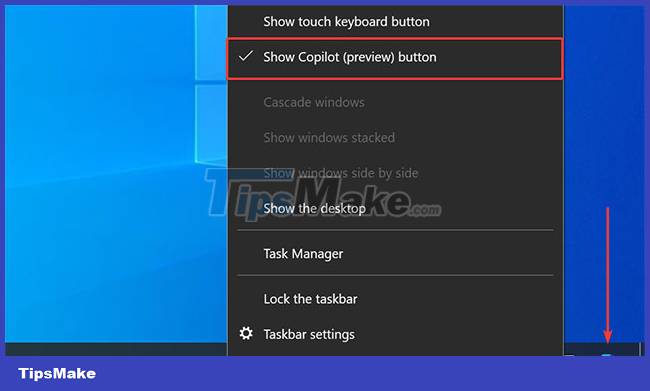
Step 11: Right-click on the taskbar and select " Show Copilot (preview) button ". The Copilot icon will then appear to the right of the notification center button. Note: you will not see the icon if you place the taskbar on the right or left side of the screen.

Hope you are succesful.
You should read it
- ★ Microsoft explains why you need Copilot on Windows 11 and 10 even if you don't want to
- ★ What is ViVeTool? How to use ViVeTool to enable hidden features on Windows
- ★ How Cortana on Windows 10 works
- ★ What to do when Copilot cannot be found on Windows 11?
- ★ How to turn off or remove Windows Copilot on Windows 11