How to change NAT type on Windows 11/10
Sometimes when connecting to the Internet on a game console, something goes wrong. If you're a student, you know this all too well - typically campus WiFi networks won't allow connections from Xbox, PS4, Nintendo or other game consoles. Sometimes, it's the router or other network devices you use that causes the problem (basically it's the Network Address Translation (NAT) settings).
When you connect through a router or firewall to the Internet, whether at home or over some public network at a hotel, you need full connection functionality.
You may want to change your NAT type from Strict to Open when playing online multiplayer games. Strict or Moderate NAT types can cause network problems when joining a game group, such as sudden disconnections, lag, and making it difficult to organize matches.
You can change the NAT type on Windows to reduce restrictions, providing faster and more reliable network connections. But you must balance your needs with the potential security risks of changing NAT.
What is NAT? Why should you not use NAT Strict?
Network Address Translation (NAT) is a method used by routers to translate public IP addresses (used on the Internet) into private IP addresses (used on home networks) and vice versa.
In the world of console gaming, there are 3 types of NAT:
- Open NAT (Type 1 | A) - All are allowed - The gaming device can connect to anyone else's game and the game host. Plus - other users will be able to find and connect to the games you're hosting. This is usually the case when the console is connected directly to the Internet without a router or firewall.
- Moderate NAT (Type 2 | B) - Game console can connect to other players, but some functions will be limited. When connecting to the Internet through a properly configured router, you will receive this type of NAT.
- Strict NAT (Type 3 | C) - Your gaming device has limited connectivity to other players. Other players on Moderate or Strict NAT will not be able to join your hosted games. This is the case when the router does not have any open ports.
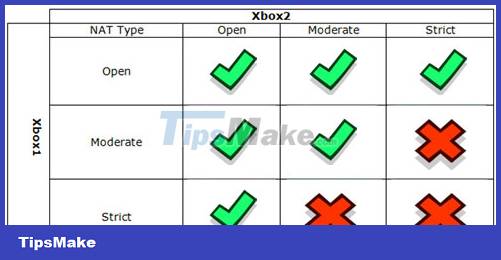
So you will have the best gaming experience if you use Open NAT or at least Moderate NAT. That's why you have to learn how to change the NAT type.
The simplest way to do this is to use a VPN like Speedify. This VPN will bypass any NAT by tunneling traffic directly to the VPN server. Because the server has Moderate NAT (Type 2 | B), your connection will also receive this type of NAT.
How to set up a static Private IP address
Whether you want to change the NAT type using the UPnP or Port Forwarding method, you will need a static IP address to make it work. Since most routers assign dynamic IP addresses, you must manually configure a static IP for your Windows device.
If you assigned a static IP address to your device, skip the following steps to change the NAT type. If not, follow the steps in the article: How to assign a static IP address in Windows 11, 10, 8, 7, XP or Vista to set up a static IP address on your Windows computer:
Once you have a static IP, you can follow the steps below to change the NAT type on your Windows computer.
How to change NAT type on Windows 11/10
1. Turn on Discovery mode on Windows
Network Discovery is a built-in feature in Windows that helps you allow other computers on the network to discover your computer. You can turn Network Discovery mode on or off on Windows 10 from the Settings app. Here's how to do it on Windows 11:
1. Press Win + I to open Settings.
2. Open the Network & internet tab on the left.

3. Click Advanced network settings .
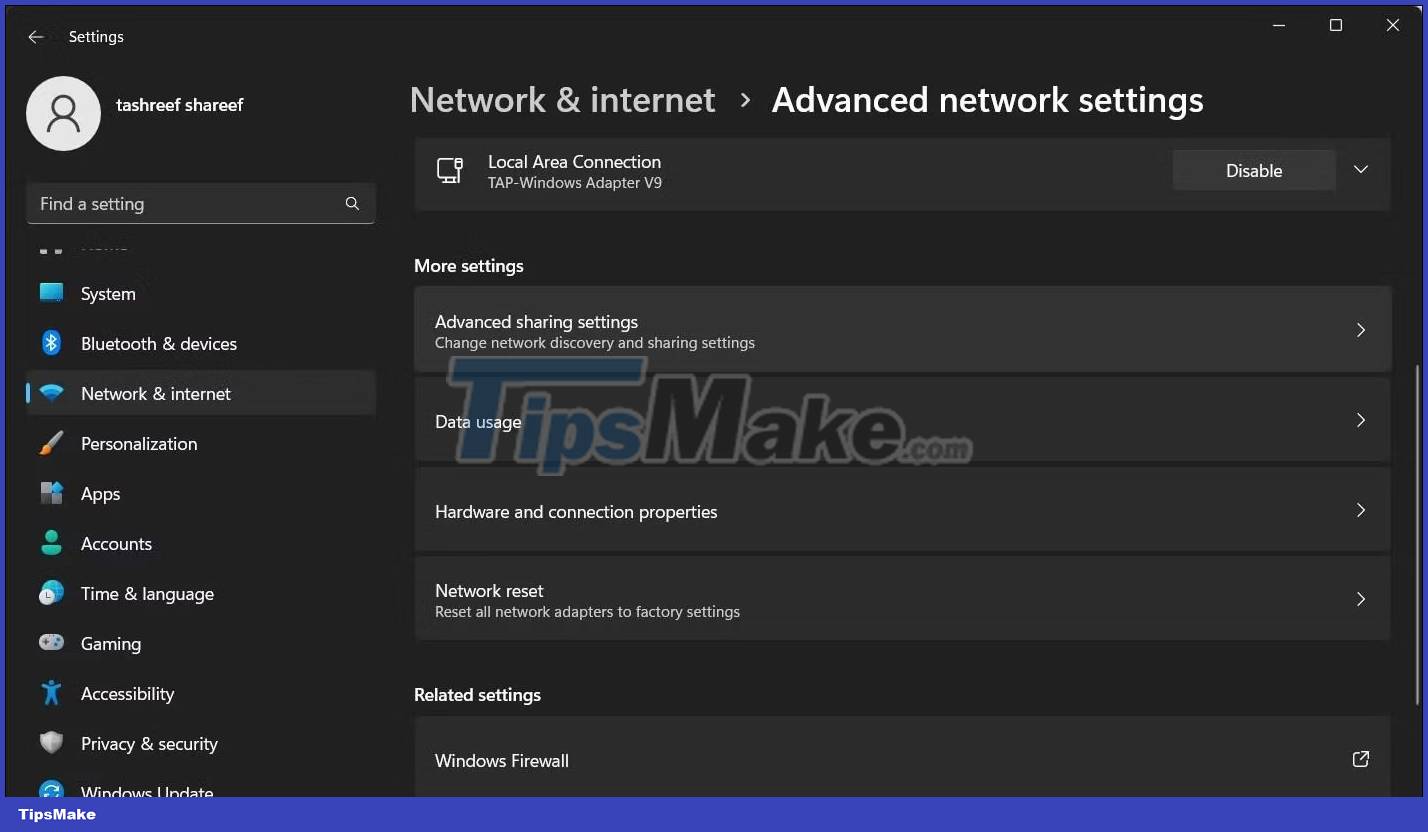
4. Scroll down and click Advanced sharing settings in the More settings section .
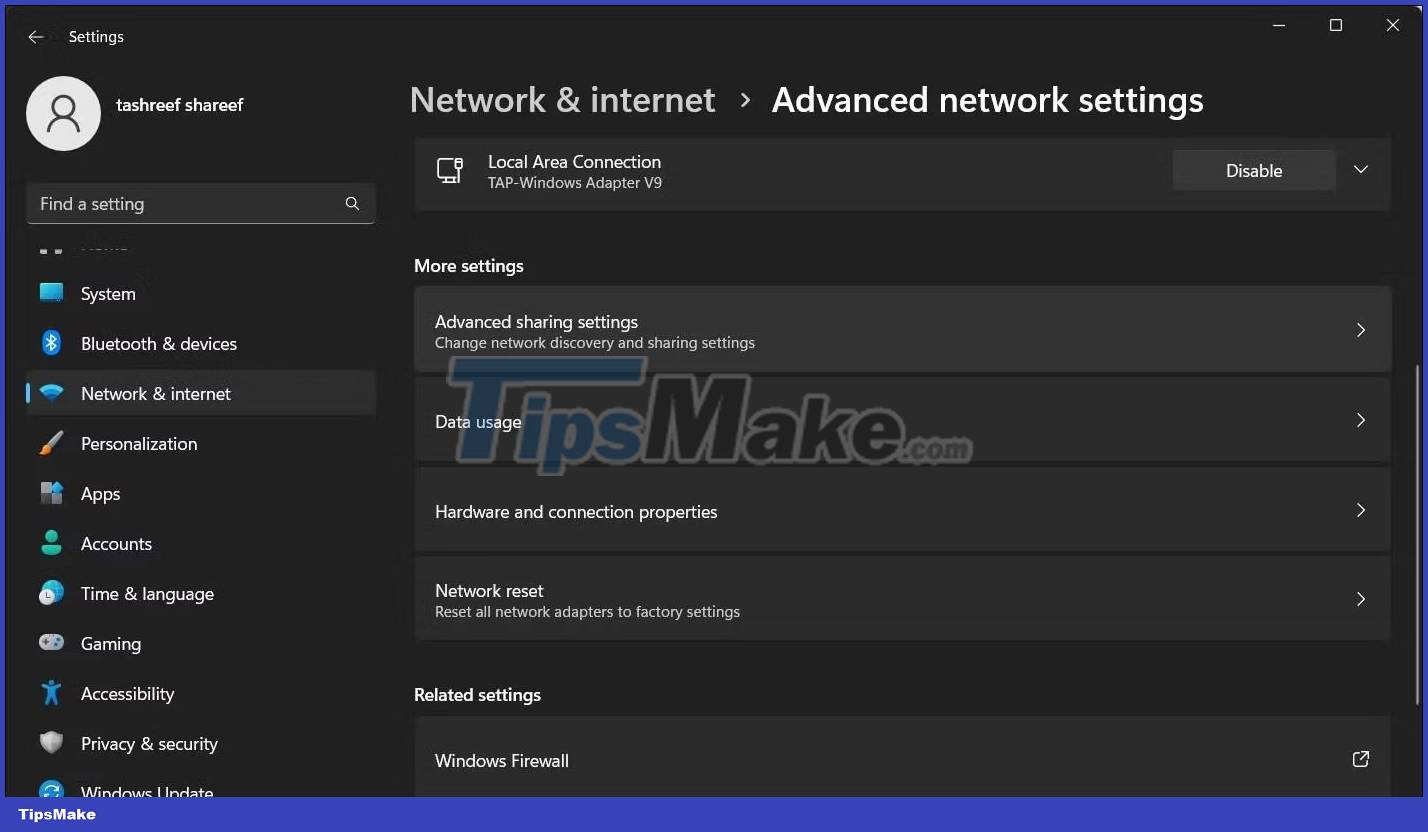
5. Toggle the Network Discovery switch to enable it for public networks.
2. Enable UPnP on the router
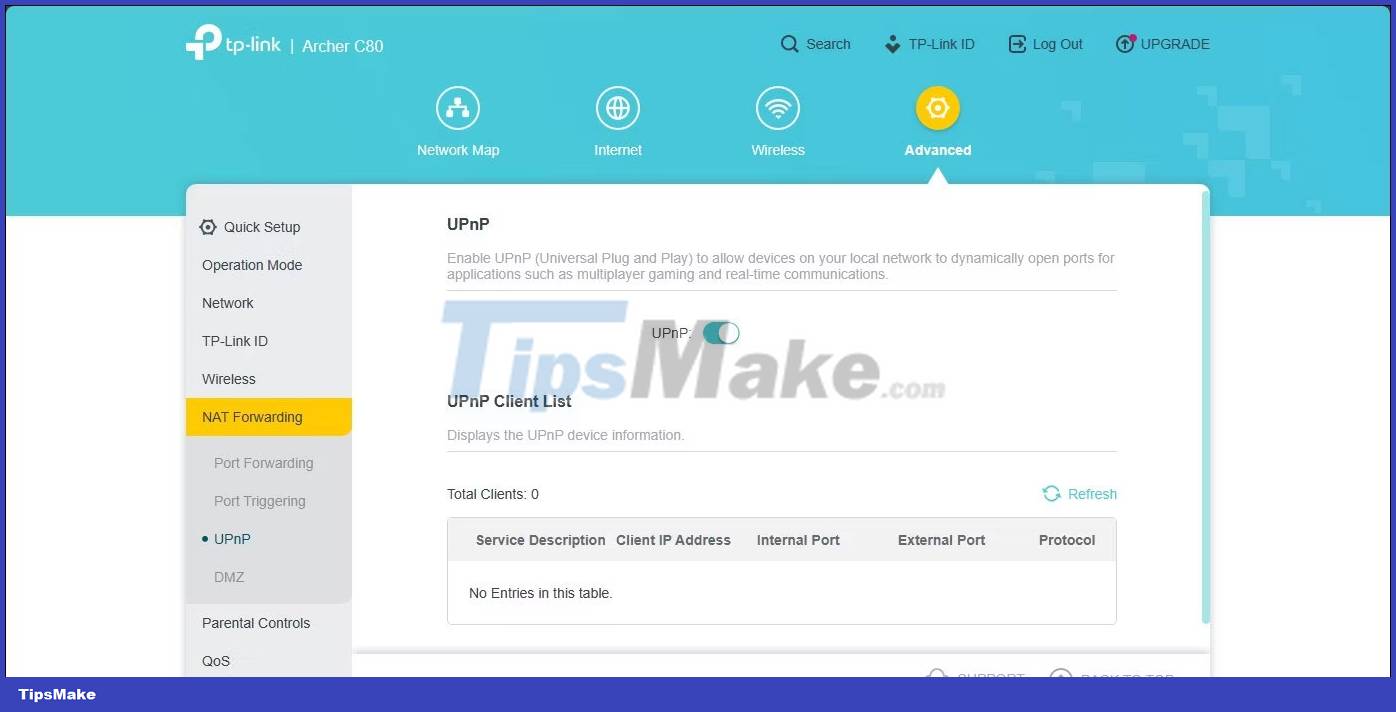
You can change the NAT type to Open by enabling Universal Plug and Play (UPnP) in your router settings. This is the easiest way to change the NAT type, as long as you can access your router configuration page. However, there are security concerns with the UPnP method that hackers could exploit.
Note that the following steps apply to TP-Link routers. The UPnP activation process may vary for routers from other manufacturers. Check your router's manual online or the manufacturer's knowledge base for instructions.
Follow these steps to enable UPnP:
- Log in to your router's web-based utility. To do this, enter the default gateway address (for example (http://192.168.0.1) in the search bar and press Enter . If you don't know, here's how to find your router's IP address.
- On the router control panel, open the Advanced tab .
- Click to expand NAT Forwarding on the left.
- Open the UPnP tab in NAT Forwarding .
- Toggle the switch to enable UPnP .
You can now close the router's web-based utility and check for any improvements in your network connection.
3. Change the NAT type using Port Forwarding
Additionally, you can use the more secure Port Forwarding method to change the NAT type for a specific game or application. Although the process is a bit complicated compared to UPnP, port forwarding offers better control over open ports and their use with enhanced security.
To create a new Port Forwarding entry, you need to know the TCP or UDP port used for your specific game. For example, Call of Duty: Black Ops Cold War uses the following ports:
TCP: 3074, 27014-27050 UDP: 3074-3079To find your game's UDP and TCP ports, do a web search with the game name for port forwarding. Usually, game developers provide port information for their games on their websites.

Alternatively, go to portforward, select your game, then select your router name and model using the options given. On the next page, scroll down to find ports specific to your game.
Port Forward maintains a database of game ports across multiple platforms and for many different router manufacturers.
To change the NAT type using Power Forwarding:
1. Log in to the router's web application. In this case, the article will use TP-Link's web-based utility.
2. Open the Advanced tab .
3. In the left pane, click to expand NAT Forwarding .
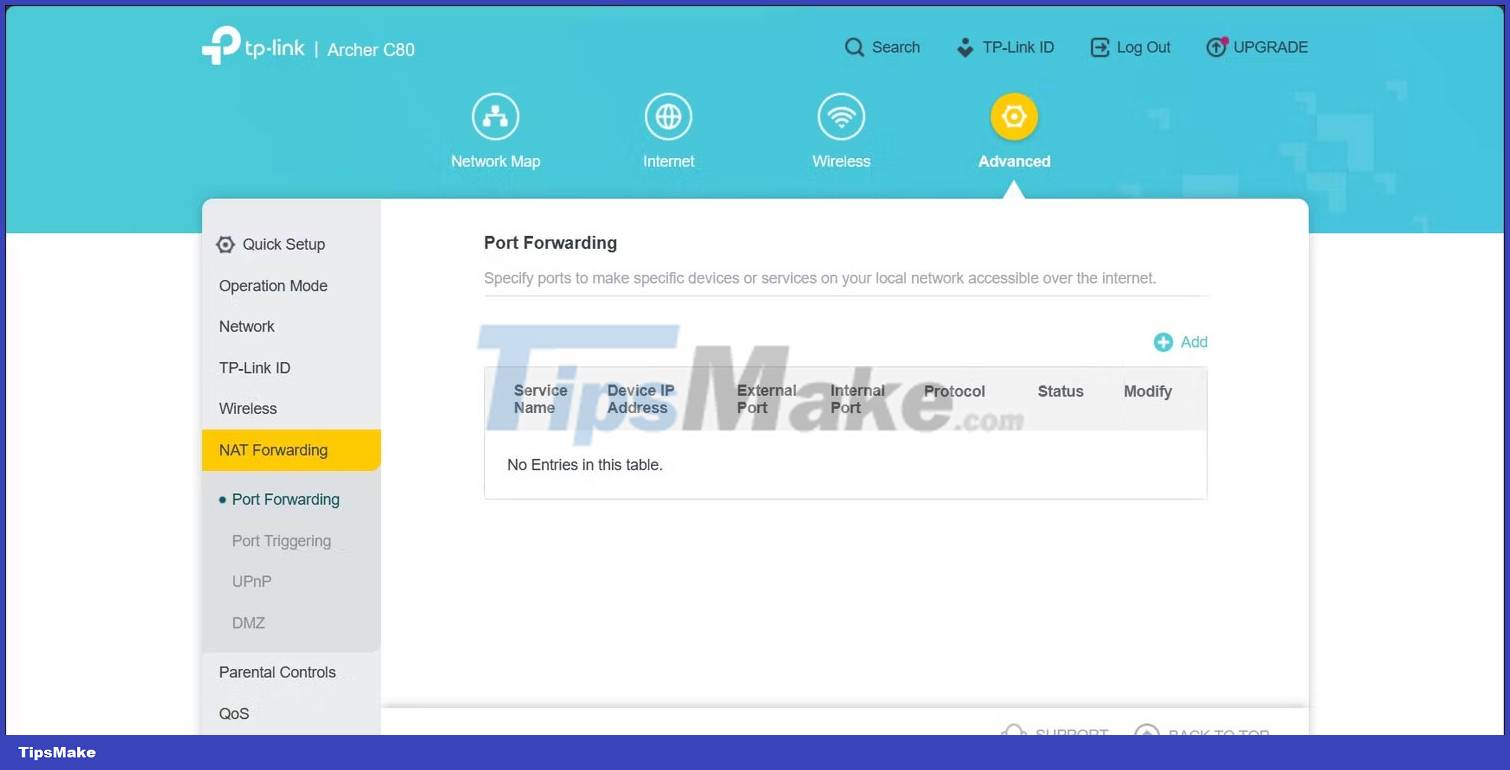
4. Open the Port Forwarding tab.
5. Click the +Add icon in the upper right corner to create a new port forwarding entry.
6. In the Add a Port Forwarding Entry dialog box , enter a name for the Service Name . Be sure to add a name to easily identify this Port Forwarding item for future reference.
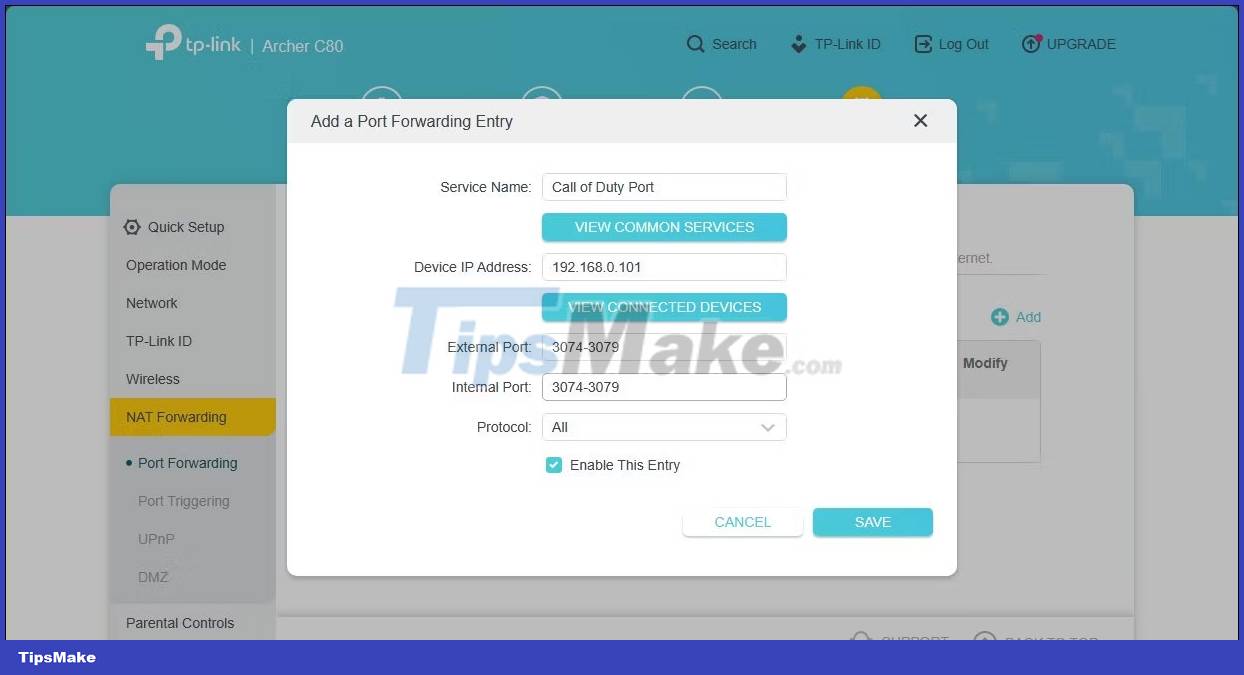
7. In Device IP Address , enter your computer's static IP address for Ethernet or WiFi.
8. Enter your game port number in the External and Internet Port fields . You can use a UDP or TCP port, but use the same port in both the External Port and Internal Port fields .
9. Set the Protocol field to All .
10. Once completed, click Save to save the port forwarding entry.
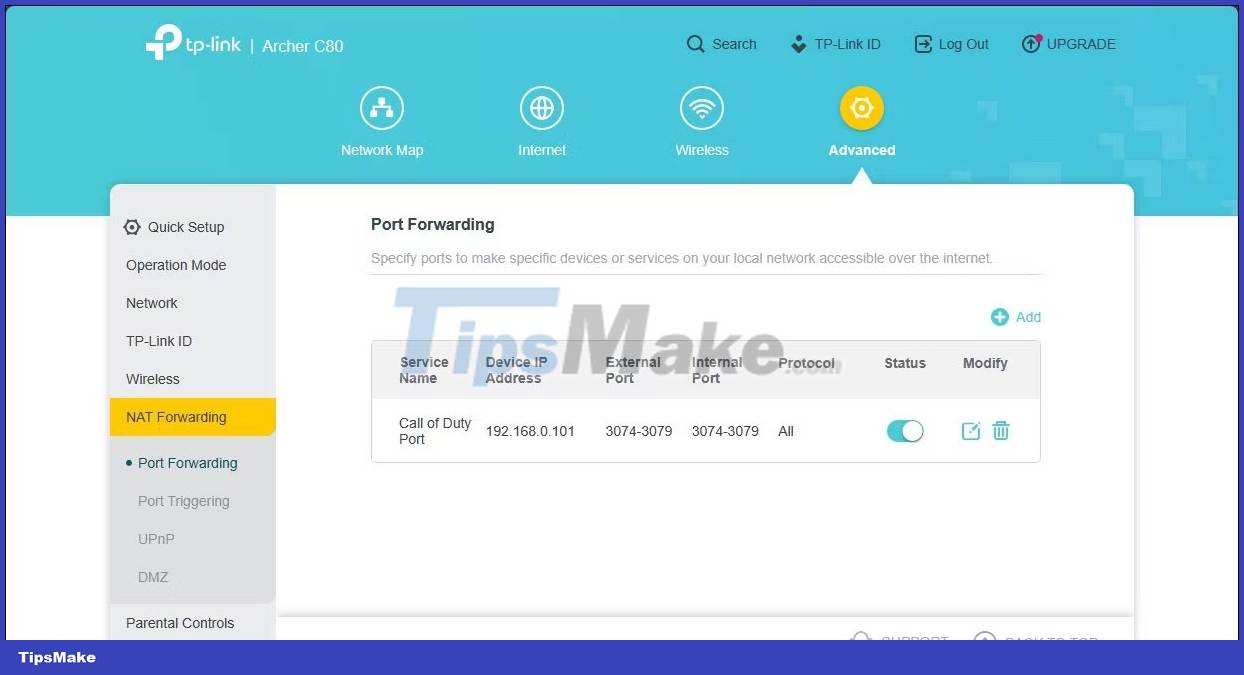
This entry will be saved in the Port Forwarding table. You can enable or disable entries using the Status toggle switch.
In addition to Port Forwarding, you can also change the NAT type by modifying the router's configuration file. However, some router manufacturers, including TP-Link, encrypt configuration files, making it extremely difficult to make the necessary modifications.