Hide Control Panel on Windows 10 using Group Policy
Want to prevent others from changing settings on Windows 10? This guide will help you disable Control Panel using Group Policy Editor and Registry Editor, ensuring effective system security.
Table of Contents
If you want to control access to Control Panel on Windows 10, apply two methods: Group Policy Editor and Registry Editor. Simple, fast solution, ensuring data security.
Instructions to turn off Control Panel on Win 10
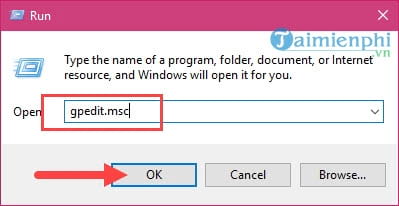
Step 1: Press the Windows + R key combination to open the Run command box, then type " gpedit.msc " and access the Local Group Policy Editor .
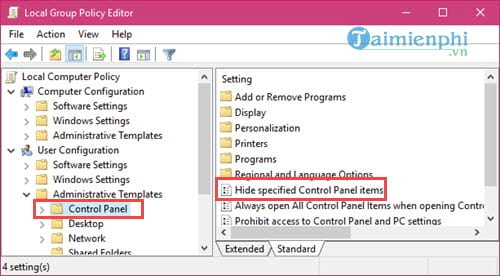
Step 2: In Local Group Policy Editor, access in order User Configuration > Administrative Templates > Control Panel , then look to the right and you will see the file Hide specified Control Panel items .
Step 3: Double click on Hide specified Control Panel items or right click and select Edit to edit.

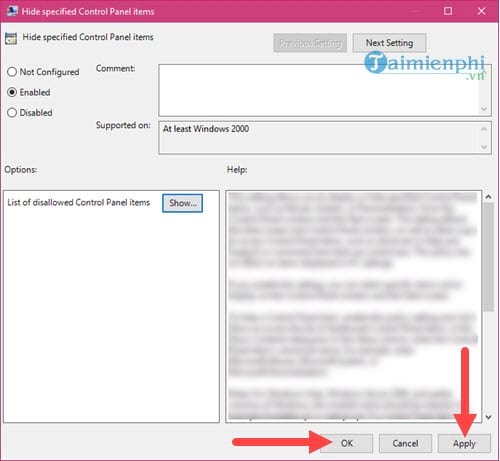
Step 4: In Hide specified Control Panel items , select Enabled and then click show below.

Step 5: In the Show Contents section , you have the right to hide any item or hide the Control Panel itself if you enter a name.

After filling in any item name, just confirm OK below.
Step 6: Finally, confirm again by clicking Apply and OK to exit Hide specified Control Panel items .
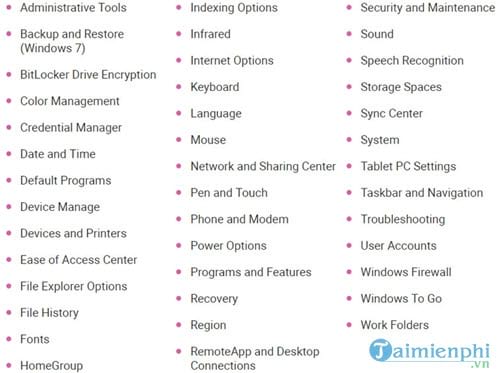
Below is a list of items you can hide in Control Panel, note that you must type each letter correctly to be able to hide them.
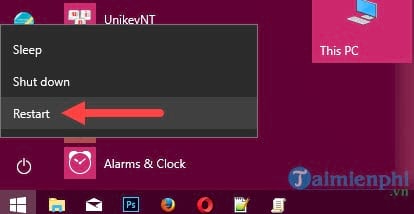
Step 7: Once everything is done, exit Local Group Policy Editor and restart your computer .
Hiding Control Panel helps prevent unauthorized access and protect system settings on Windows 10. If you need tighter control over computer usage, you can combine disabling Control Panel on Win 10 with Group Policy configuration to limit user rights.
Was this article helpful?
Your feedback helps us improve.
Related Articles
 How to reset Local Group Policy settings on Windows 104 minutes read
 Change the default Control Panel view to a Windows computer5 minutes read
 Install the printer using Group Policy Object3 minutes read
 8 'tweak' Windows Group Policy any Admin should know12 minutes read
 How to Customize Your Windows Control Panel2 minutes read
 System Administration with Group Policy in Windows XP - Part I11 minutes read
Reader Comments 0
Sign in with email or Google to join the discussion.