Have a sharp picture in Photoshop less than 10 seconds
One of the questions I get most from readers and other bloggers is how I have pictures that look "so clean". Most people assume that due to camera or lens characteristics. And I just said that it's partly due to the macro lens. But I am sure that what they care about is the trick I use to create sharpness for the image without using the "Sharpen" button.
That's the Reduce Noise tool.
The key thing you need to know is that this trick works best for small images (low resolution). But if you are editing photos for the web, they have been reduced in size so it is perfectly suitable for this trick.
Guide:

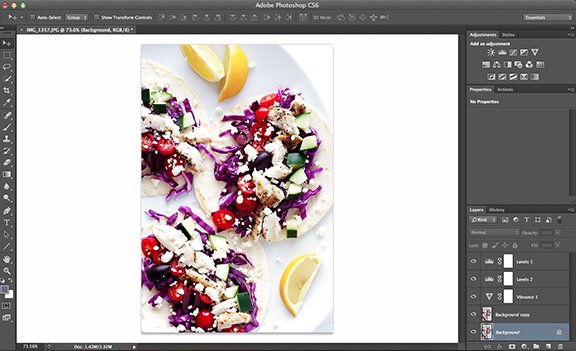
1. Start, open the image and edit the light, the storm, . as you like. Next, resize the image to the size you want. (My photos are usually 576 pixels wide.)

2. And make sure that you have selected Background in the Layers menu in the bottom right corner, because that is the layer we will adjust.

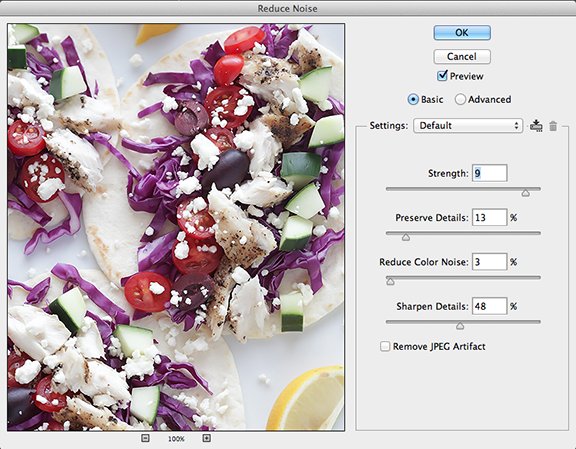
3. Then, on the toolbar select Filter> Noise> Reduce Noise.

4. In the pop-up box, I usually drag them to the side so I can see the changes between the pictures while editing.

5. We now have customizations.
My top priority is "Strength" to stay at 9, "Preserve Detail" is quite low at about 10-20, and "Reduce Color Noise" is about 1-5 (otherwise the color will be quite light). I default to installing these three customizations and rarely changing them.
An adjustable slider from image to image is "Sharpen Details" . Depending on the size of your image, this photo is quite sensitive, so customize it to fit your eyes. Basically, this feature is similar to "Sharpen Mask" in Photoshop.

6. Finally, click OK and you have the desired picture.

I can see the difference between pictures can only use the microscope. But I'm really attracted to it. It is smooth to every edge and everything appears sharper.
I recommend that you do not install automatically edit this feature in Photoshop. Because I think that you will want to manually edit in Photoshop for your picture more shimmering than ever without taking 10 seconds. It is well worth the time you spend.