Table of Contents
Quick answer
PowerPoint isn't just for presentations; it can also be used to create fun interactive games. By leveraging animation, hyperlinks, and VBA, you can design educational and entertaining games directly within the software.
Creating games in PowerPoint makes lectures and presentations more engaging. With animations, triggers, and hyperlinks, you can design quizzes, word guessing games, or simple mini-games without needing to program.
How to create a game in PowerPoint
Note: This guide is based on Office 2016. You can follow similar steps on Office 2016 .
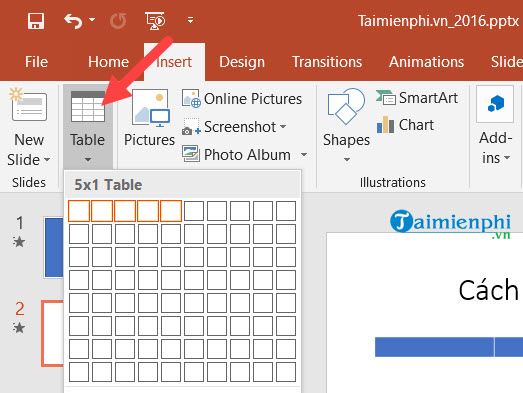
Step 1: Create a table of your desired length.
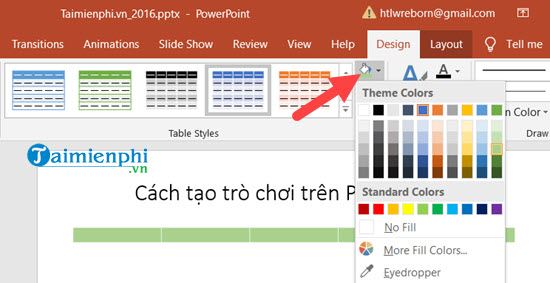
Step 2: Then go to Design > Theme Colors to adjust the colors of the table you just created.
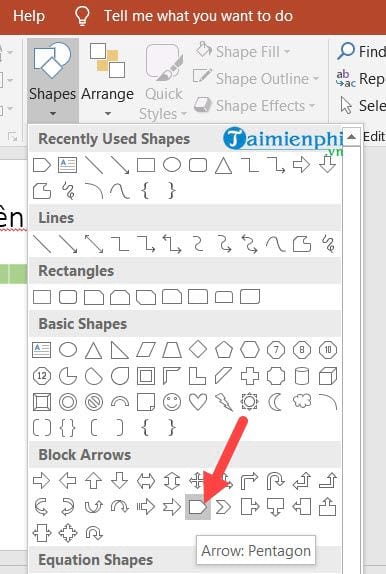
Step 3: Continue by going to Home > select Shapes > Choose Arrow Pentagon .
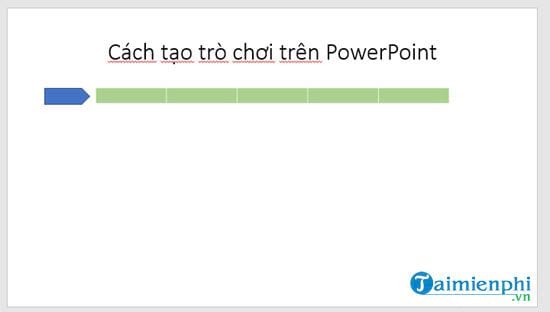
Step 4: The result will look like the image below. Note that to resize the Table you just created, simply hold down Ctrl and drag the mouse.
Step 5: Click on the newly created Arrow Pentagon > select Format and then choose a Style that is easiest to read.
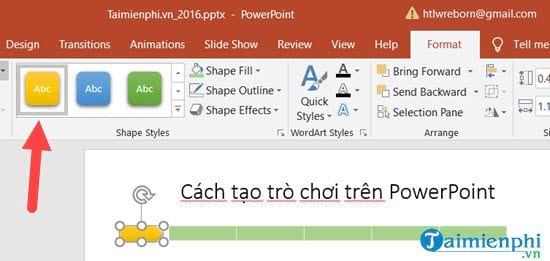
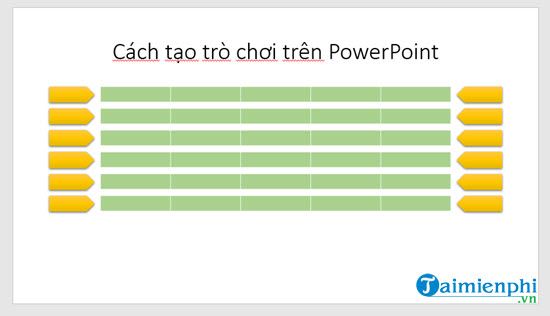
Step 6: Select the entire table and the newly created Arrow Pentagon, then press Ctrl + D to duplicate it. Duplicate it 6 times and arrange it as shown in the image below.
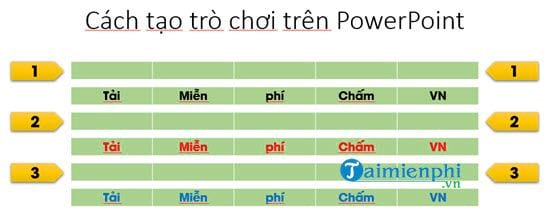
Step 7: Next, erase all Arrow Pentagons in lines 2, 4, and 6 and fill in the answers in these lines. Don't forget to number the remaining Arrow Pentagons 1, 2, and 3.
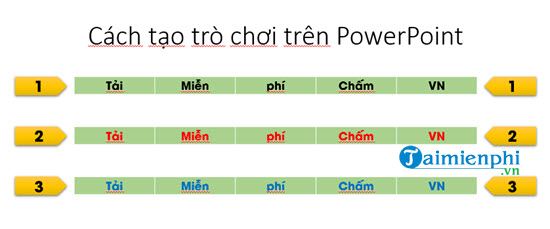
Step 8: After filling in the answers, drag the answer boxes to the rows above you.
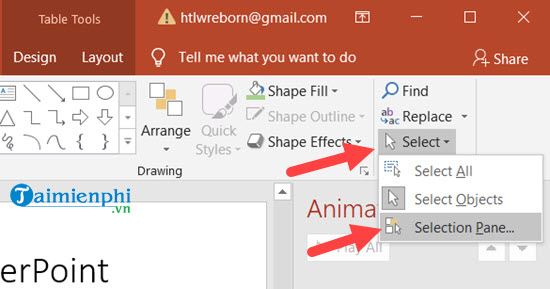
Step 9: Activate the Pane feature by selecting Select in Home > then selecting Selections Pane .
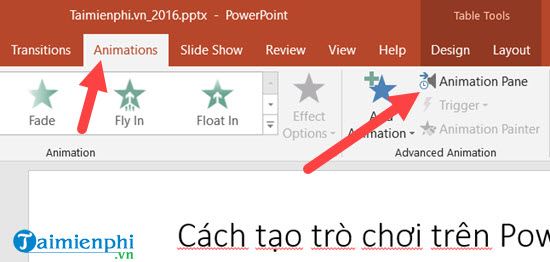
Similarly, in the Animations section , select Animation Pane .
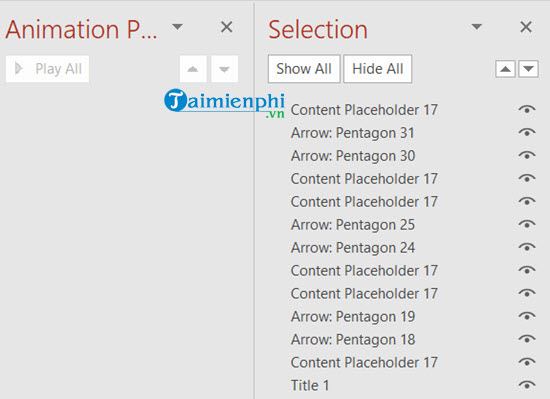
Step 10: Here you will see a list of all the Tables and Arrow Pentagons currently available.
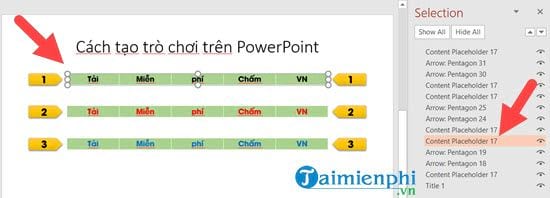
Just by clicking on it, we'll know what that location is. Once we know all the locations, let's start creating the game.
Step 11: Click on the first Table in the game, select Add Animation , then choose a suitable Effect . Here you will see a list of this Animation Pane appear next to it > Right-click on it > select Timing .
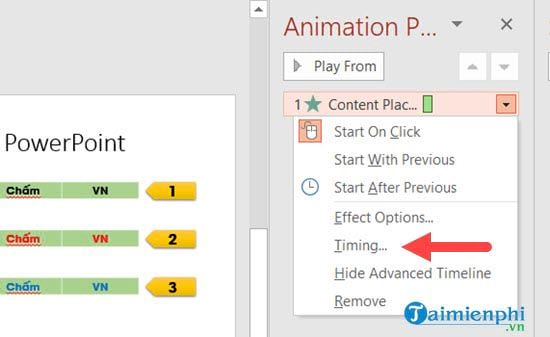
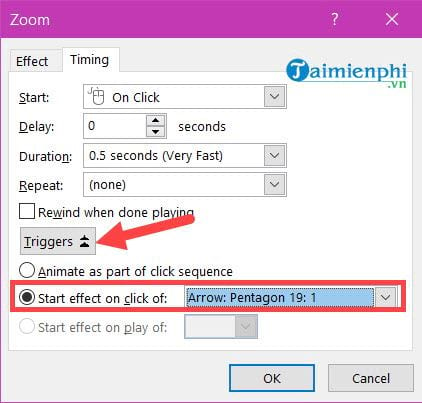
Step 12: In this section, select Triggers > then click Start effect on click of and point it to the Arrow Pentagon on the right side of the line .
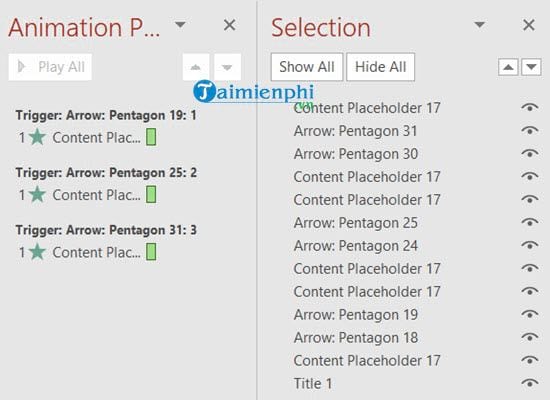
Step 13: Do the same with the remaining lines to get the 3 effects shown below.
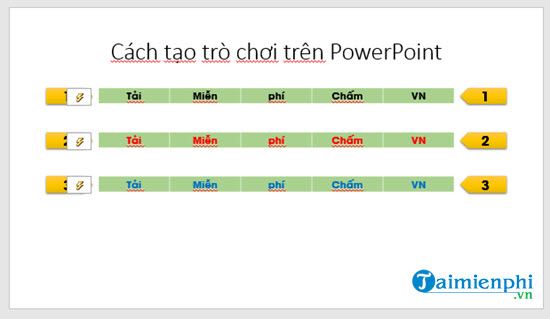
Step 14: At this point, you will see the set icon on all three lines, corresponding to the effect for all three.
Step 15: Now proceed to create 3 new slides , each containing the answer key for the 3 questions.
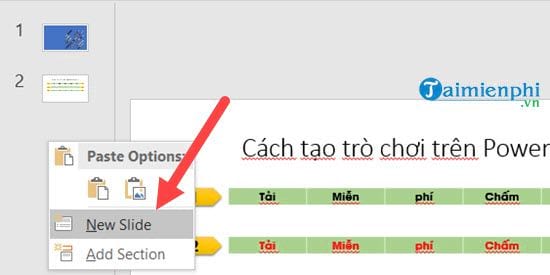
Step 16: For each slide, you can fill in content similar to the following or any content you create.

Step 17: Now we will work with the Arrow Pentagons on the left that we created earlier. Click on them one by one and then select Hyperlink .
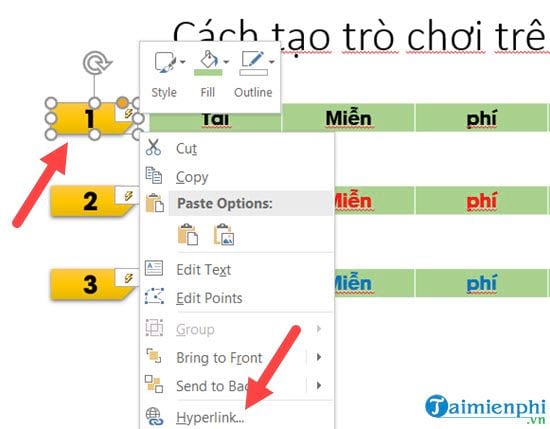
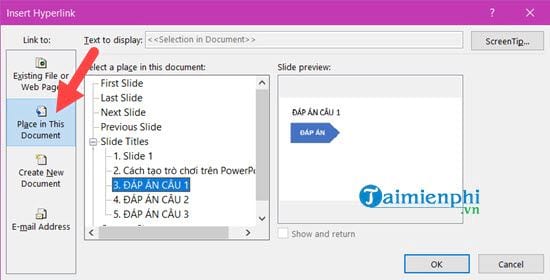
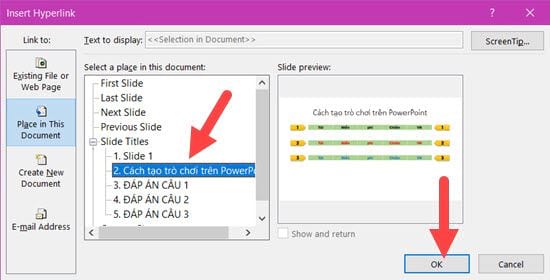
Step 18: Then select Place in This Document and link to the corresponding answer.
Step 19: Then, in the answer slide, hyperlink it again.
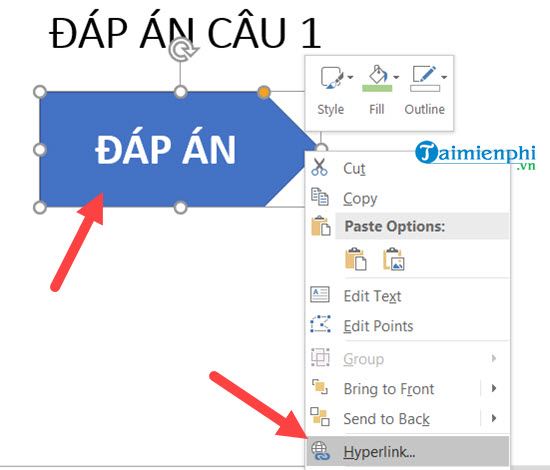
Step 20: Similarly, link to the first main slide in PowerPoint.
After performing the above action, press F5 .
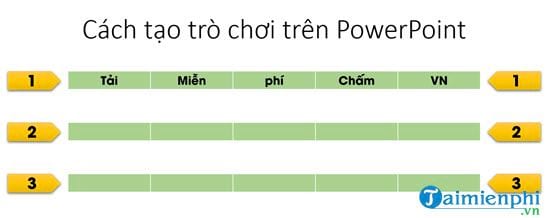
So, we've completed the tutorial on creating games in PowerPoint . Although the game in the example is quite simple, you can use it as a basis to design your own fun game that suits your needs. To do better, you should learn about motion effects in PowerPoint and how to use animation to make the game more lively. If you're not familiar with these operations, you can refer to the tutorial on creating motion effects in PowerPoint to get acquainted with the necessary effects.
Related Articles
 PowerPoint 2019 (Part 7): Applying Transition Effects: Explained8 minutes read
 How to Create a Crossword Game on PowerPoint: PowerPoint Crossword9 minutes read
 Create Effects for Text and Objects in PowerPoint 201610 minutes read
 How to Creating Effects in PowerPoint: Step-by-Step Guide5 minutes read
 How to Use Effects in PowerPoint6 minutes read
 How to Create Effects for Photos on PowerPoint4 minutes read
Reader Comments 0
Sign in with email or Google to join the discussion.