Table of Contents
This guide provides a practical overview of Guide the Color Calibration for the Most Standard Computer Screen, including its main features, benefits, limitations, and important considerations.

Before we come to the calibration of the computer screen, you need to grasp the terms related to images to facilitate the alignment and processing them as quickly as possible. Some terms we will meet are: Gamma, Brightness, Contrast.
- Gamma: Gamma directly affects the color gamut of two different colors (middle tone), if the gamma is not good, there will be details that are missing or seriously wrong.
- Brightness: Adjust the brightness of the screen.
- Contrast: The contrast between light and dark areas makes images sharper.
On Windows 7 and above operating systems, the Microsoft manufacturer has integrated for users the ability to adjust screen color directly on the machine. But this way still depends on the eyes of the user and can not automatically align as specialized devices Spyder . But the creative way this color calibration tool also helps the user somewhat. With this tool, there are parameters that the system will intervene like Gamma, there are also parameters you have to adjust the engine (Through the settings keys on the screen). You need to coordinate between these two adjustments to get a nice screen.
Step 1: You proceed to open the Start Menu and type DCCW , then there will be a software DCCW ( Display Color Calibrator ) you proceed to open this software to continue using.

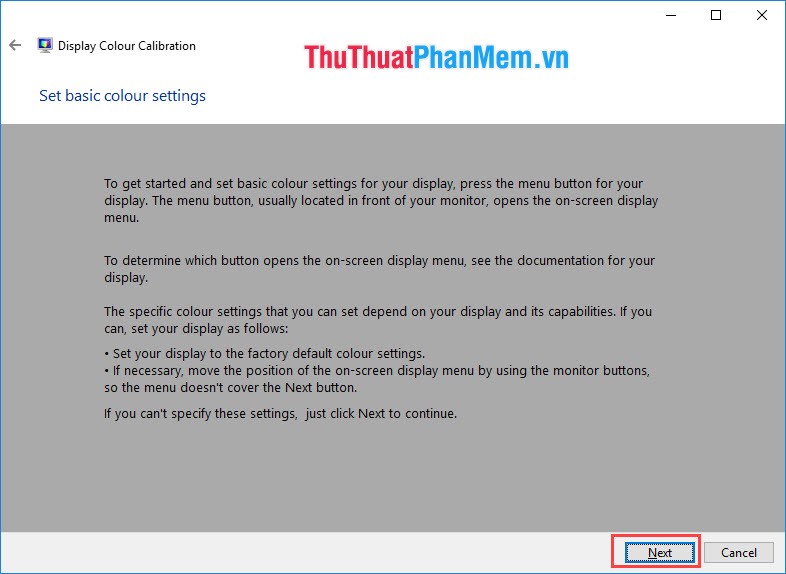
Step 2: When the software window pops up, this will be the tutorial. You proceed to zoom in full screen mode to be able to align more easily. Then click Next to continue.

Step 3: According to the instructions of the software, this step you need to reset the color of the screen to the default mode to be able to align the best colors. But this step is not very important because after all we will adjust the whole color of the screen, so click Next .
If you want to do this step, you press the control button on the screen and select Reset Default .
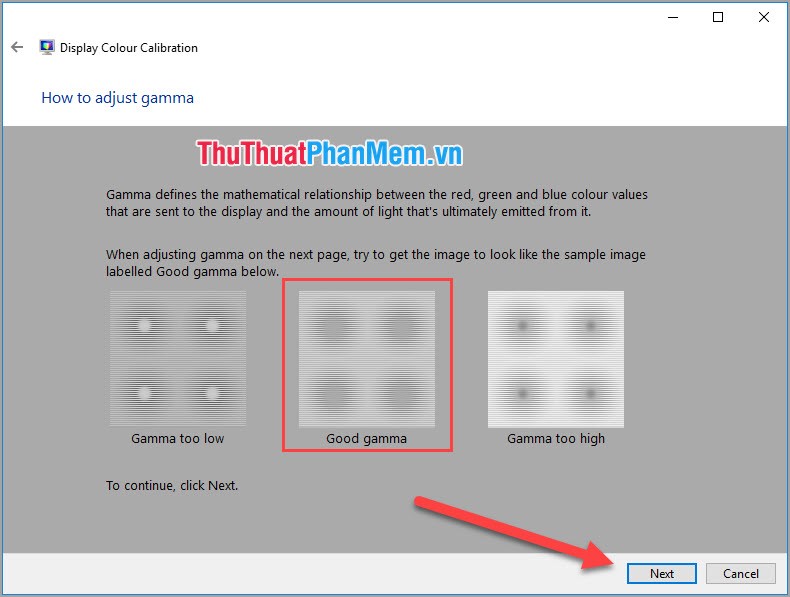
Step 4: The first task we need to do is adjust Gamma . As you can see on the software, there are examples of Gamma, you understand how to adjust Gamma to show as in the middle (Good Gamma). To make it simpler, you can recall the following: Adjust so that there are no white or black spots in the middle of the spots. Then click Next to begin editing.
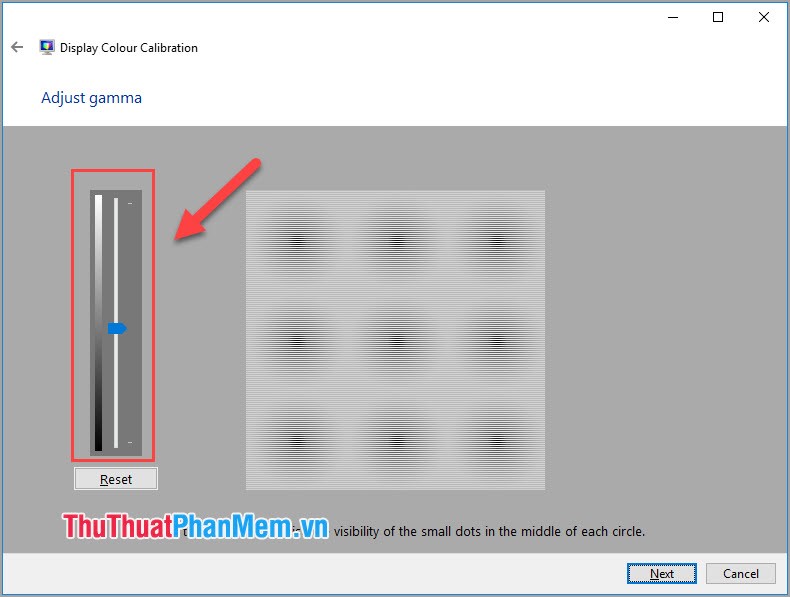
Step 5: Gamma adjustment bar you can drag up or down so that the image as the instructions are. When adjusting Gamma, click Next to continue.
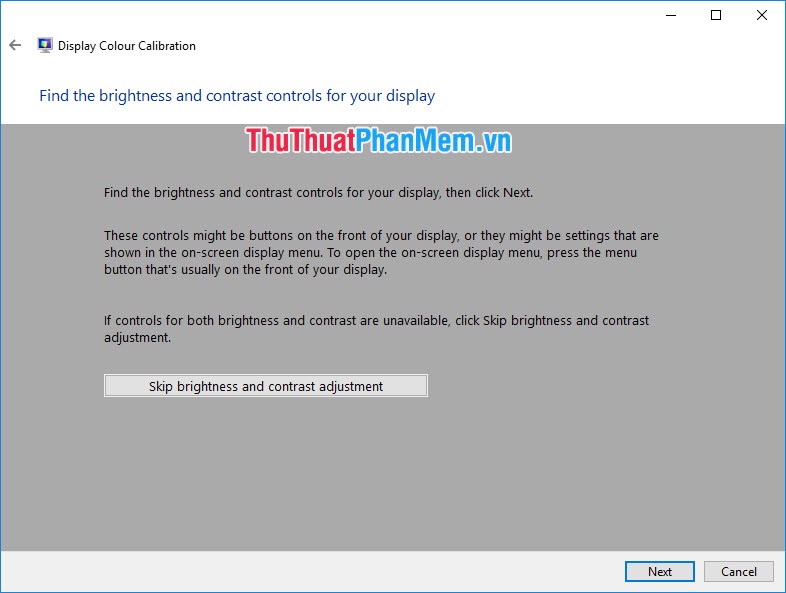
Step 6: After adjusting the Gamma, we will continue to adjust the Brightness and Contrast ( Brightness and Contrast ). At this point you need to use hard keys on the screen because the software can not interfere anymore. You open the screen settings menu and navigate to Brightness / Contrast to adjust.
Click Next to continue.
Step 7: After that, the software will guide you how to adjust it to best suit. You notice, the ideal brightness is when the X mark behind the display up clear, not pale as well as loss of detail. Click Next to begin editing.
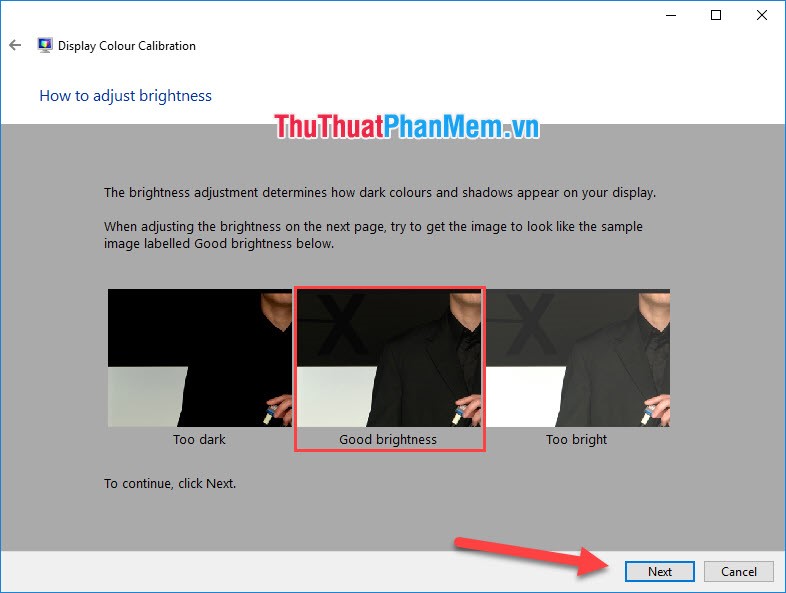
Step 8: You proceed to use hard keys to set the screen to adjust for the best results.
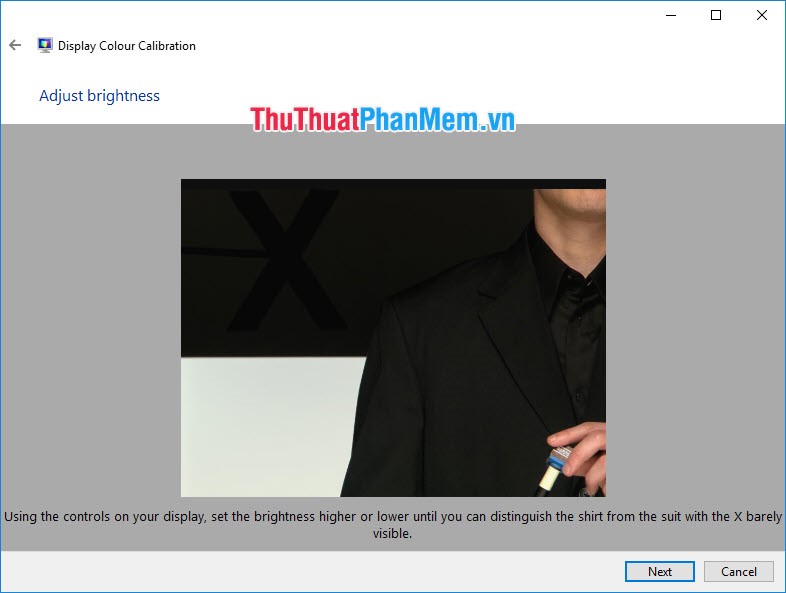
Step 9: When the brightness adjustment is complete, you continue to the Contrast adjustment. In the software's manual, Contrast is best when the edges of objects are sharp enough and not too bright and dark.

Step 10: To adjust Contrast, you still have to use the hard keys on the screen. After adjustment is complete you click Next to continue.
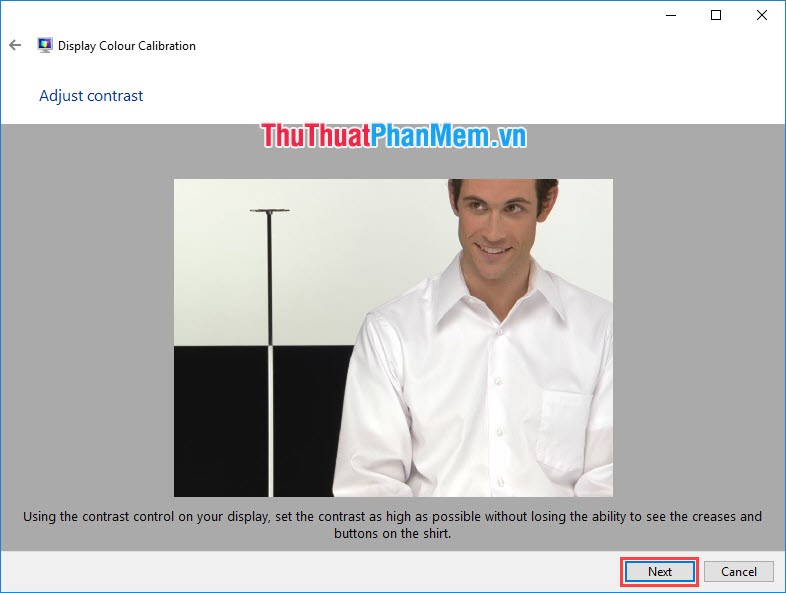
Step 11: So you have to understand the three most important parameters of a screen. The next parameters depend on each individual such as: Red, yellow, blue, anti-eye strain. Click Next to set.
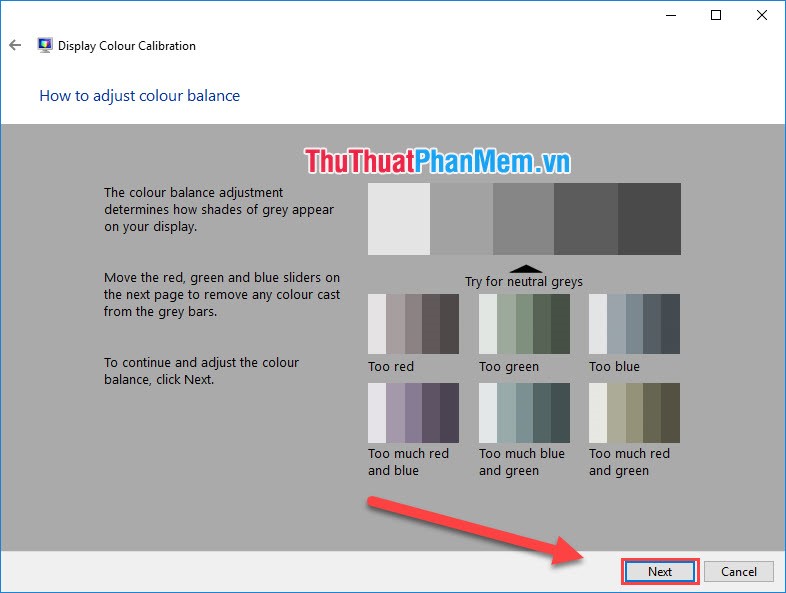
Step 12: At this time you proceed to edit all 3 bars red, blue, green so that the upper color band appears to suit your eyes best.

Step 13: So you have adjusted the color system of the screen. You will now have the option of Previous calibration (colors before color balance) and Current calibration (colors after color balance). You select one of these two items to see the difference between before and after color balance. After the test is complete, click Finish .
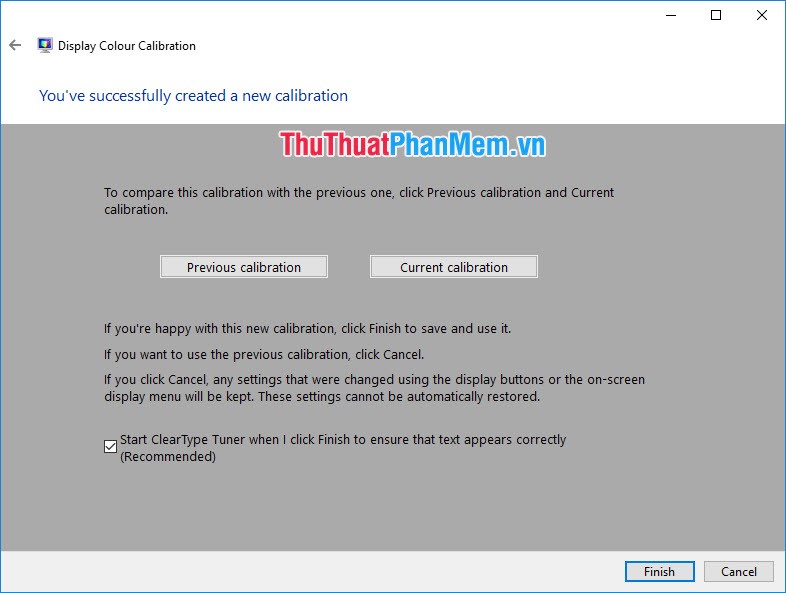
Step 14: Continue, you will be redirected to the ClearType Text Turner window. This will be the place to display text and images so that you can check whether the color correction has just been reasonable or not. Then click Next to continue.
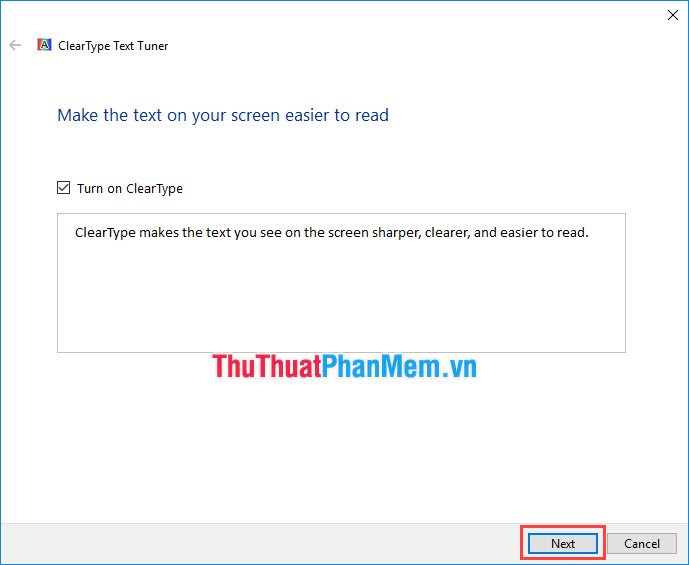
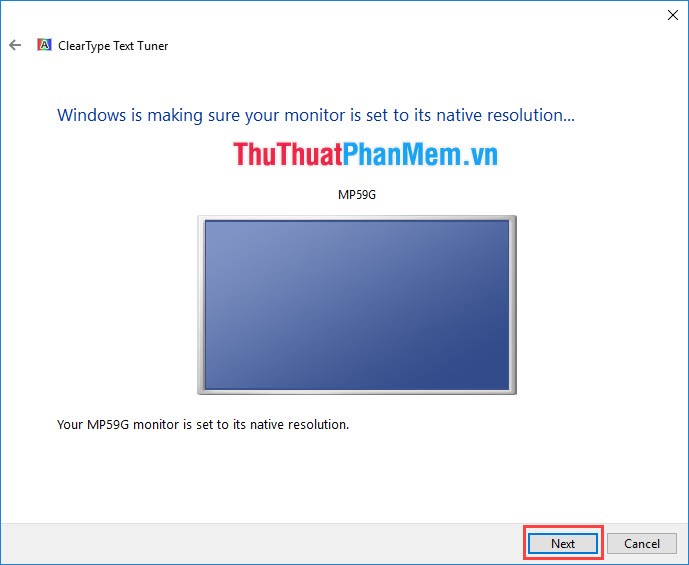
Step 15: Next, the software will ask you to adjust the resolution to the factory default settings and click Next .
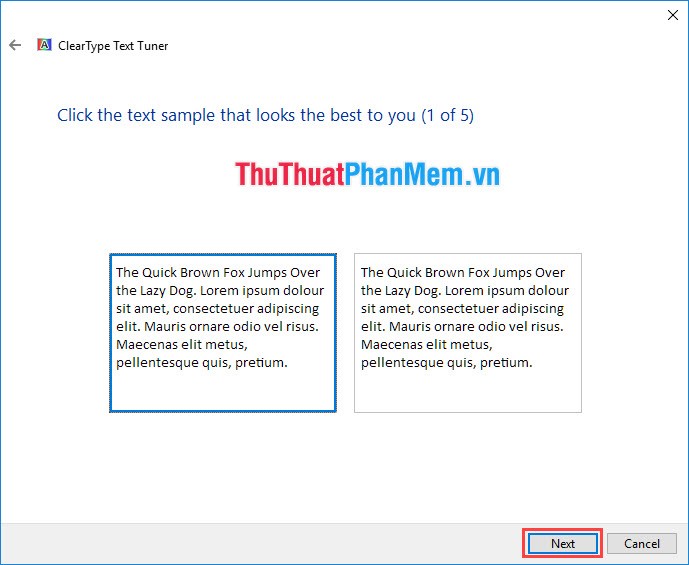
Step 16: After that, the software will display many different fonts. Your job is to see which tables are the best and most obvious to choose from. Then click Next to continue.
Step 17: Thus, you have completed the job of adjusting the colors of the screen most accurately. Click Finish to complete.

You only need to spend a little time to be able to adjust the display of the screen in the best way. This is the most effective way if you do not have specialized equipment. Good luck!
FAQ
What should I know about Guide the Color Calibration for the Most Standard Computer Screen?
Focus on the key features, requirements, limitations, and practical use cases explained in this guide.
How do I get the best results with Guide the Color Calibration for the Most Standard Computer Screen?
Follow the recommended steps, use current software or information, confirm compatibility, and review settings before major changes.
Are there any risks or limitations?
Potential limitations depend on compatibility, data quality, cost, privacy, support, and how the product or method is used.
Related Articles
 5 Best Online Tools for Screen Calibration9 minutes read
 Screen Calibration: How to Calibrate the Screen Perfectly?9 minutes read
 How to Change the Color of Windows 11 Computer Screen3 minutes read
 How to Adjust Screen Color Most Accurately8 minutes read
 Standard Color Encoding for Programmers and Designers6 minutes read
 How to Adjusting Computer Screen Colors to Reduce Eye Strain6 minutes read
Reader Comments 0
Sign in with email or Google to join the discussion.