Table of Contents
Pippit’s Product showcase tool turns a product image into an AI-generated video featuring a presenter holding or wearing the item. Choose the presentation style, supply an image, describe the action, and add narration. Review the generated visual before creating the final clip.
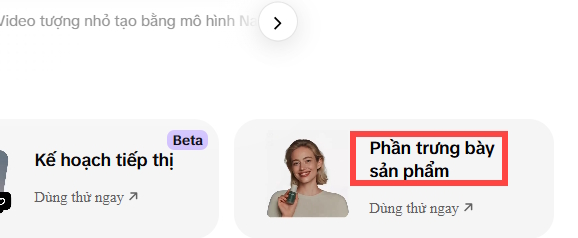
The screenshots below show an earlier interface labeled Product Display. Pippit’s current product showcase guide describes the feature under Video generator. Labels and available options may differ in your account.
1. Open Product showcase
Sign in to Pippit and open Video generator. Look for Product showcase in the popular tools area, or Product Display if your interface matches the screenshot.
2. Choose the video style and presenter
Select a Product-holding video to show an item in a presenter’s hands, or Virtual try-on for a wearable product. These are alternative video types; choosing the tool does not automatically create both scenes.
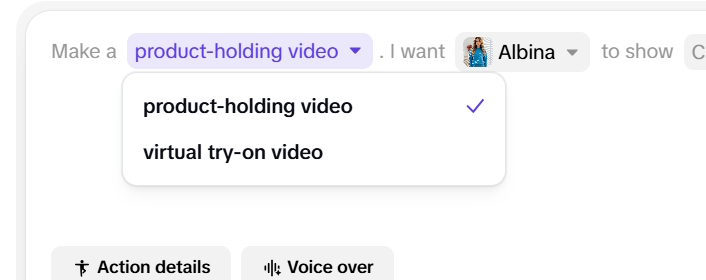
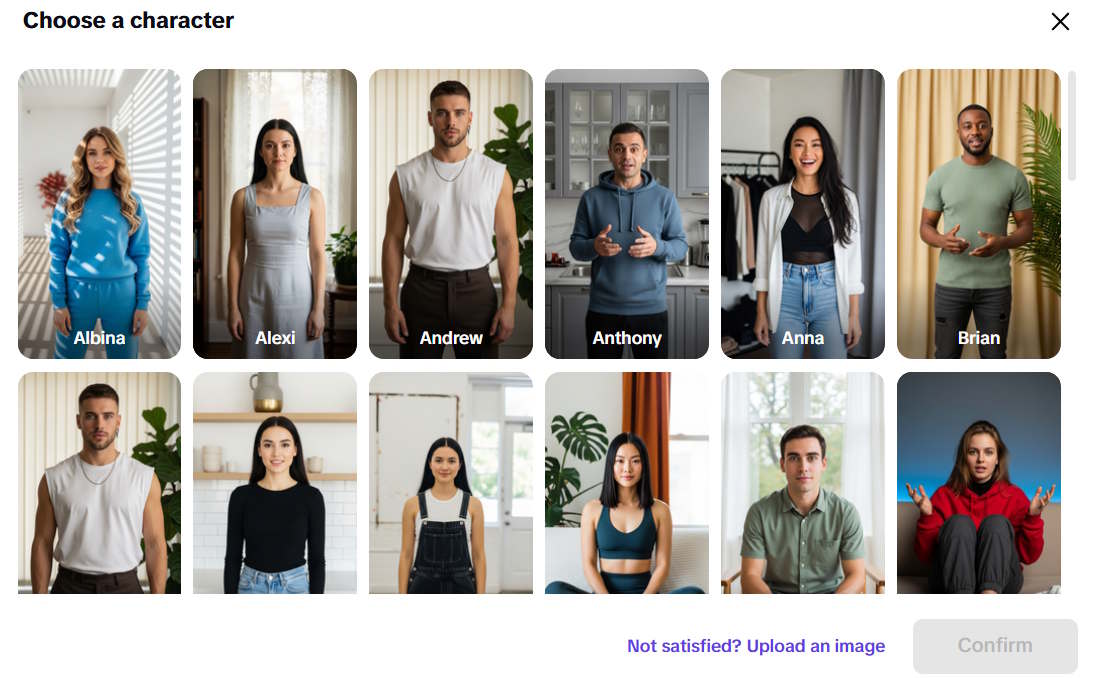
Choose an avatar suited to the scene, or upload a presenter image if that option is available. Use an image you have permission to use.
3. Add the product, action, and voiceover
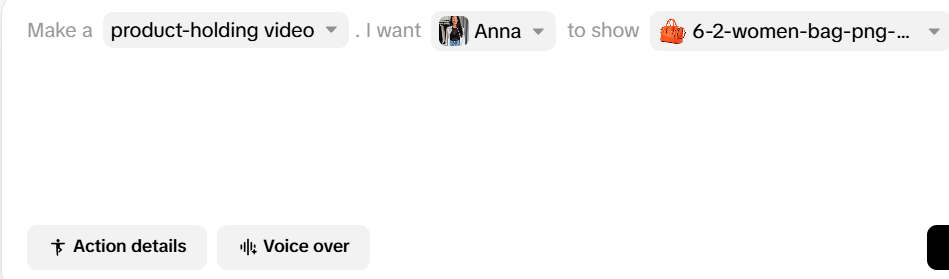
Upload a clear product photo with the entire item visible. A simple background helps you inspect whether the generated result preserves its shape and packaging. If you need to prepare imagery first, TipsMake’s guide to editing images with Firefly Boards covers related tools.
In Action details, describe what the presenter should do. In Voice over, enter the words to be spoken and choose a voice. Keeping these separate prevents stage directions from becoming narration.
For a bottle, an action prompt might be:
Hold the bottle upright at chest height with its front label facing the camera. Move slowly and keep the bottle visible throughout the shot.A separate narration draft could read: “Here is our [product name]. The front label shows the [verified feature].” Replace the placeholders and use only details supported by the real product. ChatGPT can help draft the wording, but is optional.
Check the generation options and any displayed credit cost, then select Generate.
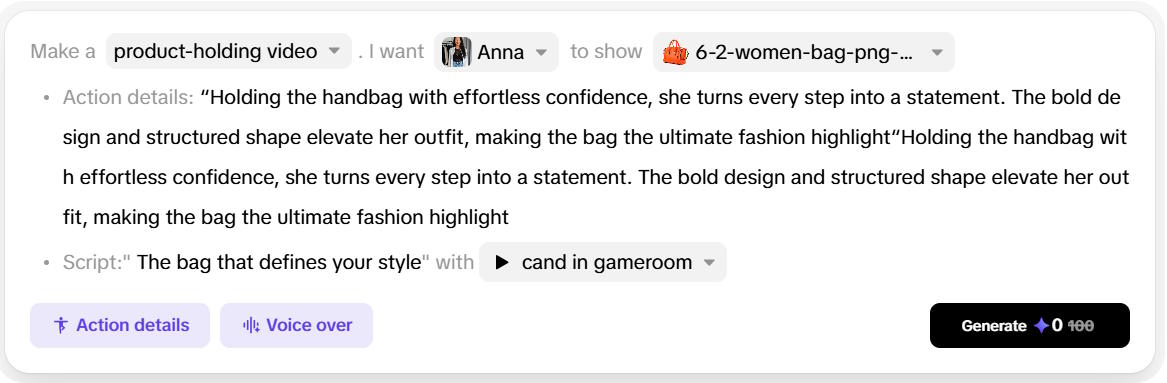
4. Check the preview and create the video
When visual candidates appear, select the one that best matches the real item. The source screenshots show three candidates; do not assume every generation will provide that number.
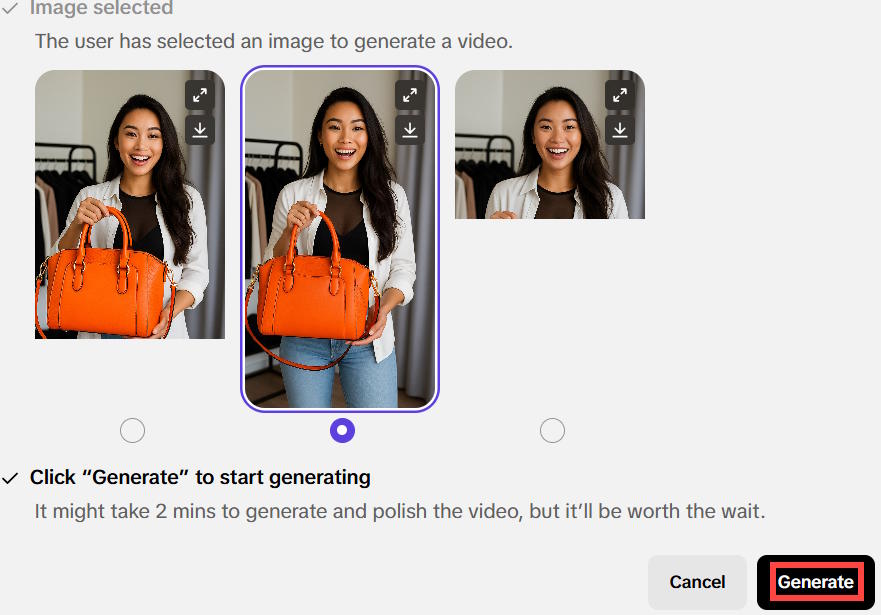
Reject results with altered labels, distorted hands, incorrect colors, or misleading product proportions. Generate the video from the chosen visual, then open the result or project entry to preview and download it.
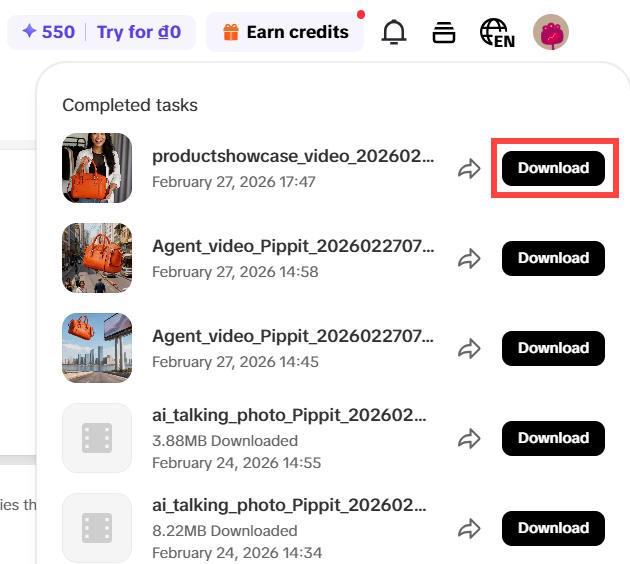
Watch the full clip before publishing. Check narration, product appearance, and cropping on the intended screen. AI-generated handling or fit is an illustration, not proof of the item’s real-world performance. For further editing, the CapCut background guide explains a separate finishing option.
Related Articles
 How to Create Product Advertising Videos from Images on Pippit5 minutes read
 How to Create Product Advertising Videos on Flow3 minutes read
 Summary of Tik Tok Video Editing Apps on Android, iOS8 minutes read
 How to Create Videos from Photos Quickly Guides AZ Steps5 minutes read
 How to Combine Videos on Capcut, Combine 2 Videos into 13 minutes read
 How to Create AI Instagram Story Videos: Step-by-Step Guide3 minutes read
Reader Comments 0
Sign in with email or Google to join the discussion.