Table of Contents
You can use product photos and a reference video to guide an advertisement in Pippit. The reference provides a starting point for pacing and presentation, while your uploaded images identify the product to show. A generated result still needs checking; it is not guaranteed to reproduce the reference accurately.
Use media you have permission to reuse. Decide which aspects of the reference you want, such as close-up shots or a calm voiceover, rather than asking the tool to copy every detail.
1. Add a reference video
Sign in to Pippit and open its video-generation workspace. In the interface shown below, the lightbulb control opens the reference-video option. In newer layouts, look for a reference upload in a supported mode such as Agent mode.
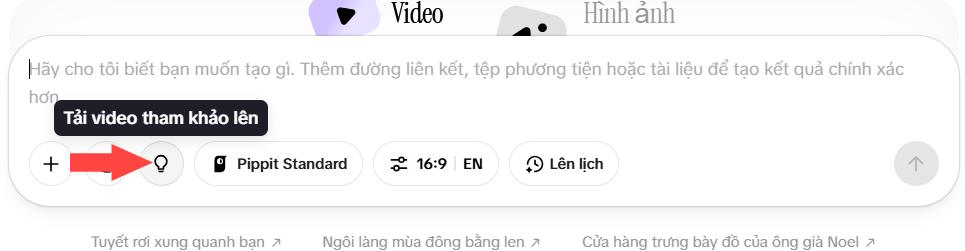
Pippit’s product-video guide describes uploading reference media in Agent mode. If the control is missing, check the selected mode before assuming that the feature has disappeared.
2. Upload the product photos and describe the result
Use the plus button or Add media and more to upload clear product images. Include the important view of the real packaging or item.
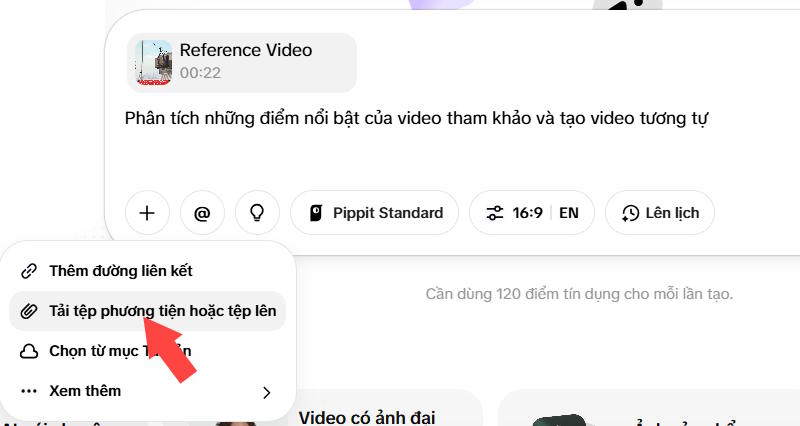
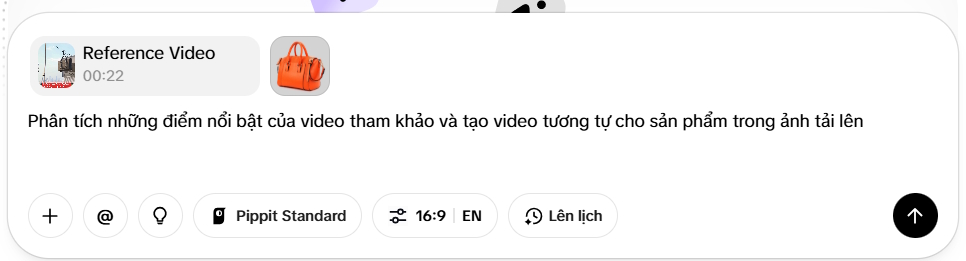
Give the reference a specific purpose. For example:
Create a short product ad using my uploaded photos. Follow the reference video's calm pacing and sequence of wide shots followed by close-ups. Keep the product's color, shape, and label consistent with the photos. Use only the product facts I provide. Do not copy the reference's brand name, logo, or spoken script.Add the verified product name and features separately. For more ways to describe scenes and motion, see TipsMake’s AI video prompt examples.
3. Set language, size, and captions
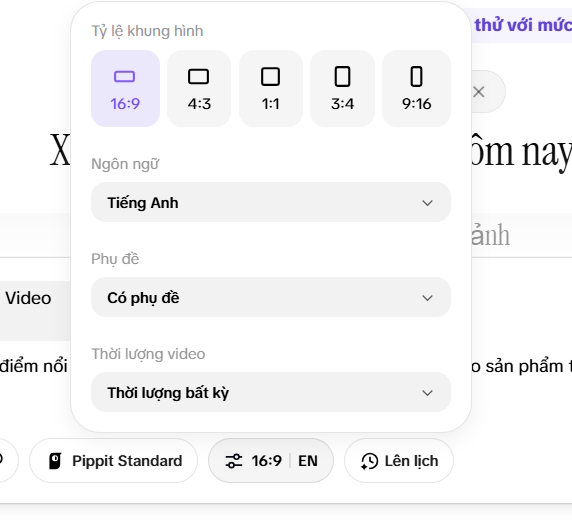
Choose the available language, aspect ratio, duration, and subtitle options to fit where the ad will appear. Pippit’s ad-creation instructions note that settings and reference-video support depend on the generation mode.
If you need Vietnamese narration, check the languages shown in your account and preview pronunciation and captions. Available languages and output quality can change, so verify the options in your account.
4. Generate, inspect, and refine
Start generation and open the completed preview. Check the entire clip for altered labels, unrealistic product use, inaccurate claims, and captions that cover the item. If a detail is wrong, revise the prompt or source images before generating another version.
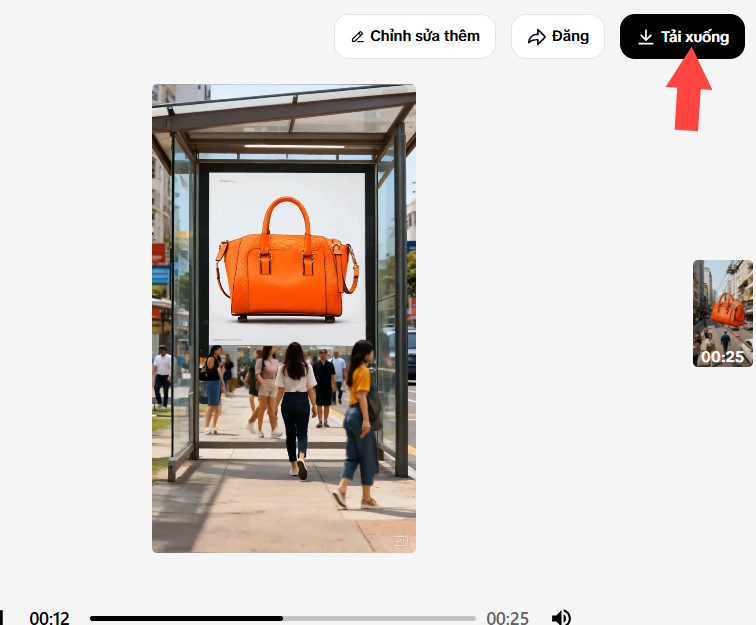
Choose Edit more to adjust the result in Pippit’s editor, or Download when it is ready. Compare the result with the reference for the intended pacing, while checking product accuracy against your own photos.
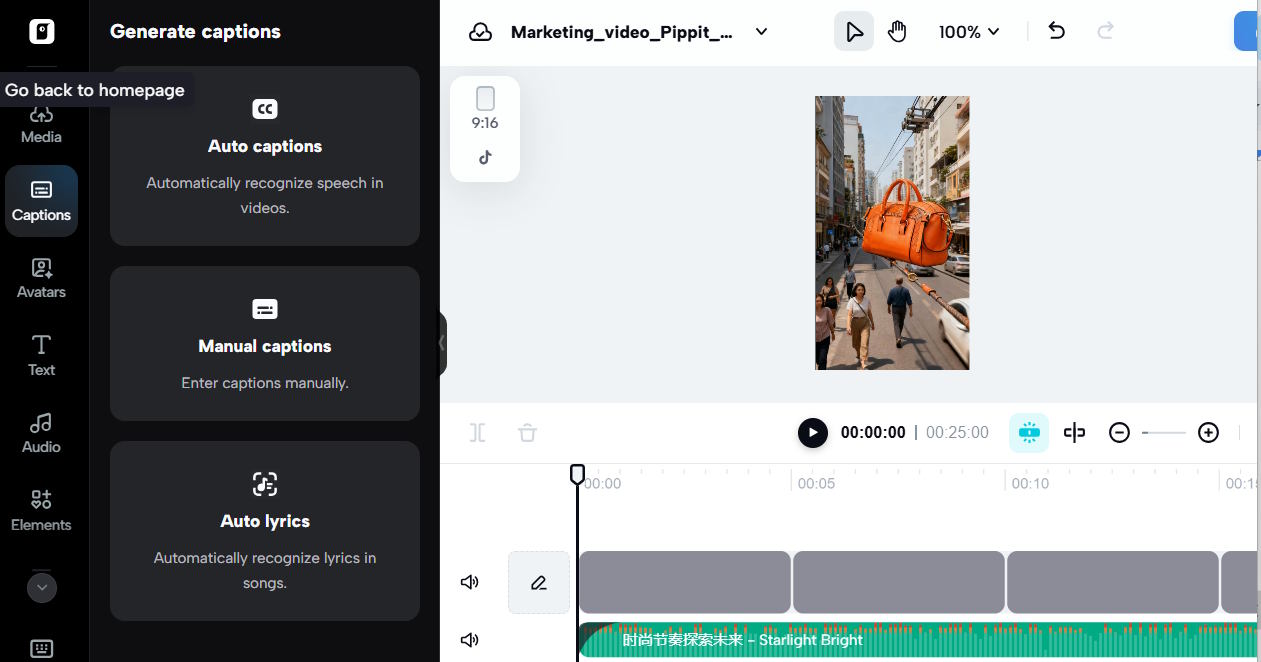
AI generation is only one part of making a usable ad. TipsMake’s overview of short-form video tools in CapCut covers another editing workflow if you need additional finishing options.
Related Articles
 How to Create Product Showcase Videos on Pippit Extremely Quickly5 minutes read
 How to Create Product Advertising Videos on Flow3 minutes read
 11 Software to Create Presentation Videos, Create the Best Promotional33 minutes read
 Instructions for Creating GIF Images on YouTube Do Not Need Software7 minutes read
 13 Extremely Creative Advertising Ideas That Cannot Be Ignored5 minutes read
 How to Create Gif Images from Videos with Workflow on iPhone6 minutes read
Reader Comments 0
Sign in with email or Google to join the discussion.