Table of Contents
Google Flow can turn product photos, a presenter reference, and a written shot description into a short advertising clip. The reliable workflow is to plan one simple shot at a time, use product images as references, and verify every visible label and spoken claim before publishing.
Flow can preserve the overall look of an uploaded object, but generative video may still change packaging, text, proportions, hands, or small details. Keep the real packshot and approved marketing copy available for the final edit.
What to prepare
- One sharp front-facing product photo, ideally on a plain background
- Optional side or rear product images for shape and packaging context
- A presenter photo that you own or have permission to use
- An approved script containing only claims you can substantiate
- A target format, such as vertical 9:16 for short-form social video or landscape 16:9 for a website
Do not upload a person’s photo without permission. Do not imitate a real person’s voice, use protected branding without authorization, or ask the model to invent testimonials. For cosmetics, health products, finance, and other regulated categories, have the final claims and required disclosures reviewed before publication.
Plan the ad as separate shots
A short sequence is easier to control than one prompt that asks for a complete commercial. This three-shot plan is enough for many product demos:
| Shot | Purpose | Prompt focus |
|---|---|---|
| 1. Product introduction | Show the package clearly | Framing, lighting, background, slow camera movement |
| 2. Presenter demonstration | Show scale and basic use | Hand movement, expression, short approved dialogue |
| 3. Closing packshot | End on the real product and call to action | Stable composition with space for text added later |
Step 1: Create or upload the reference assets
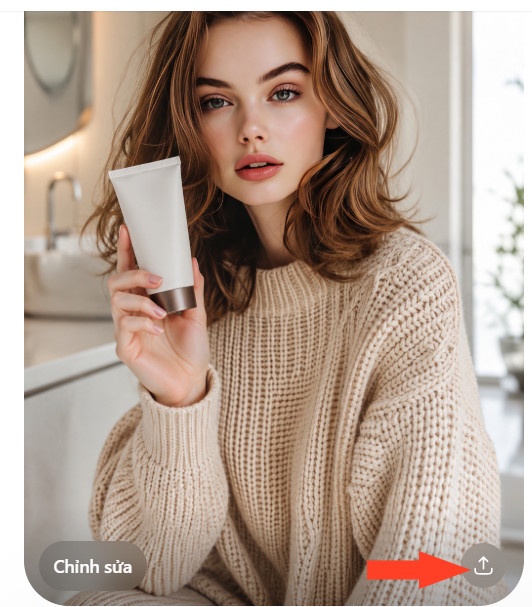
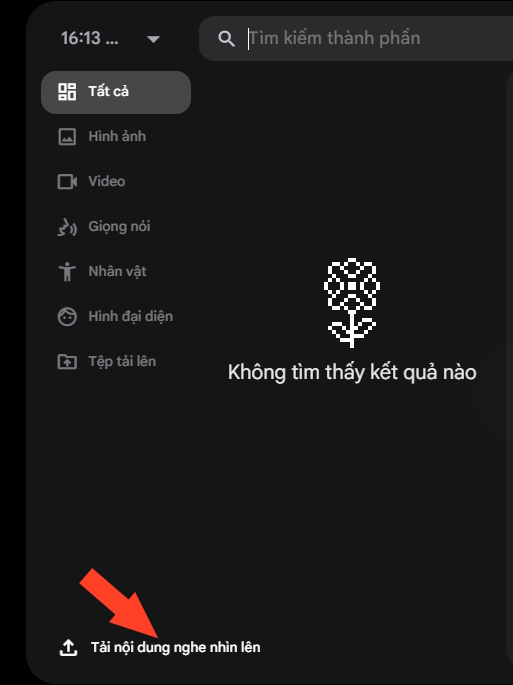
Open Google Flow and create a project. Upload the product and presenter images as ingredients or references. Current versions of Flow can also create and edit images inside the project, so a separate compositing tool is optional.
If you do create a combined reference image, ask for a plausible pose and setting without promising exact reproduction. A practical image prompt is:
Place the presenter in a bright, modern room, holding the supplied product at chest height with the front label facing the camera. Preserve the product’s overall shape, cap color, package color, and proportions. Use soft commercial lighting and leave uncluttered space on the right for later text.
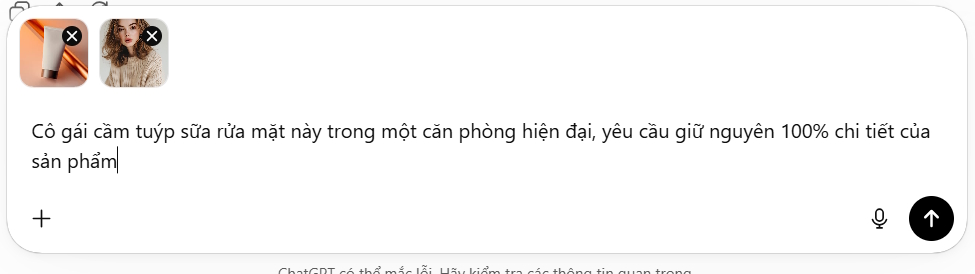
Inspect the result at full size. If the label, logo, cap, container shape, or presenter’s hands are wrong, regenerate or use the original product photograph as the visible packshot in the final editor. For more on this problem, see TipsMake’s guide to maintaining visual consistency in AI content.
Step 2: Start a video generation in Flow
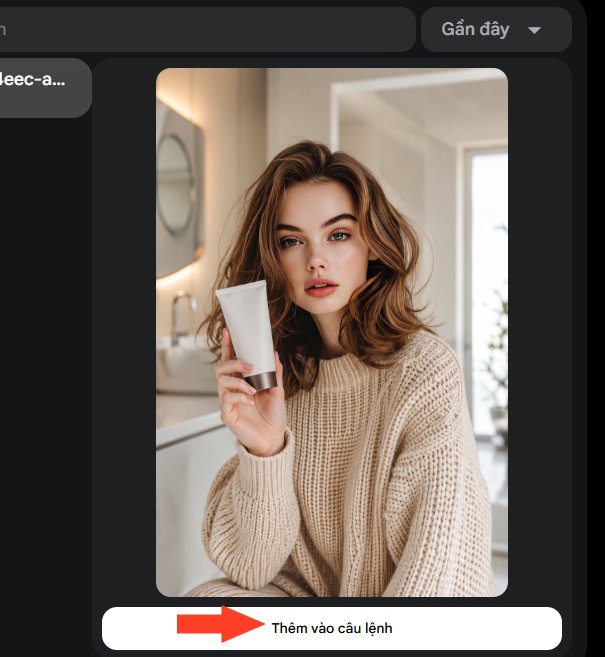
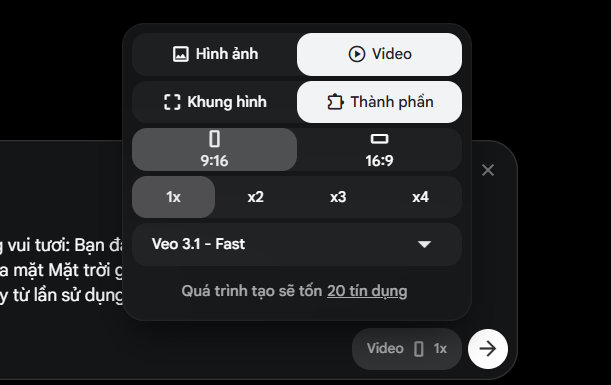
In the Flow project, choose Video in the generation settings. Add the product and presenter as ingredients, or select the prepared image as a starting frame. Google’s current Flow tools support text prompts, ingredients, starting and ending frames, and other video inputs; the available model and controls can vary by account and device.
Choose the output orientation and generation length before submitting. A vertical composition should be described as vertical in the prompt as well as selected in the settings.
Step 3: Write a prompt that controls the shot
Describe the subject, action, environment, camera, lighting, audio, and restrictions in a clear order. Use this template:
[Aspect ratio and shot type]. The supplied presenter is in [location] and holds the supplied [product] with the front facing the camera. [One simple action]. The camera [movement]. Lighting is [description]. Background sound: [description]. The presenter says in [language and tone]: “[approved line].” Keep the product shape and colors consistent with the references. No extra labels, no on-screen text, no additional products.
Example:
Vertical 9:16 medium shot for a social product demo. The supplied presenter stands in a bright bathroom and holds the supplied facial cleanser with the front facing the camera. She raises the bottle slightly and smiles. The camera makes a slow, subtle push-in. Soft daylight, clean neutral background. The presenter says in a warm, conversational voice: “A simple cleanser for my morning routine. Check the product page for ingredients and directions.” Keep the package shape and colors consistent with the reference. No extra labels, no on-screen text, no additional products.
This sample avoids unsupported promises such as “deep cleans,” “safe for every skin type,” or “visible results after one use.” Replace it only with claims that the product owner has approved and can support.
Step 4: Generate and review the clip
Submit the prompt and review the result before generating more shots. Check the product frame by frame, especially while it moves or passes behind a hand. Also listen for changed words, awkward pauses, or a mismatch between lip movement and speech.
- If the product changes, simplify the movement and keep it farther from the hands.
- If dialogue is inaccurate, shorten the line or generate a silent clip and add an approved voiceover later.
- If the composition is unstable, use a starting frame and reduce camera movement.
- If text appears garbled, ask for no on-screen text and add the exact copy in a video editor.
Step 5: Assemble and download the ad
Generate the remaining shots separately. In Flow’s Scenebuilder, add the clips to a scene, arrange them in order, trim the start and end of each clip, and preview the complete sequence. Download the scene from the project when the timing is correct. Google’s Flow editing and Scenebuilder instructions cover the current controls.
Add the real logo, price, offer terms, captions, and call to action in an editor after generation. This keeps important text accurate and makes revisions easier. If you need a different workflow, TipsMake also covers turning a script into video with Pictory and creating product scenes with Canva’s AI background tools.
Final checks before publishing
- Compare the generated package with the real product photo.
- Confirm every spoken and written claim against approved source material.
- Check that you have rights to the product images, presenter, voice, music, fonts, and other assets.
- Add captions and review them manually.
- Export in the platform’s required aspect ratio and watch the final file on a phone.
- Apply any AI-content disclosure required by the destination platform, advertiser, or applicable rules.
Related Articles
 How to Create AI Timelapse Videos9 minutes read
 How to Combine Photos Using Google Flow3 minutes read
 How to Create Product Advertising Videos from Images on Pippit5 minutes read
 How to Combine Videos on Flow into a Single-Page Video3 minutes read
 How to Create a Dialogue Video from Just Two Images Using Google Flow6 minutes read
 How to Create a Video from a Single Image Using Google Flow3 minutes read
Reader Comments 0
Sign in with email or Google to join the discussion.