Corel Draw: Creating balls - Part 1
We embark on the creation of the tennis ball ...
We embark on the creation of the tennis ball .
Use the tool
 draw a circle in some blank spot on the drawing domain
Click on the selection tool

Select the 3 pt size for the newly created circle
Hold down the Ctrl key, drag the circle to the right to the position shown in Figure 1 and press the right mouse button one key before letting go of the left key of the mouse
Copy the circle you just drawn to create a new circle, lying right to the original circle
Press Ctrl + R (or choose Edit> Duplicate )
You have the third circle, to the right of the second circle (Figure 2)
Select the middle circle (Figure 2)
Select Arrange> Shaping> Shaping
The anchoring window of Shaping appears
On the Shaping window, select Intersect , turn on the Source Object box and turn off the Target Object browser (Figure 3).
Prepare to take the intersection of the middle circle with the circle on the left
Click the Intersect With button on the Shaping window and click on the circle of the left circle
The left circle is deleted. Appear the intersection of the circle on the left with the middle circle
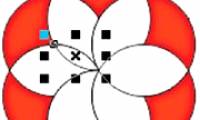
Select the middle circle, press the Intersect With button on the Shaping window and click on the circle of the right circle
The circle on the right is deleted. Appear the intersection of the right circle with the middle circle. You get the tennis ball as shown in Figure 4
'Stretch' frame selects the ball
Select the middle circle with the two left and right intersections
Press Ctrl + G or select Arrange> Group
Combine 3 selected objects into one group (group) , making them "stick" together
Select View> Snap To Guideline
Turn off 'catch sticking to the line' mode
Calibrate the 'medium' ball, close to the L letter of the symbol (you do not need to adjust it correctly) and place it on the 'fourth piece' above, right of the symbol
You get the result as shown in Figure 5
Close the Shaping window

Figure 1

Figure 2

Figure 3

Figure 4

Figure 5
Line up the words
I am close to reaching my goal! Just a little 'stork' again. With the letter L as the standard, you need to adjust so that the diameter of the ball is exactly the same as L and they are equal. The letter T must be vertically aligned with the letter L. The letter C must be in line with the T.
Create two horizontal lines at the top and bottom of the letter L
Select View> Snap To Guideline
Turn on 'catch sticky lines' mode
Get close vision, enough to cover the letter L and the ball
Select View> Simple Wireframe
Switch to the frame view mode to clearly see the two horizontal lines just created. The screen before your eyes will look similar to Figure 6
Stretch the ball so that it fits nicely between the two lines (Figure 6)
Thanks to the active binding mode, you can do the same operation very easily.
Type the left or right arrow keys depending on whether you want to 'move' the ball to the left or right a little

Figure 6
The 'inching' operation you just made helps us to 'refine' the location of the selected object. Similar to the left and right arrow keys, the 'up' and 'down' arrow keys allow 'fine-tuning' the object position vertically. Such functions of the arrow keys are very popular with CorelDRAW users. The ball that the arrow keys on the keyboard are often 'people CorelDRAW' affectionately called the key nudge (nudge key) .
Note
• If you use the click tool to click on the blank of the printed page (ie, do not select anything), an input box called a Nudge Offset will appear in the Property Bar.
 . This is the place for you to specify the shift range of the selected object each time you type the arrow key.
Open the anchor window View Manager (select Tools> View Manager if you have closed this window) click on View 1 view
Remembered vision recovery
Select the T in the 'piece of cake' below the left and type the up or down arrow keys to refine the position of the letter T vertically so that it is 'viewable'
Now the letter T is in the 'selected' state.
Hold down Shift and click on the letter L
Choose the letter L
Type C
Center the T-center for a vertical line with the center of the L
You notice, the letter T is aligned with the letter L because the letter T is selected before the letter L. In general, the last selected object is the object taken as the standard when aligning. With this experience, we continue to align the C with the ball for the vertical line and align the letter C with the T for the horizontal line.
Select the letter C
Hold down Shift and click on the ball
Choose more balls
Type C key (Center align function)
Align the center of the C line straight along the center of the ball
Click somewhere to stop selecting the letter C and the ball
Click on the letter C
Select the letter C separately
Hold down Shift and click on T
Select the letter T
Type B key (Bottom align function)
Align the lower edge of the letter C to the horizontal line with the lower T-edge
Remove the alignment lines
Select View> Enhanced
Return to normal display mode. You get the result as shown in Figure 7
Press Ctrl + S
Save the drawing

Figure 7
It's done! You can invite people around to see your work
Was this article helpful?
Your feedback helps us improve.
Related Articles
 Corel Draw: What is Corel DRAW - Introduction11 minutes read
 Corel Shortcuts - All shortcuts in Corel Draw you need to know5 minutes read
 Corel Draw: Use the photo corner effect in Corel Draw3 minutes read
 Corel Draw 12 - Draw patterns in circles3 minutes read
 Corel Draw 12: Draw the ducklings swimming2 minutes read
Reader Comments 0
Sign in with email or Google to join the discussion.