Table of Contents
Understanding Figure requires more than a headline. The overview below breaks down the key facts, changes, and user impact.
Figure Overview
In this exercise, we use the tool to draw the Rectangle Tool and some of the following commands: - Rotate: rotate the object. - Trim: create a third object from two intersecting objects. - Mirror: option to flip objects. - Rotate: rotate the object. - Fountain Fill: color gradation. - Shape Tool: a format tool, used to edit the shape changes of objects. - Align and Distribute: used to compare objects. - Tranfrom - Position: change the object to an exact position on the screen. - Convert to Curve: convert the input object (square, circle, polygon.) into a drawing object to shape the shape with the Shape Tool. Colouration - Select the rectangle tool, draw a rectangle. - On the properties bar select the Object part (s) Size and for the size of the horizontal rectangle 5 cm, 10 cm long. - Select Object - Convert to Curve. - Select the format tool ( Shape Tool ), select the upper right corner of the rectangle and press Delete, we get a right triangle (Figure 1).
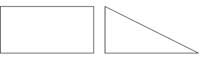
Figure 1
- Draw the second rectangle so that the size is slightly larger than the first one. - Select Object - Align and Distribute: Align Bottom: looks like two square and rectangular triangles for the bottom. - Select the rectangle. - Select Object - Transformations - Position: with parameters as shown (Figure 2, 3).
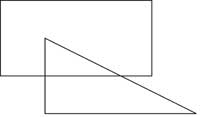
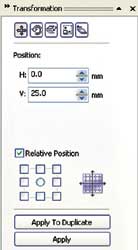 Figure 2 Figure 3
- Choose rectangles and square triangles. - Select Object - Shaping - Intersect, we get the intersection of the rectangle and the right triangle is another smaller triangle (Figure 4).
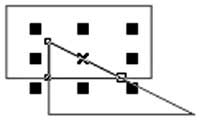
Figure 4
- Choose big rectangles and square triangles. - Select Object - Shaping - Trim, we get the third object is a square trapezoid due to the large triangular cut rectangle (Figure 5).
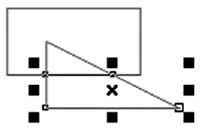
Figure 5
- Select the rectangle click Delete. - Select a small triangle, select Mirror Buttons to turn the triangle upside down (Figure 6).
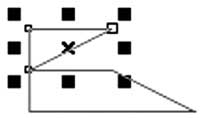 Figure 6
- Choose two large and small triangles. - Select Object - Align and Distribute: Align Bottom (Figure 7)
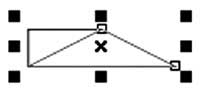 Figure 7
- Select Fill Tool - Fountain Fill Dialog, fill two triangles as you like (Figure 8, 9).
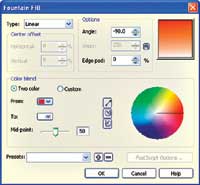
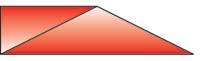 Figure 8 Figure 9
- Object - Group - Select Object - Transformations - Rotate with parameters: Angle: 90 deg (rotation angle of the object) Select the center of rotation of the object as the lower left corner (Figure 10). - Click Apply To Duplicate tab 3 times, we get the result as shown in Figure 11.
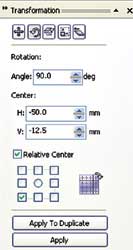

Figure 10
Figure 11
Lam Khe
FAQ
What happened in Corel Draw 12 - Quick Drawing: Figure?
Understanding Figure requires more than a headline.
What factors influenced Figure?
The overview below breaks down the key facts, changes, and user impact.
What was the practical impact on users?
Figure Overview In this exercise, we use the tool to draw the Rectangle Tool and some of the following commands: - Rotate: rotate the object. - Trim: create a third object from two intersecting objects. - Mirror: option to flip objects. - Rotate: rotate the.
Related Articles
 Corel Draw: What Is Corel DRAW - Introduction12 minutes read
 Corel Draw 12: Draw the Butterfly: Figure3 minutes read
 Corel Shortcuts - All Shortcuts in Corel Draw You Need to Know4 minutes read
 Corel Draw: Use the Photo Corner Effect in Corel Draw: Image3 minutes read
 Corel Draw 12 - Draw Patterns in Circles: Figure3 minutes read
 Corel Draw 12: Draw a Square Ornament: Select3 minutes read
Reader Comments 0
Sign in with email or Google to join the discussion.