Controlling Internet Access: Introduction to TMG Access Rule - Part 2
In the second part of this article series, I will show you the details of Access Rules after working together to create a rule using the wizard in Part 1.
Network Administration - In part two of this article series, I will go over the details of Access Rules after working together to create a rule using the wizard in Part 1 .
[#RelatedNews (8) #]
In Part 1 of this two-part series of Access Rules, we introduced you to the purpose and process of creating an Access Rule and how to use the Access Rule wizard for creating a rule. In this section, we will go over the details of Access Rules after going together to create with the wizard in Part 1. We want to do this because there are some settings that are not revealed in Access Rule. wizard.
If you double click on an access rule after creating it, you will see the Properties dialog box for the rule that appears. The first tab you will see is the General tab. Here you can rename the rule's name and provide a description for it. We see the description is very useful, because you can demonstrate by document the purpose of the rule, who created the rule, when the rule was created, and why it was created, such as someone has requested. create a rule or some business issue it needs to solve.
Note that the Evaluation order is in this tab. However, you need to know this is the evaluation order for the list of firewall rules outside of the System Policy rules. System Policy rules are always evaluated before policy rules. You can also enable or disable the rule by using the Enable checkbox.
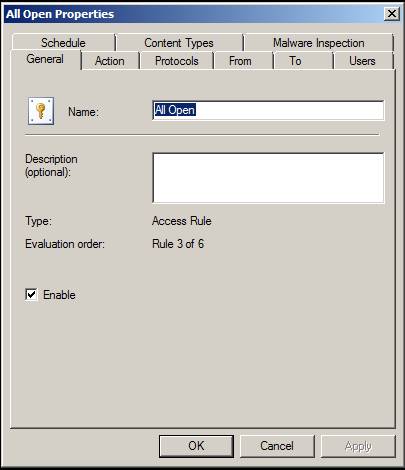
Figure 1
On the Action tab, you have several options:
- Allow - When this option is selected, the rule becomes the allow rule and when the connection attempt matches the settings in this rule, the connection is allowed.
- Deny - When this option is selected, the rule becomes a rejection rule and attempts to connect to the settings in this rule are denied.
- Display denial notification to user - If the rule is HTTP rule and select this option, then you can enter a text, this text will be returned to the user when the connection is denied. This information will be displayed in the browser window. By using this option, you can let users know why the connection was denied.
- Add denied request category to notification - This option is only available when URL filtering is enabled if URL filtering is enabled on your TMG firewall, you will have the option to let users know, when the request is denied, What category does the site the user tries to access. In general, users don't really care about this information, but if you have rules for administrators and some special users, they'll probably be interested in this information to create requests to reclassify sites.
- Redirect web client to the following URL - If you do not want to give the user a page showing why the connection was denied, you have the option to redirect the user to a certain website. This may be a website that includes service agreement items that you set out with a user or an educational site that provides them with information about the proper use of a corporate Internet connection.
- Log requests matching this rule - This option is enabled by default and allows connections that match this rule to be recorded in the TMG firewall record. However, there will be times when you do not want to record information - such as inappropriate traffic. This will reduce the overall size of the log file and make your logs brighter, easier to poison and parsed.
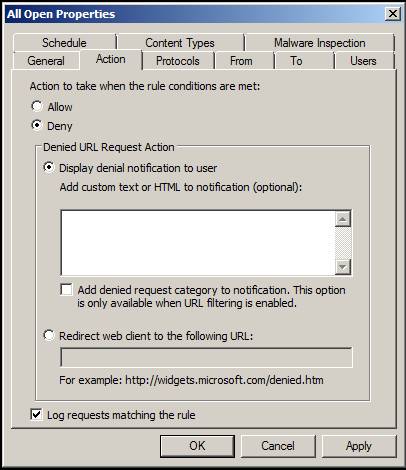
Figure 2
On the Protocols page, you have several options similar to those included in the Access Rule wizard. The This rule applies to checkbox also provides the same options and you can use the Add , Edit and Remove buttons to edit, add, and remove protocols that will apply to this rule. You also have the available Ports option. The Filtering button, when enabled, allows you to configure the HTTP Policy for the rule (if it is an HTTP rule). This feature is grouped into earlier versions of ISA firewall, better known as HTTP Security Filter . There may also be other filters - depending on the protocol you use - if the filter may apply to outgoing protocols. Most of the protocol filters we have with TMG are designed to protect inbound connections, but there are a number of implications for outgoing protocols.
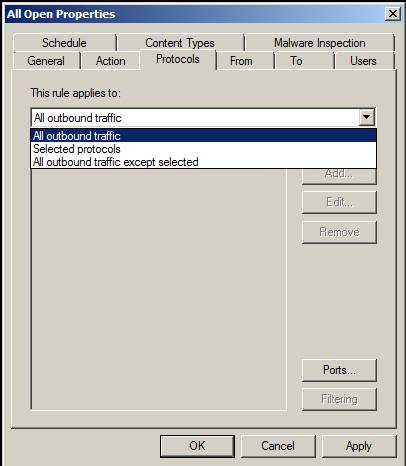
Figure 3
On the From tab, you can define the sources that the rule will apply to. There are many clients located on TMG protection network. This option is similar to what you see in the Access Rule wizard. When you click Add, you will see the Add Network Entities dialog box and you can choose from several network entries or create new entries. An option available in this tab but not in the Access Rule wizard is the Exceptions section. Here you can set the sources that you want the rule to apply to, but there is a subset within that group that is the exception, you can put those exceptions in the Exceptions section. This is a powerful option and sometimes needs to be noted in designing your Access Rules.
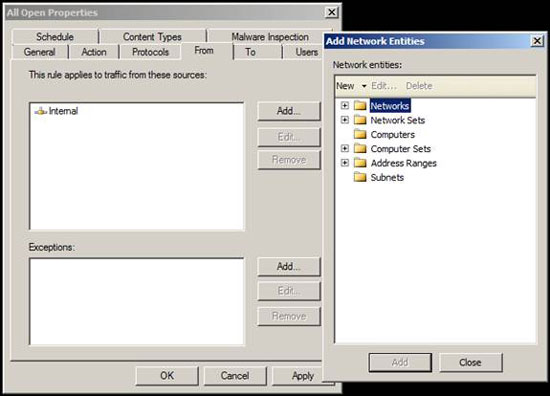
Figure 4
The To tab is similar to the From tab , where you define the destination you want the rule to match. When you click Add, you will see the Add Network Entities dialog box, you can select the destination from the list or you can create a new destination. As shown in the From tab, you also have the option to create Exceptions exceptions .
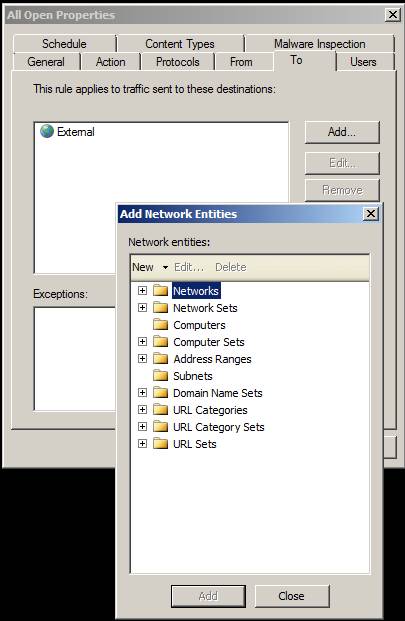
Figure 5
On the Users tab, you can define which rule will apply to which user. By default, All Users is the user set used for Access Rules. It should be noted that All Users here does not really mean all users but just anonymous connections and authenticated connections - so it means 'user scope is not considered'. If you want to force the user to authenticate, you need to use another set of users and remove the All Users user set.
If you click Add, you can select All Authenticated Users and only users who can authenticate with the TMG firewall will be allowed to access this rule. Authentication can be done through the client's web proxy configuration or the Client Firewall (TMG client) configuration. If you want to create your own user set, click the New button.
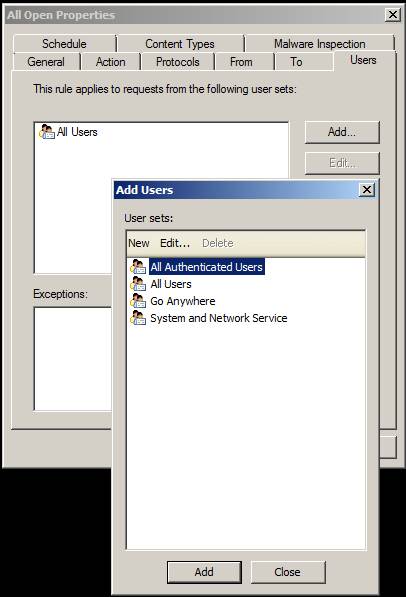
Figure 6
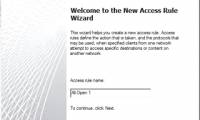
When you click New , the program will start Welcome to the New User Set wizard. On the first page of the wizard, enter a name for the user set. In this example, we will create a user set that includes the Domain Admins Active Directory group, so name this rule as Administrators and click Next .
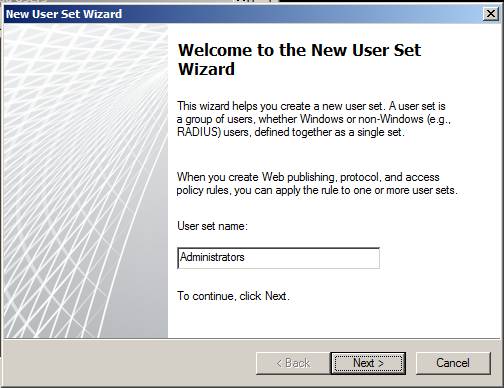
Figure 7
On the Users page, when you click Add, a menu will appear. This menu includes the following authentication sources:
- Windows users and groups - There are multiple users and groups within the Active Directory domain or an authentic domain that the TMG firewall belongs to.
- LDAP - There are multiple users and user groups within Active Directory and you can use it when the TMG firewall is not a member of the domain. Note that TMG does not support LDAP authentication for Access Rules.
- RADIUS - Users can access via RADIUS. Note that RADIUS itself does not support Group Membership, although you can create a user set containing multiple accounts that can be accessed via RADIUS, which is quite effective in special groups on the TMG firewall. . RADIUS is supported for web connections sent out via the TMG firewall.
- SecurID - There are many users defined by SecurID. However, SecurID is not supported for outbound connections via TMG firewall via Access Rules.
In this example, the TMG firewall joined the Active Directory domain, so we will select Windows users and groups .
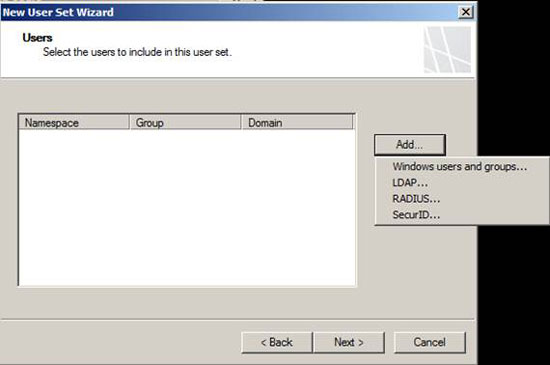
Figure 8
You will see the Select Users or Groups dialog box appear. We enter the Domain Admins into the text box Enter the object names to select and click Check Names and then click OK to add this Active Directory group to the user set.
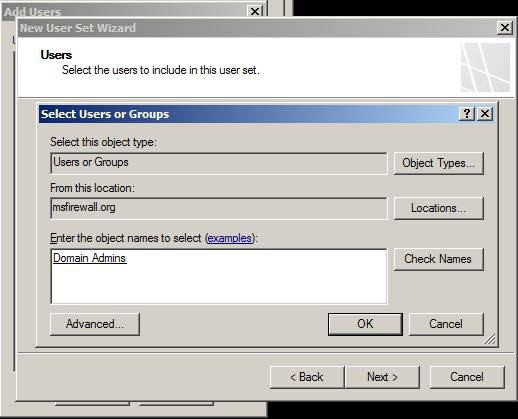
Figure 9
You will see the new user set on the Users page. You can add more users to this user set if you like. In this example, we will click Next and do not add anyone to this user set.
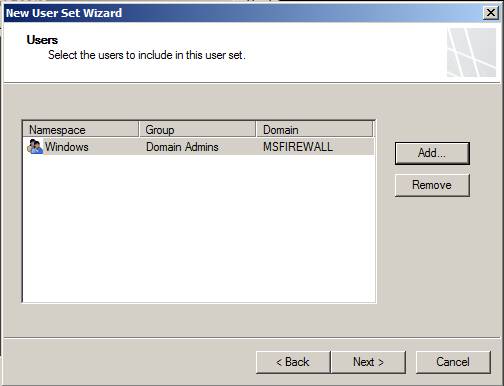
Figure 10
On the Completing the New User Set Wizard page, click Finish to create a new user set.
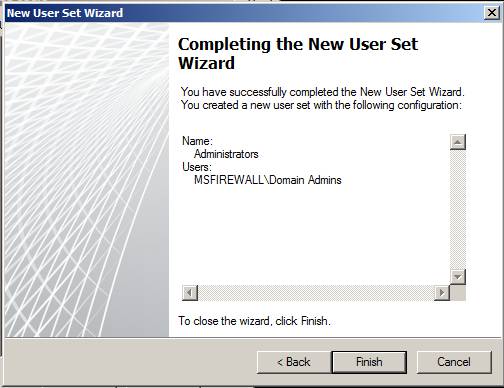
Figure 11
At this point, you can create the Administrators group in the Add Users dialog box and you can use this group in Access Rules and publish rules.
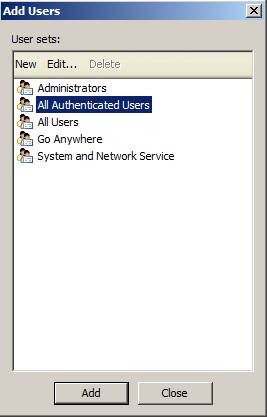
Figure 12
On the Schedule tab, you can set a schedule for the rule to set how long the rule will apply. Note that when you define a schedule, the schedule will only be applied to new connections in case the user is connected before the schedule expires, then the user's connection will not be broken. . However, if a new connection attempt matches the rule outside the schedule, the connection will be rejected. The default schedule is always Always , but there are two other accompanying schedules: Weekends and Work hours . If you don't like these included schedules, you can click the New button and create a custom schedule.
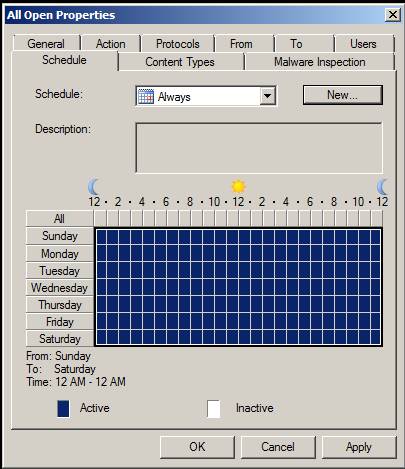
Figure 13
The Malware Inspection tab is a tab only available on the TMG firewall. There are several options on this tab that are not exposed in the Access Rule wizard:
- Inspect downloaded content from web servers to clients - When you enable this option, all content downloaded from web servers will be inspected with the Microsoft AV engine used by the TMG firewall.
- Force full content requests (removing HTTP Range header) - Forcing a firewall to require complete content so that it can be fully evaluated. If only one range is assessed, potential hazards may be missed.
- Use specific settings rule for malware inspection - You can customize the anti-malware settings for the rule when selecting this option. If you select this option, you need to click the Rule Settings button to complete your custom configuration.
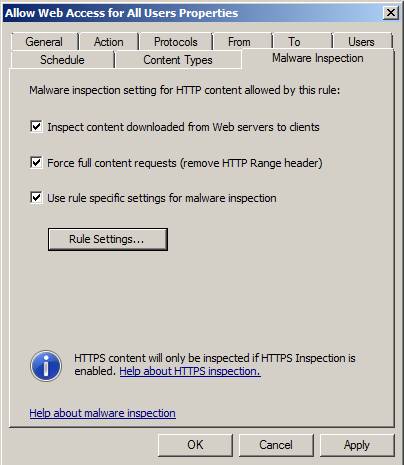
Figure 14
On the Edit Rule Malware Inspection Settings page, you have several options. The following figure shows the default settings:
- Attempt to clean the infected files - When this setting is enabled, the TMG firewall will try to clean the file before forwarding it to the user. If the file cannot be cleaned, it will delete the file.
- Block files with low and medium severity threats (Higher level threats are blocked automatically) - The default TMG firewall will not lock files at normal and low risk levels, using Microsoft AM engine classification system.
- Block suspicious files - The TMG firewall uses a reflection method to determine if a file is malware. When this option is selected, the file will be locked if the diagnostic method determines which file might be malware.
- Block corrupted files - When this option is enabled, files identified as errors will be blocked.
- Block files that cannot be scanned - When this option is enabled, if Microsoft AV engine cannot scan files, the file will be locked.
- Block encrypted files - If the file is encrypted, the Microsoft AV engine will not be able to evaluate the file and so, when this option is enabled, it will lock the file.
- Block files if scanning time exceeds (seconds) - When this option is enabled, it will limit the time the Microsoft AV engine can evaluate a file before deciding to forward or lock it. The default value is 5 minutes.
- Block files if archive level depth exceeds - When this option is enabled, the AV engine blocks files beyond the set depth here. The default value is 20 levels.
- Block files larger than coal (MB) - When this option is enabled, it will lock files larger than the values listed in the text box, with a default value of 1000MB (1GB). This option can be used to improve performance on the TMG firewall, but you need to be careful not to lock the files that users need because many users often work with large files. .
- Ảnh lưu trữ các tập tin này không có nội dung là lớn hơn (MB) - This option sets the maximum size of an unzipped file. This value is used to store memory in the TMG firewall.

Figure 15
Conclude
In this article, I have explained the details of Access Rules. Most of the options you want to configure have been exposed in the Access Rule Wizard, but there are other important options that can only be accessed after you have created the rule, by accessing the box. The rule's Properties dialog. We hope this series of two parts will be helpful to you, especially those who are new to the TMG firewall, and this information will help you create the right access policies. organize yourself.
Was this article helpful?
Your feedback helps us improve.
Related Articles
 Controlling Internet Access: Introduction to TMG Access Rule - Part 113 minutes read
 Controlling Internet Access: Introduction to TMG Access Rule - Part 313 minutes read
 Controlling Internet access - Part 4: TMG Network and Network Rule12 minutes read
 2/3 access on the Internet ... not human3 minutes read
 Introduction to Network Access Protection (Part 4)7 minutes read
 Introduction to Network Access Protection (Part 2)8 minutes read
Reader Comments 0
Sign in with email or Google to join the discussion.