Controlling Internet access - Part 4: TMG Network and Network Rule
In the next part of this article series, I will show you some of the concepts used in the TMG firewall network - TMG firewall Network and TMG firewall Network Rule.
Network Administration - In the next part of this article series, I will show you some of the concepts used in the TMG firewall network - TMG firewall Network and TMG firewall Network Rule .
In this series of articles covering the basics of the TMG firewall, we introduced you to access rules and web publishing rules. In this article, I will talk about TMG networks and network rules. TMG firewall is definitely one of the more intuitive firewalls. You don't need to memorize commands but instead use a fairly professionally designed user interface.
Create a TMG Firewall Network
The TMG firewall networking model is based on the TMG firewall 'Network' concept, with the uppercase N. A TMG firewall Network is a collection of IPv4 addresses that do not belong to any other TMG firewall Network. The NIC connects the TMG firewall itself to those IP addresses that are considered 'root' of TMG firewall Network.
Assume that you have a TMG firewall that has two NICs. An interface is connected to the Internet and it is the default External interface, it is connected to the default External Network. Another NIC is connected to another subnet, which is the default Internal Network. If the subnet is within range 10.0.0.0.-10.0.0.255 then your default Internal Network is defined by those addresses and the NIC connected to that subnet is 'root' of the default Internal Network.
In Figure 1 below, you can see the Networks tab in the Network button in the left pane of the TMG firewall interface. There are 5 default TMG firewall networks here:
- External . The default External Network includes all IP addresses that are not included in the other TMG firewall network.
- Internal . The default Internal Network is defined when you install the firewall. The default Internal Network is typically a network consisting of domain controllers (domain controllers) or DNS servers that the TMG firewall needs to perform basic operations.
- Local Host . The Local Host Network is defined by IP addresses bound to all network interfaces on the TMG firewall's NICs.
- Quarantined VPN Clients . The Quarantined VPN Clients Network is a dynamically created network, consisting of all VPN client IP addresses currently being quarantined.
- VPN Clients . The VPN Clients Network is another dynamically created network that includes the IP addresses of all VPN clients that are not currently quarantined.
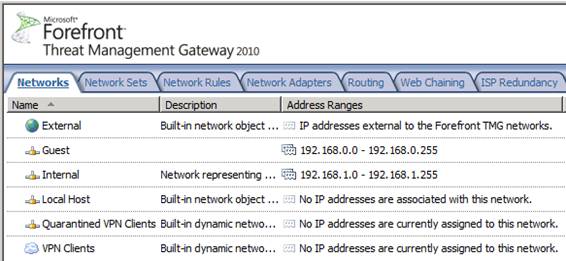
Figure 1
If you want more than two NICs in a TMG firewall, you need to create new networks to support these NICs.
Note:
To create a new TMG firewall network, click the Create a New Network link in the right pane of the console. This action will appear Welcome to the New Network Wizard , as shown in Figure 2 below. In this page, you need to assign a name to the network. In the example in the article, we named the network DMZ and clicked Next .
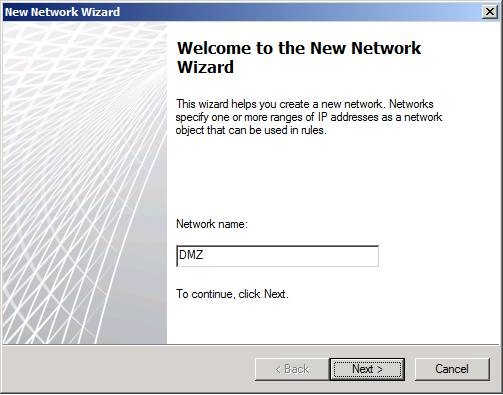
Figure 2
On the Network Type page, you must show the wizard the type of network you want to create. Here are the choices you need to choose:
- Internal Network - Internal Network is a network protected by TMG firewall. When creating an Internal Network, you will have a number of configuration options specific to that network, such as the web proxy settings used by network clients. We will mention this later.
- Perimeter Network - The Perimeter Network is similar to the Internal Network in the form of options available to you after the network is completed. In fact, there is no difference in performance between Perimeter Network and Internal Network, specifying 'type' makes it easier to distinguish which network you consider the internal network, which network is viewed is DMZ.
- VPN Site-to-Site Network - This is a special type of network that TMG uses to connect two networks over the Internet, using VPN routers.
- External Network - The External Network is a network that has no options available on Internal and Perimeter networks, and is not considered a TMG-protected network; It allows you to connect to resources outside the organization, but cannot reach (with access) via the default port on the default External Network.
In this example, we'll create a DMZ network so select the Perimeter Network option as shown in Figure 3 and click Next .
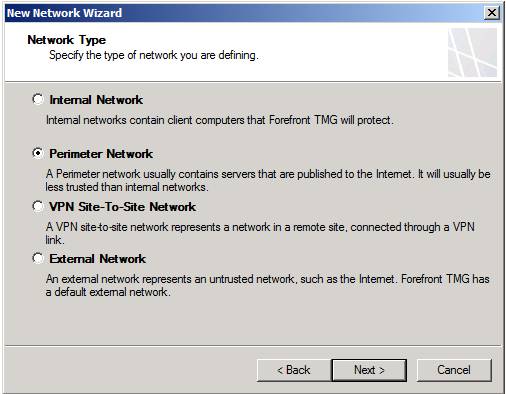
Figure 3
On the Network Addresses page, you need to configure the IP addresses used to define the network. There are many addresses that can be reached directly by the NIC connected to the network you are creating. There are three ways to add addresses to define a network:
- Add Adapter - This is the best way to add addresses. If you configure the routing table on the TMG firewall before creating the network, this option will automatically include all reachable addresses by the NIC on the network you are defining.
- Add Private . This option allows you to easily add a set of private IP addresses to define your new network.
- Add Range . This option allows you to specify a range of IP addresses to define for your network. You usually have to use this option if you have not configured the routing table on the TMG firewall; In that case, all addresses that are directly accessible by NICs are not included when you use the Add Adapter option.
In this example, we will select the NIC ( Guest ) (we renamed the NICs to make it easier to distinguish) as the root of the DMZ network being created. See the figure shown in Figure 4.

Figure 4
Review the options on the Completing the New Network Wizard page, which you can see in Figure 5 and click Finish .
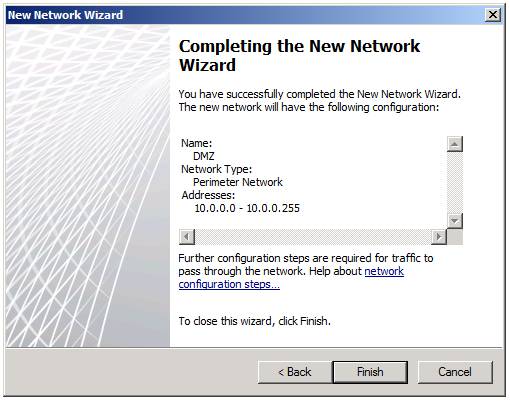
Figure 5
Here, the new network has been created. However, there is not much you can do now until you create a Network Rule.
Create a TMG Firewall Network Rule
The network is connected to other networks by network rules. If there is no rule to connect a network to another network, there is no traffic flow between networks. When you connect a network to another network, you need to define the route relationship between the networks. The route relationship can be NAT or can be Route. A linear relationship means that packets from a particular network to a destination network will be routed, just like any routed connection. If you choose NAT relations, connections from the source network will be NAT to the destination network, with the primary IP address on the NIC closest to the destination network instead of the originating IP address of the host on the source network.
To create a new rule, click the Network Rules tab in the Networks node in the firewall interface. Then click the Create a Network Rule link in the right pane of the interface. The first page you see will be Welcome to the New Network Rule Wizard, as shown in Figure 6 below. First you need to assign the name to the rule in the Network rule name dialog box. In this example we have named the rule Internal to DMZ , this is the rule that will connect the default Internal Network to the new DMZ Network. Click Next .
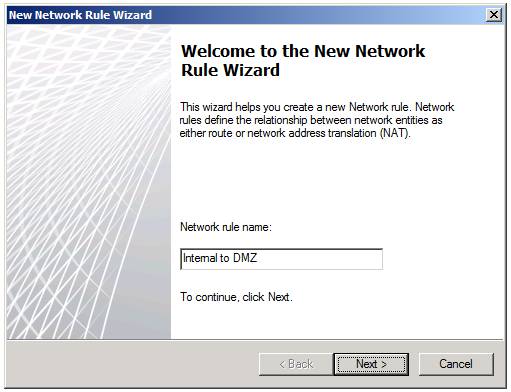
Figure 6
In the Network Traffic Sources dialog box, you need to set up the network for the network rule. In this example, we have selected the default Internal network as the source network. Click Add and then in the Add Network Entities dialog box, double click Internal , as shown in Figure 7. Click Close and then click Next .
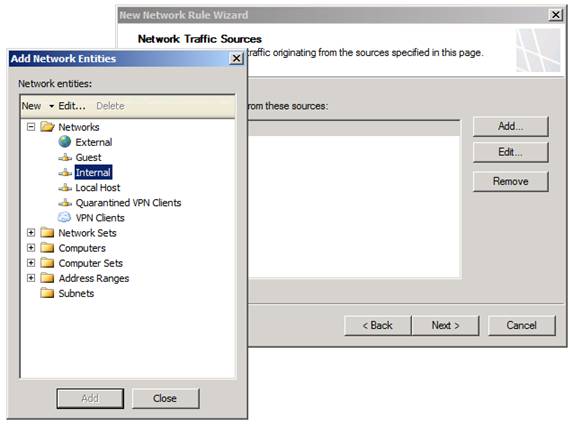
Figure 7
On the Network Traffic Destinations page, set the destination of the rule. In this example we selected the Guest network (which is a DMZ Network) as the destination side of the Network Rule. Click the Add button and select the DMZ Network from the Networks list in the Add Network Entities dialog box , shown in Figure 8, and then click Next .
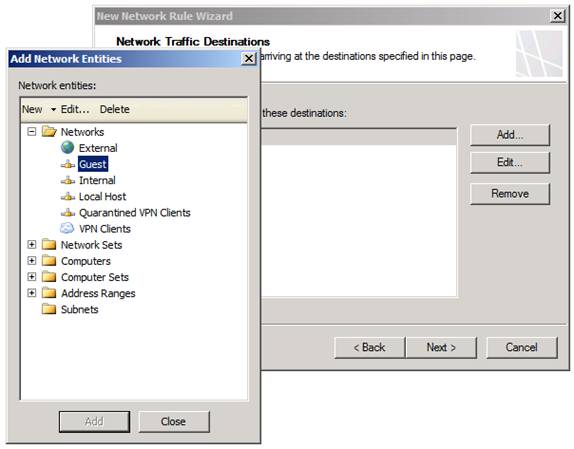
Figure 8
On the Network Relationship page , Figure 9, select the route relationship between the source and destination networks. In this example, we selected the Route option and clicked Next .
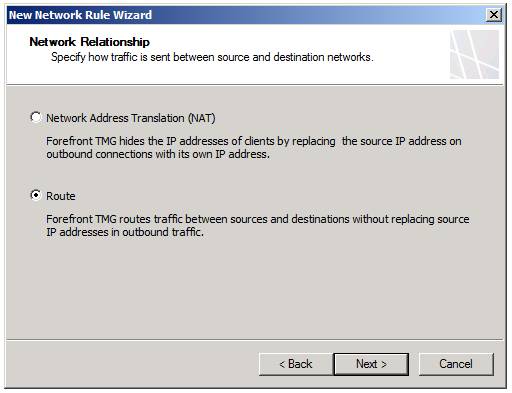
Figure 9
The last page of the wizard is the Completing the New Network Rule Wizard, as shown in Figure 10. Check your settings and click Finish .
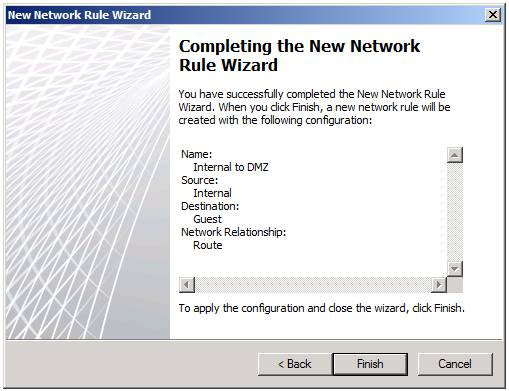
Figure 10
You can see the new network rule in the Network Rules list in the Network Rules page, as you can see in Figure 11. Network Rules are evaluated in order - so if you see overlap in some rules you can Move the rule you want to be rated higher on the list by right-clicking on it and clicking the Move Up command. After the rule to transfer is in the desired location, click the Apply button to save the configuration to the firewall policy.
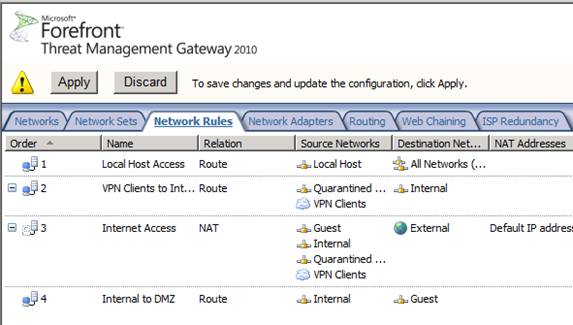
Figure 11
Conclude
In this article, I have shown you some of the basic concepts used in TMG firewall networking - TMG firewall Network and TMG firewall Network Rule. If you've never used more than two NICs in a TMG firewall, you'll never need to think about this topic. However, if you decide you want to raise the TMG firewall to a higher level, you can install multiple NICs in the firewall and create new TMG firewall networks. The important thing to remember here is that you cannot use those networks until creating a rule to connect those networks together. When networks are connected through certain rules, communication is allowed between these networks.
In the next article in this series, I will show you the default options available in the network configuration when creating an Internal or Perimeter network.
Was this article helpful?
Your feedback helps us improve.
Related Articles
 Controlling Internet Access: Introduction to TMG Access Rule - Part 216 minutes read
 Controlling Internet Access: Introduction to TMG Access Rule - Part 113 minutes read
 Controlling Internet Access: Introduction to TMG Access Rule - Part 313 minutes read
 2/3 access on the Internet ... not human3 minutes read
 Introduction to Network Access Protection (Part 4)7 minutes read
 Introduction to Network Access Protection (Part 2)8 minutes read
Reader Comments 0
Sign in with email or Google to join the discussion.