Configure the VMware VirtualCenter Management Server
In this article, I will show you how to configure the VMware VirtualCenter Management Server and personalize it.
In this article, I will show you how to configure the VMware VirtualCenter Management Server and personalize it .
Introduce
When working with VMware, you will immediately see the advantages of consolidating the management of multiple ESX servers in your environment into a VirtualCenter for centralized control. VirtualCenter is an excellent solution for providing high availability services (HA) and centralized testing. Also personalize easily the VirtualCenter after your initial installation. In this article, I will show you how to configure the VMware VirtualCenter Management Server and personalize it.
Configure the VirtualCenter Management Server options
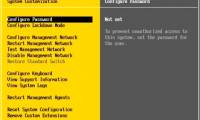
The VMware VirtualCenter (abbreviated to VC) is used for centralized management of multiple VMware ESX servers. VC helps provide reporting, logging and other management services for your virtual environment. Registration, Active Directory configuration, SNMP, email checking and advanced security can all be configured within the VC. Launch the VMware Infrastructre Client (VIC) to access the VC. When working with VC, go to Administration in the toolbar and select 'VirtualCenter Management Server Configuration'.
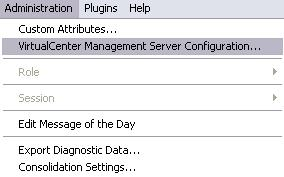
Figure 1
Once selected, the VirtualCenter Management Server Configuration dialog box will appear and allow you to configure options within the VC. These options will help you not only register the VC but also allow you to maintain it. Below are some configuration options.
- Options for registration
- Collect statistical data
- Configure runtime settings
- Email notifications
- Test based on SNMP
- Protocol settings on the web
- Timout settings
- Recording options
- Database
- SSL settings
- Advanced settings
Here, you can see the options from the left of the VirtualCenter Management Server Configuration dialog box. To learn more about each section, we have introduced in detail each of the configurations in the section below.
Register the server
Next, you can configure options for registration. When installing VC, the main installation configuration options will allow you to evaluate VC, or register it to use the product. The License Server can be configured to use registration services on the VC server itself or use its own Licsene Server. Other configuration options need to select the VC version and allow new hosts to be added to the inventory when added.
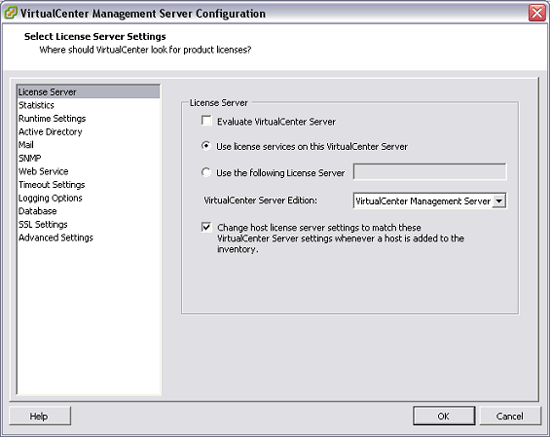
Figure 2
Statistical
When choosing Statistics, you can configure how the VC collects statistics. In this option, you can view the Statistics Intervals by default as well as edit them.
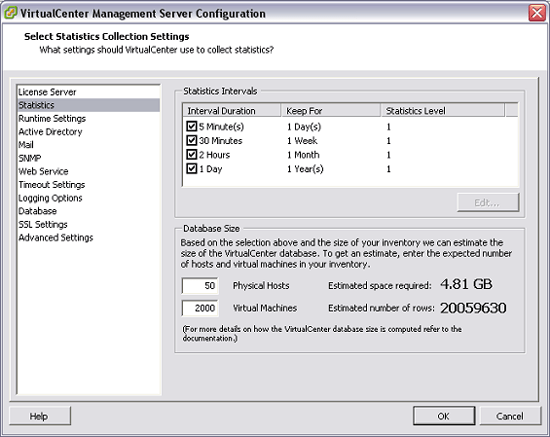
Figure 3
To edit the current configuration intervals, simply highlight the statistics interval setting you want to edit and click the Edit button.
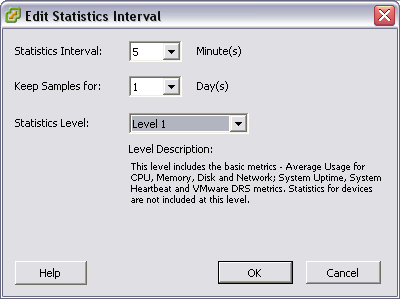
Figure 4
At this point, you can configure the time period, the date to keep templates and levels to use for specific collections. For example, level 1 includes basic issues like the average performance of CPU / Memory / Disk and CPU / Memory / Disk as well as System Uptime and VMware DRS.
In addition to configuring things such as collection periods, statistical restrictions, and statistical levels, you can also specify the number of threads used to collect performance statistics from managed hosts and Detailed level for collection of performance statistics.
Runtime settings
When you switch down to the VirtualCenter Management Server Configuration settings, you will see the Runtime settings. Here you can see or configure the unique run-time settings for VirtualCenter installation. Here, you can see that the VC Server's unique ID is set to 36. You can also configure the VirtualCenter TCP / IP port number. Here, the port is set to 902. Finally, you can configure the server's IP address.
Note : You need to restart the VC to change all foreign settings from managed IPs.
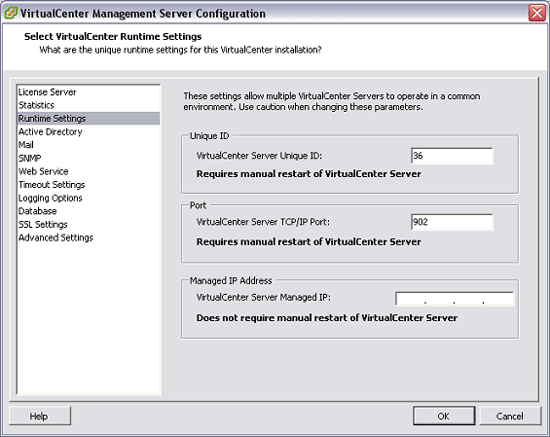
Figure 5
Active Directory
Most applications connect to the LDAP directory for authentication and other security reasons. Active Directory (Microsoft LDAP is providing) is a commonly used directory service. Here you will be able to configure certain settings such as Active Directory timeout, maximum number of users and groups displayed in the Add Permissions dialog box and the frequency for performing user synchronization and validation. and a known user group of VirtualCenter. The Enable Validation checkbox allows you to configure Validation Period (quickly). This allows you to configure the amount of time that the VC will wait before performing the synchronization and validation of users and groups for Active Directory.
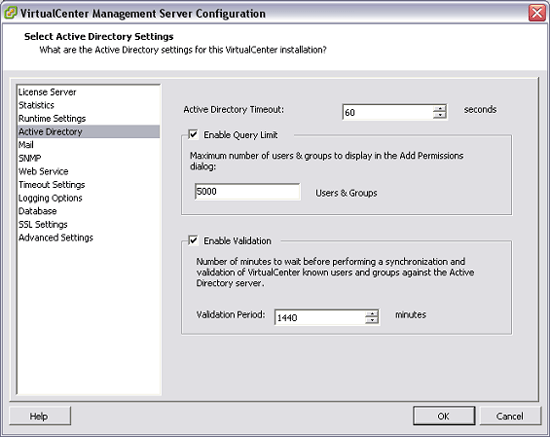
Figure 6
Next, you can configure Mail options, which is a very simple operation. Specify the SMTP server and mail account that you like the VC to use to forward mail.
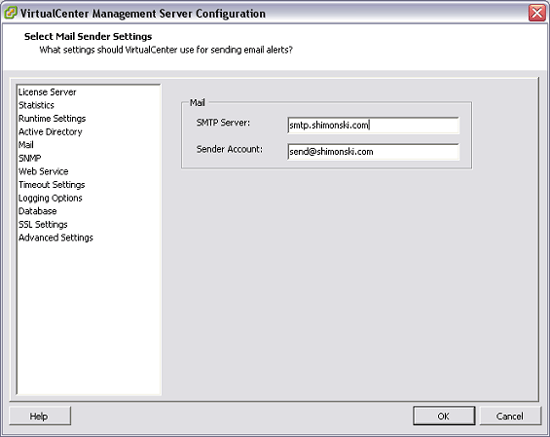
Figure 7
SNMP
You can also configure Simple Network Management Protocol (or SNMP) for VirtualCenter.
You can now configure and specify URLs, ports and community strings. Note that the default is called public and private, so many times it often changes these default passwords (or community strings).
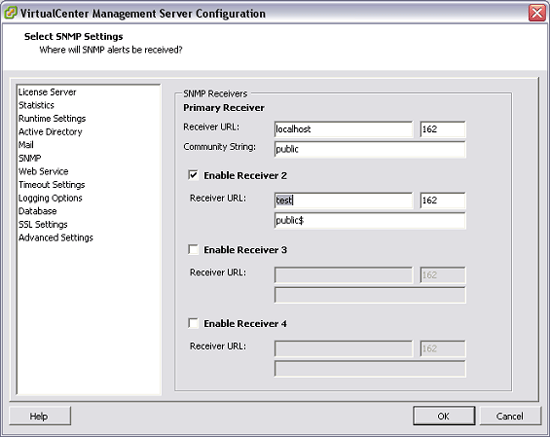
Figure 8
Web Service
In this section, you can configure Web Service. With VC, you can connect via web browser and manage VC, download VIC and other software, check the status of your ESX environment. You can specify the shared web port - such as port 80 for HTTP and port 443 for HTTPS.
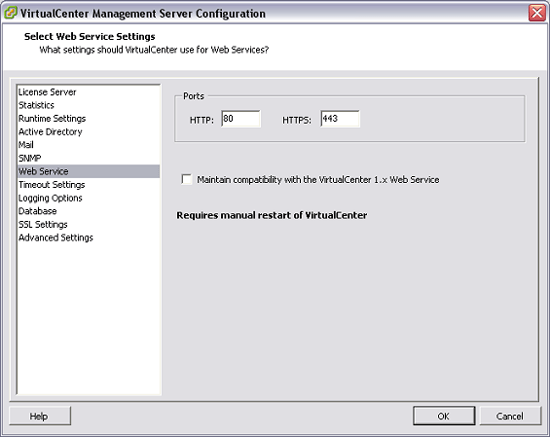
Figure 9
The Timeout setting
Within Timeout settings, adjust the VC settings to use for both connections and timeouts. If the client connects to VC, it is necessary to specify certain timeout cycles. Specify timeout values for a VIC (Virtual Interface Client) connection for normal operations and long operations, in this case, it is set to 30 seconds for normal operations and 120 minutes for operations. long action.
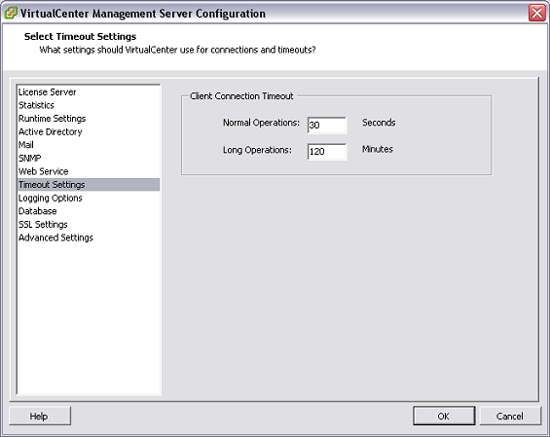
Figure 10
Recording options
In Logging Options, you can specify the level of detail and scope of records collected during normal VirtualCenter operations. There are so many options:
- Info (regular notes)
- None (disable recording)
- Error (errors)
- Warning (error and warning)
- Info (regular notes)
- Verbose (long note)
- Trivia (extended notes)
Here, you can configure which level of logging you want the VC to take. This needs to be used with care. For example, if you decide to perform advanced troubleshooting and change the recording type for VC, make sure you're working close to VMware's technical support team or knowing exactly what you're doing. perform.
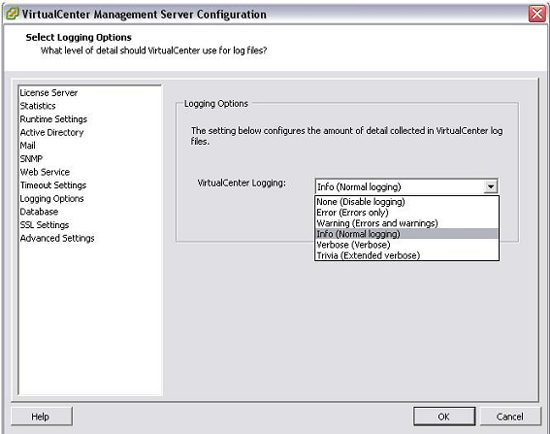
Figure 11
Database
When configuring the Database section, specify the password needed to access the VirtualCenter database. You can also change the maximum number of database connections that will be created. If you change this option, you will have to restart the VC yourself.
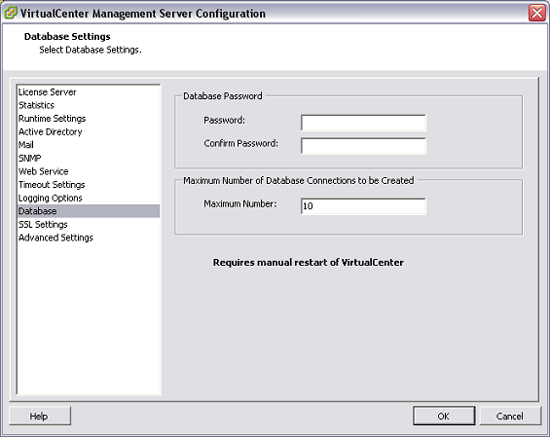
Figure 12
SSL settings
When working with SSL (or Secure Sockets Layer), you need to make sure that the VC is configured to do so. For example, if you configure this option and check the box for Check host certificates, you need to make sure that the VC Server and VIC verify the authenticity of the SSL certificates you choose to use. To use, you need to know how to use, work and replace VirtualCenter Server Certificates.
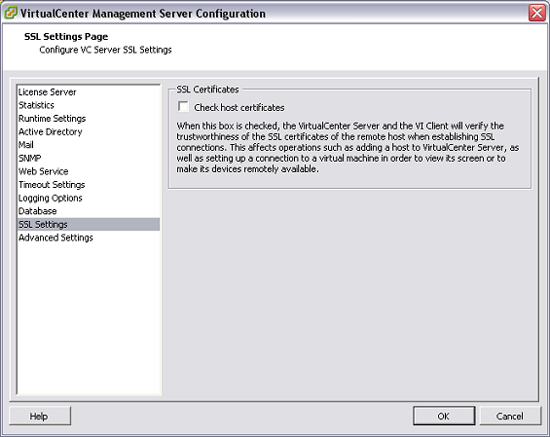
Figure 13
Advanced settings
Finally you can configure advanced settings. Here, you can add rows and values.
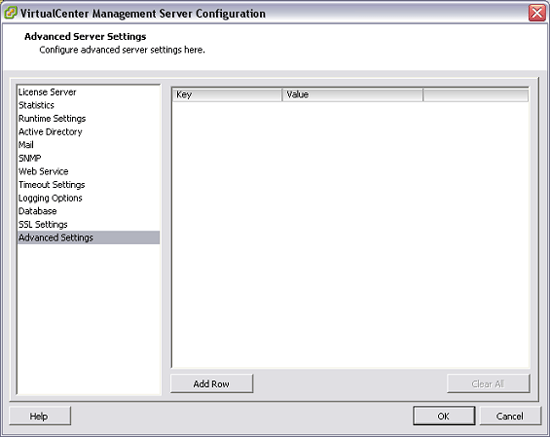
Figure 14
You can use the Advanced Settings page to change the VC Server configuration file, the file named vpxd.cfg. You can use the SDK to edit this file. This file should not be edited unless you know exactly what you are doing. You can use this section to add entries to the vpxd.cfg file, but it cannot be used to edit or delete them. To add configuration settings, click Add Row to create an empty row. Depending on the change you make to the vpxd.cfg file, it will depend on whether you need to restart the VC or not.
Conclude
In this article, I have shown you some configuration changes that you can make to the VirtualCenter management configuration. VMware VirtualCenter (or VC) is used for centralized management of multiple VMware ESX servers and helps support reporting, logging, and other management services for your virtual environment.
Was this article helpful?
Your feedback helps us improve.
Related Articles
 Consider about VMware Server 2.0 RC19 minutes read
 How to install and configure MySQL server on Pi6 minutes read
 How to configure DNS Server on Ubuntu Server 11.043 minutes read
 Configure DPM in VMWare6 minutes read
 How to access VMware ESXi hidden interface7 minutes read
 How to install VMware ESXi4 Server5 minutes read
Reader Comments 0
Sign in with email or Google to join the discussion.