VMware: Find out about Virtual Switch
Robert J. Shimonski
Network Management - In this article we will introduce you to VMware 'Virtual Switch'. The Virtual Switch is just a logical switch structure attached to the VMware infrastructure (ESX) that can connect virtual machines in many ways. The following section will introduce you to the basics of Virtual Switch as well as the techniques used and how to use, configure and manage. To view the Virtual Switch, you need to use VMware, VIC and need to have access to VirtualCenter.
Find out about Virtual Switch
VMware infrastructure networking components will not be easy to comprehend without knowing a bit of background information and understanding of 'network activity' in general. First, network activity is the connection for shared resources, systems, and services wherever you have access. In a 'logical' or 'virtual' environment you have to know the difference between a logical adapter and a virtual adapter and how to link them all together through a virtual switch (logical) structure configured by VMware. Figure 1 shows the basics of VMware virtual connection.
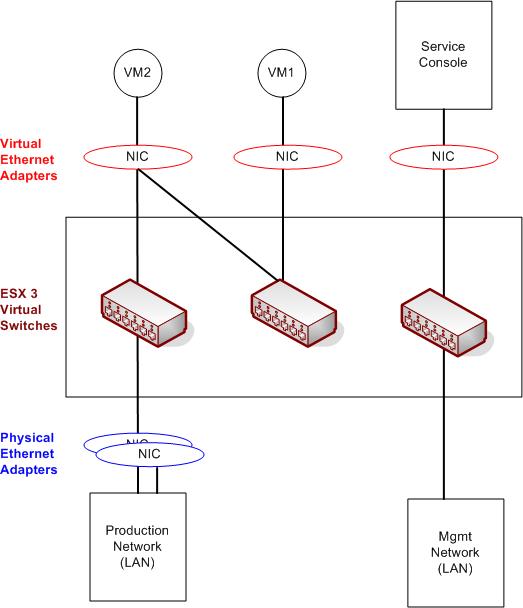
Figure 1: Virtual infrastructure in general
VMware infrastructure is implemented in modular design so that all resources can be shared and assigned if needed. Virtual and physical networking components are all designed in the same way. If you need to share some logic and virtualization resources, you only need to provide these components and then configure them to work. This creates the most flexibility and efficiency. In Figure 1 here, you can see that virtual machines can be connected through a virtual conversion component, then connect to physical NICs if needed. In Figure 1, you will also see that network management is completely separate from the rest of the network, thus increasing the security of your infrastructure management. Necessary network components provided by ESX is a virtual Ethernet adapter, used by separate virtual machines (VMs) and virtual switches used to connect each VM to each other or to the ESX service console. To configure this functionality, you need to log into VMware VirtualCenter and browse to the server you want to configure. Once you've selected it, you can select the Configuration tab as shown in Figure 2.
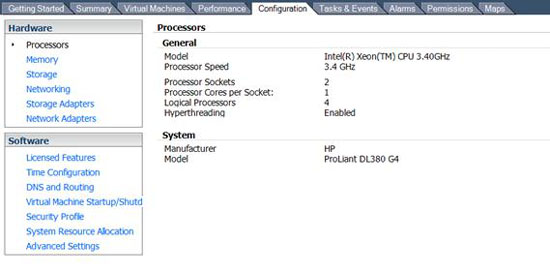
Figure 2: Configuration tab in VirtualCenter
In Figure 3, you can select the Network Adapter from the Hardware menu, and you can also see the presence of devices, their speed, and which switches they connect to.

Figure 3: The Network Adapter properties sheet
When the physical NIC is set up correctly, we only need to add the NIC from VM with your Virtual Switch.
Configure Virtual Switch
Configuring Virtual Switch is not difficult at all if you know your options. If you understand the concept of logic and physics, all you need to do now is configure them. Obviously, if you have deployed your ESX server, you may have one or two NICs installed inside. There are many of your physical NICs. Within the ESX environment, you can configure the properties of the logical aspect of the switch to connect your virtual machines to its network and the external environment, which is the network that your internal LAN is connected to. connect to WAN or Internet. That said, all you need to do now is configure virtual machines, then network adapters for each virtual machine in Virtual Switch. Figure 4 shows the properties of Virtual Switch.
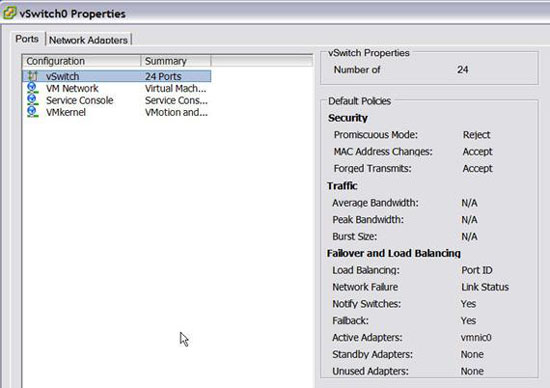
Figure 4: Property page of Virtual Switch
In Figure 5, you can configure virtual NIC properties. For example, if you need to configure the speed and duplex of vmnic, all you need to do is click the Edit button, then select the desired speed and duplex.
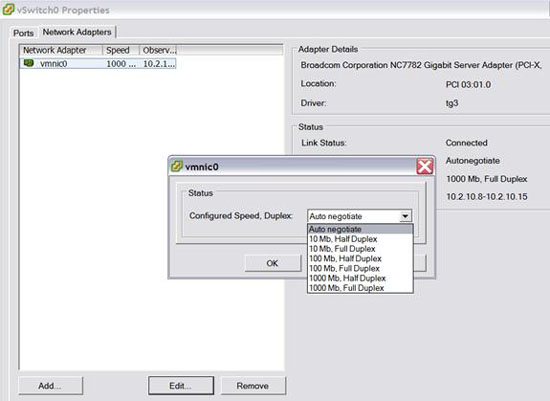
Figure 5: Set Speed and Duplex on Virtual NIC
You can also configure the port number used in the switch. Ports allow you to create a virtual NIC based connection from a VM to a Virtual Switch. Figure 6 shows the configuration of the ports on the General tab of the Virtual Switch properties page.
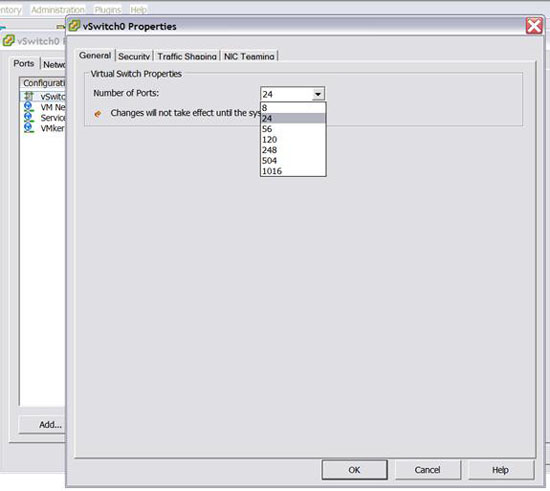
Figure 6: Configure the port number
If you need to, you can also click the Add… link on the Configuration tab in the service console - this way can help summon the Add Network Wizard as shown in Figure 7. You can add a VM connection, a VMKernel or a Service Console connection.
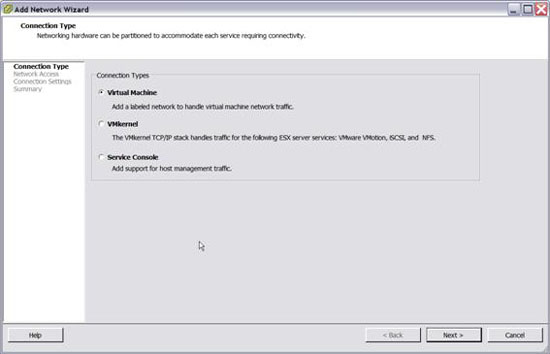
Figure 7: Using Add Network Wizard
If you choose to add a network based VM, in Figure 8, you can choose which physical NIC you want to connect to and in the preview window, you can see the network map being set up.
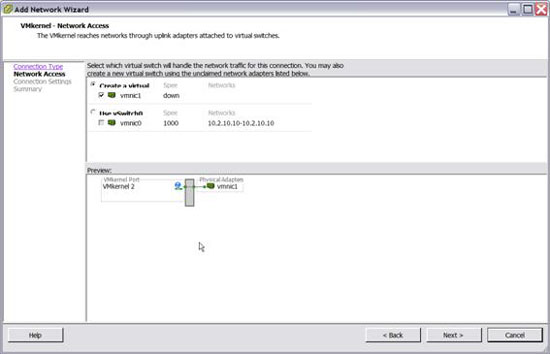
Figure 8: Start creating a network
Conclude
In this article, we introduced the physical components of VMware and logical network operations. As mentioned, Virtual Switch is easy to configure if you know what options are needed. Find out more about VirtualCenter's network operation options and how to configure virtual aspects of NICs and switches.
You should read it
- ★ Instructions for speeding up virtual machines in full set
- ★ Stealing virtual machines and virtual machine data
- ★ Top 5 tips for installing and using VMware virtual machine
- ★ How to create a Windows 10 virtual machine with VMware Player and VirtualBox
- ★ How to copy data from real machine to VMware virtual machine