Common errors during OneNote synchronization on Windows 10 and how to fix them.
Understanding the errors that occur during OneNote synchronization on Windows 10, as well as how to fix them, will help you proactively resolve issues when they arise. Let's explore the causes and solutions for these common errors with Taimienphi..
Microsoft OneNote is one of the best applications for creating notes, compiling research data, organizing frequently used information, and you can use OneNote anywhere – on Windows 10 devices, as well as on Android, iOS, macOS devices, and on the web. Below are common errors during OneNote syncing on Windows 10 and how to fix them.
Common errors during OneNote synchronization on Windows 10 and how to fix them.
Fixing notebook (notes) syncing issues in OneNote
If a particular notebook (notebook) fails to sync with OneNote, you can try some of the solutions below to fix the problem.
Check the notes on the web.
You can quickly identify the problematic service by trying to open the notes using a web browser.
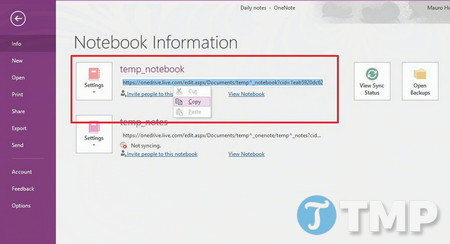
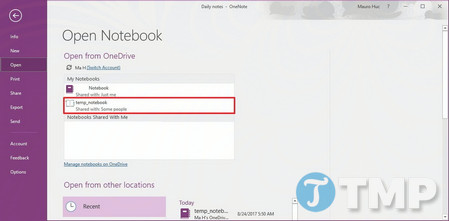
Step 1 : Open OneNote, then click File , and then select Info.
Step 2 : In the right-hand pane, find and right-click the link, then select Copy (or right-click the note and select Copy Link to Notebook ).
Step 3 : Open any web browser on your computer.
Step 4 : Right-click and paste the link into your browser's address bar, then press Enter to open the note.
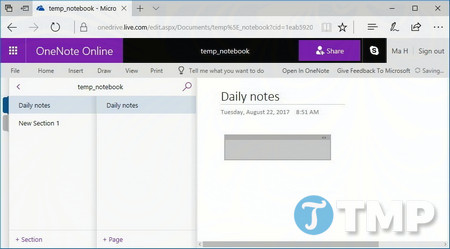
If you can't open the notes in your browser, the problem might be with the desktop client.
Try reopening the notes.
If the error is due to the application, try reopening the notes app again to fix the syncing issue.
Step 1 : Open OneNote, click File , then select Info .
Step 2 : Click on Settings and then select Close (or right-click on the note and select Close This Notebook ).
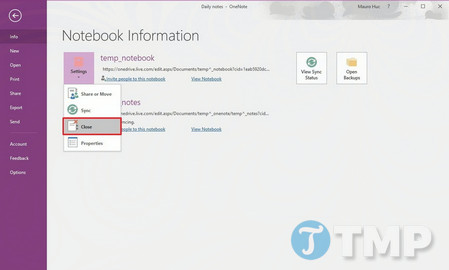
Step 3 : Click on File , then select Open .
Step 4: Click to select the note you want to open.
After completing the steps above, the connection will be reset and your notes will be synced.
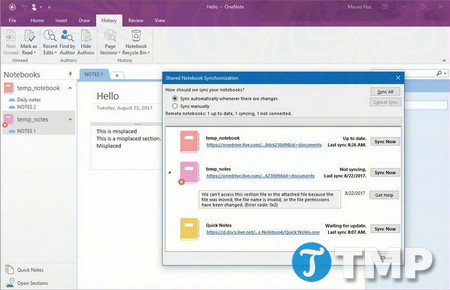
Check synchronization status
If you can open the online notes but don't see any changes, you'll need to check the sync status to find the specific error and fix it.
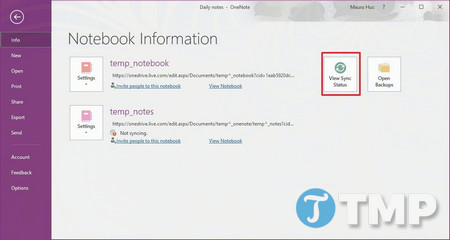
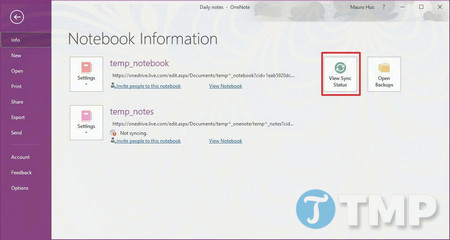
Step 1 : Open OneNote, click File , then select Info .
Step 2 : Click the View Sync Status button (or right-click on the notebook and select Notebook Sync Status ).
Step 3 : If available, click the Get Help button to access additional steps and troubleshoot the specific problem.
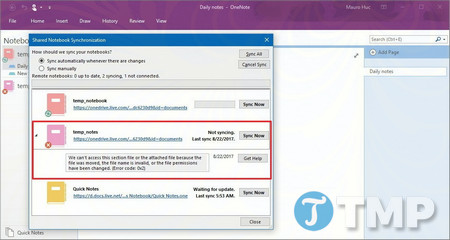
If the "Get Help" button isn't displayed, you'll have to note down the error or error message and search online for a solution.
An important note is that you must open OneNote and log in to your account.
Check the service status.
If you can't open your notes in your web browser, the root of the problem is most likely with the OneDrive service. Use Internet Explorer or Microsoft Edge , then go HERE to check.
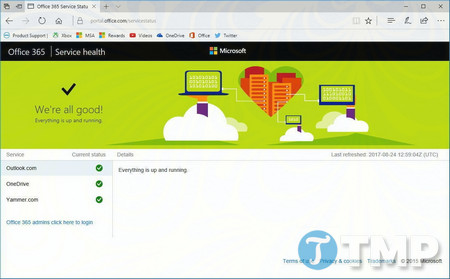
If OneDrive is still running, you can contact Microsoft support for assistance.
Fixing Section sync issues in OneNote
When sharing a notebook with others, you might encounter a problem where a particular section is out of sync. In this case, you can try manually syncing that section, or copying the pages to a new section and then deleting the faulty section.
Manually synchronize sections.
If a section doesn't automatically sync in OneNote, you can sync it manually.
Step 1 : In OneNote, click File , then select Info .
Step 2 : Click the View Sync Status button (or right-click on the note and select Notebook Sync Status ).
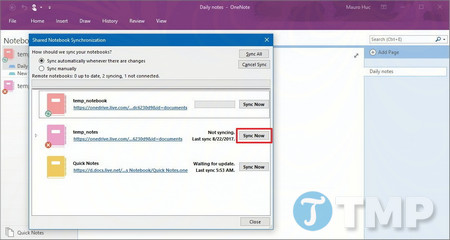
Step 3 : In the Shared Notebook Synchronization section , click the Sync now button next to the option not to sync.
Copy pages to a new section.
If a section in OneNote refuses to sync, you can try copying the pages to a new section, then deleting the faulty old section.
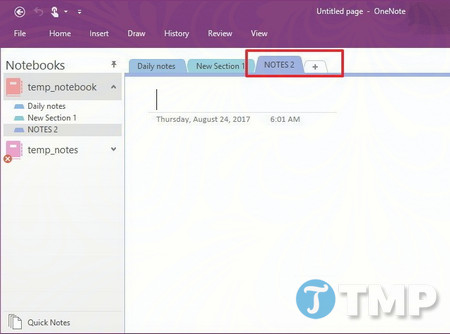
Step 1 : In OneNote, click the Create a New Section button located in the navigation bar.
Step 2 : Use a descriptive name for the new section.
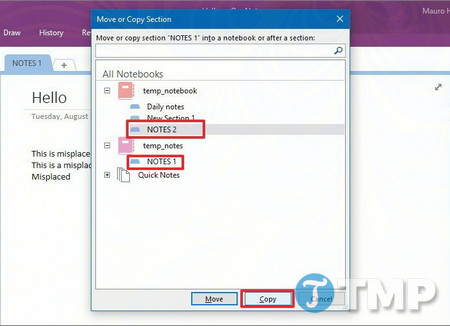
Step 3 : In the section with the synchronization error, right-click on each page and select the Move or Copy option .
Step 4 : Select the new section you just created, then click Copy .
After completing the above steps, you can continue to manually synchronize the section. If everything works correctly, you can delete the old, faulty section by right-clicking on it and selecting Delete .
Clean out your OneNote trash bin.
Sometimes, deleting old, faulty sections or sections you no longer use can cause synchronization errors. That's why you should thoroughly clean out any deleted sections from the Recycle Bin.
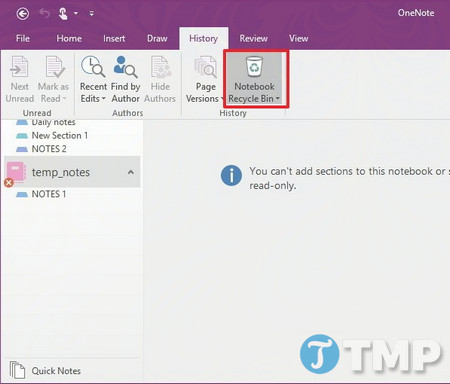
Step 1 : In OneNote, click the History tab .
Step 2 : Click the Notebook Recycle Bin button .
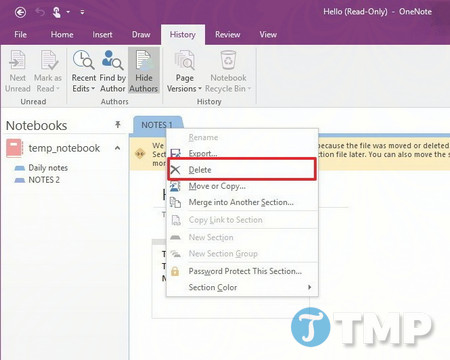
Step 3 : Right-click on each section and select Delete .
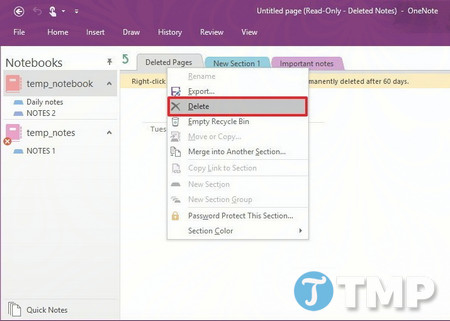
If the section contains pages you want to keep, follow the instructions above to copy the pages to the new section and empty the recycle bin.
Fixing missing sections in OneNote
When you share a notebook with another user and OneNote tries to sync the changes to a section but can't find the section file, it will appear in a different location with an icon in the Notebook list.
If you are facing this error, you can try moving the section to a different notebook or deleting it.
Move the missing section to a different notebook (notebook).
If you find a lost section, OneNote allows you to move it to your notebook.
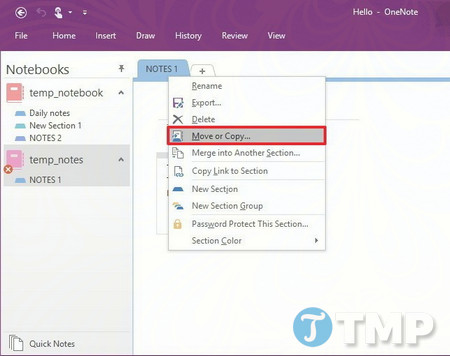
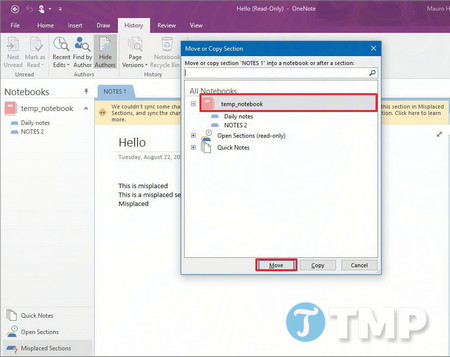
Step 1 : In OneNote, right-click on the tab containing the missing section, then click Move or Copy .

Step 2 : In the Move or Copy Section , click to select the notebook you want to move or copy from the list.
Step 3 : Click the Move button or the Copy button , depending on what you want to do.
Delete the lost section from the notebook.
If you no longer need that section, you can delete it.
Step 1 : In OneNote, in the Notebooks list, click Misplaced Sections .
Step 2 : Right-click on the section name and select Delete .
Fixes content conflicts during syncing on OneNote.
When collaborating with other users to edit the same text, you may encounter content conflicts during synchronization in OneNote. Upon detecting a conflict, OneNote will create duplicate copies of the same page, and you will receive a yellow notification on your screen.
If you encounter content conflicts during syncing in OneNote, you will need to copy the content to the main page and delete that page.
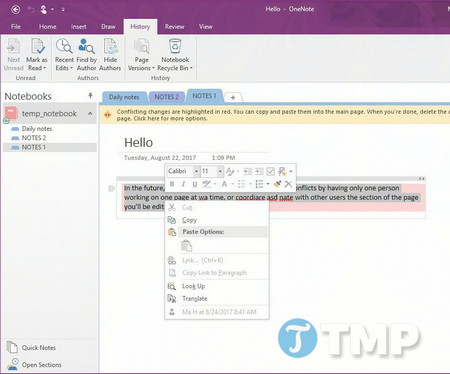
Step 1 : In OneNote, at the top corner of the page, click the yellow error message.
Step 2 : Copy the content from the current page displaying the error message and paste it into the main page.
Step 3: Right-click on the corrupted page and select Delete to remove it.

To minimize content conflicts during synchronization in OneNote, the only solution is to assign each person to edit one document at a time.
Fixes the "insufficient storage space" error during syncing in OneNote.
In the rare case that you receive an error code, such as 0xE00015E0, it means your device does not have enough free space or the notebook is too large to sync.
Backup errors in OneNote usually occur because the number of backup files is too large.
To quickly resolve this issue, adjust the backup settings in OneNote.
Optimize the files
One way to prevent synchronization issues is to optimize the space the notebook uses.
Step 1 : In OneNote, click File , then select Options .
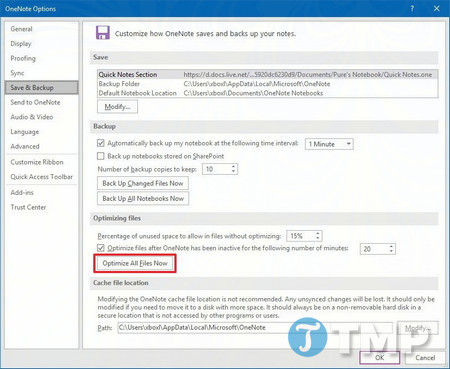
Step 2 : Click on Save & Backup .
Step 3 : In the Optimizing files section , click the Optimize All Files Now button .
Limit automatic backups.
In addition to optimizing files, you can also set a reduction in the number of times OneNote automatically backs up to save storage space and prevent future synchronization issues.
Step 1 : In OneNote, click File , then select Options .
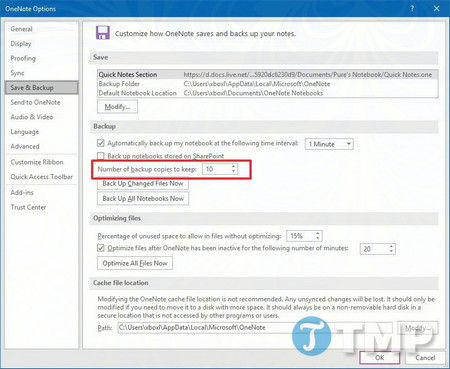
Step 2 : Click on Save & Backup .
Step 3 : In the Backup section , reduce the number of automatic backups in the Number of backup copies to keep section .
Delete unnecessary backups.
Additionally, you can free up space by deleting unnecessary backup files.
Step 1 : Press the Windows + R key combination to open the Run command window.
Step 2 : In the Run command window, enter the following command and press Enter or click OK :
%localappdata%MicrosoftOneNote
Step 3 : Double-click the folder corresponding to the version number you installed. For example, 16.0 is OneNote 2016.
Step 4 : Double-click the Backup folder .
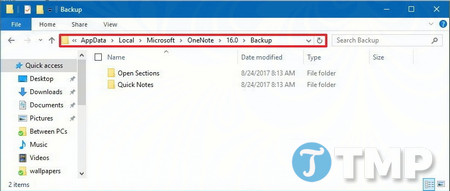
Step 5 : Delete backup files that you no longer use.
After completing these steps, OneNote will synchronize large notebooks (notebooks) without any further problems.
Above, TipsMake has compiled and introduced common errors during OneNote synchronization on Windows 10 and how to fix them. However, remember that sometimes errors can occur due to the program itself. This is why you should update to the latest versions of OneNote on your computer and use them, as these versions include bug fixes and new features.
To quickly check for OneNote updates on your computer, go to File => Account => Office Options , and click the Update Now button .
Additionally, before attempting to troubleshoot errors or issues during OneNote synchronization, you should first check your internet connection. It's very likely that the root of the problem lies in your internet connection.
Currently, besides OneNote, Evernote is also a popular software used by many people for taking notes. If you are using Evernote and want to transfer data to OneNote, it's very simple. The detailed instructions on how to transfer data from Evernote to OneNote are provided here.