Table of Contents
This guide provides a clear overview of change administrator, including 1. Using Windows Settings, 2. Change Administrator in Windows Via Control Panel. Use it to understand the topic, compare the available options, and make a more informed decision.
Note : To prevent non-administrators from gaining unauthorized access, Windows requires you to make changes from the existing Administrator account.
1. Using Windows Settings
When you want to change the administrator in Windows, the simplest way is to use Windows Settings.
1. Open Settings.
2. Select Accounts in the left pane.
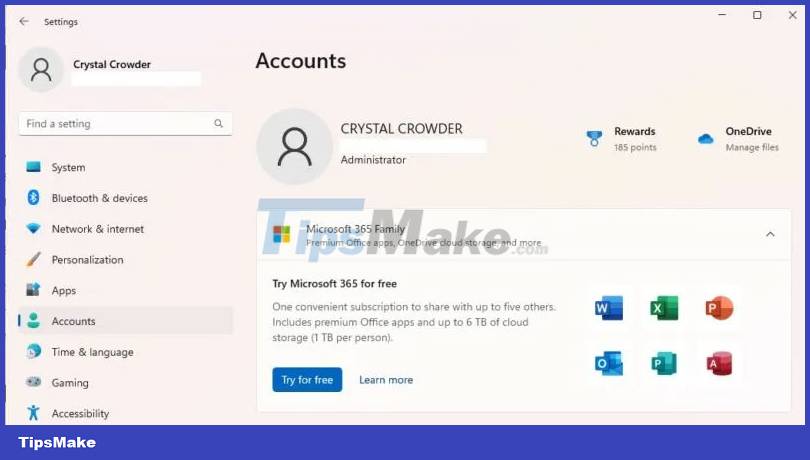
3. Select Other users on the right. This option is called Family & other users in Windows 10.
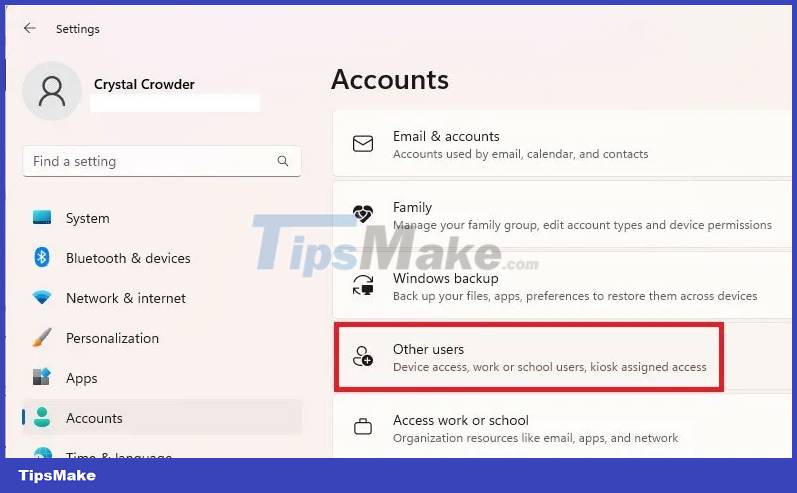
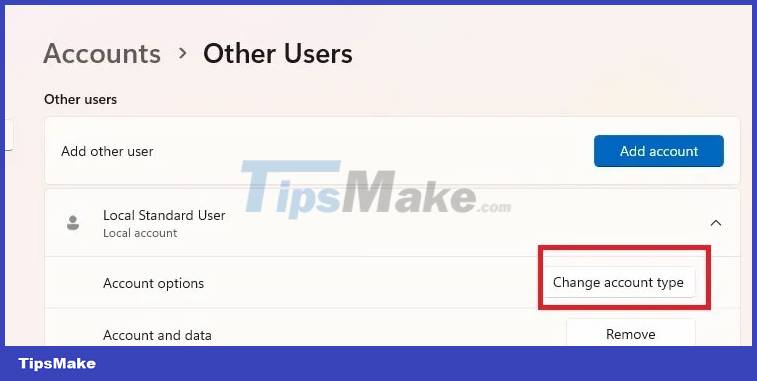
4. Select the desired user from the list.
5. Click Change account type .
6. Select Administrator from the list of account types and click OK to confirm.
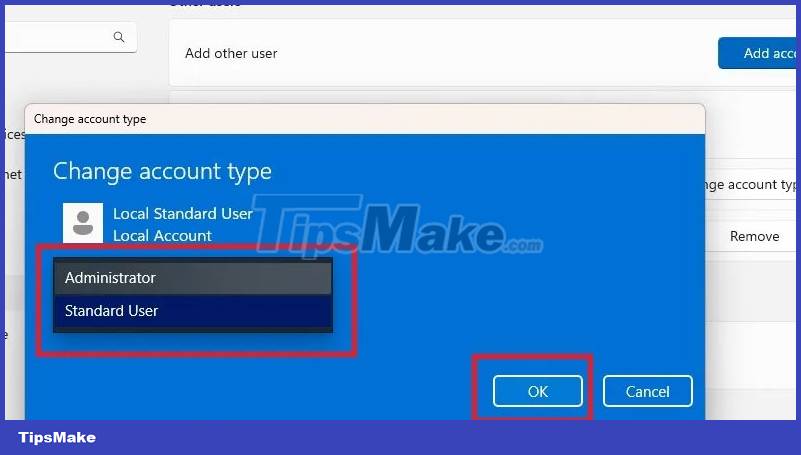
You can easily downgrade the administrator account using the same method.
2. Change Administrator in Windows Via Control Panel
If you prefer to change settings from Control Panel rather than Settings, follow these steps:
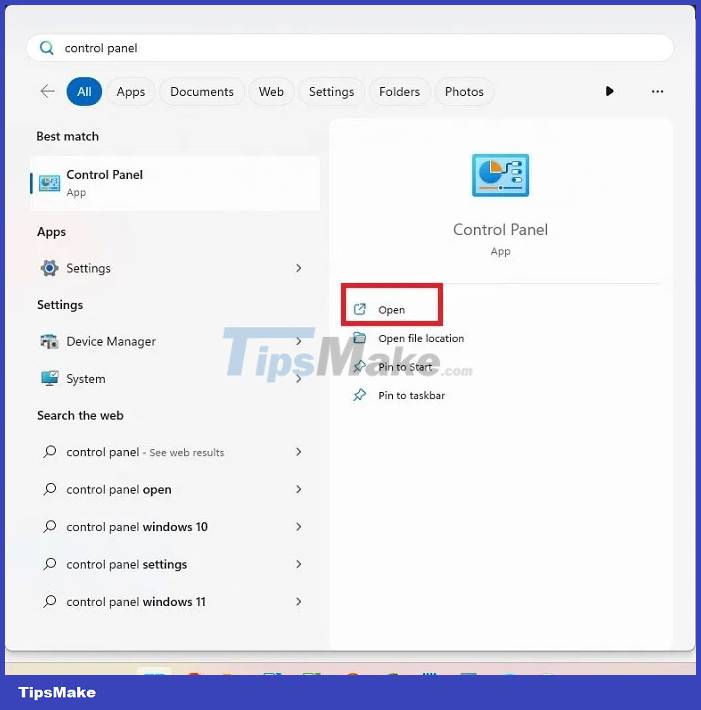
1. Go to Start and search for Control Panel , then click Open.
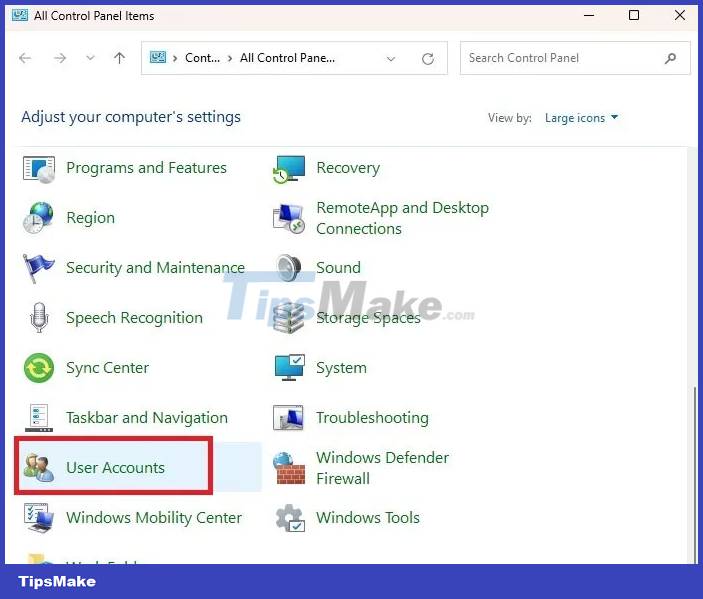
2. Select User Accounts.
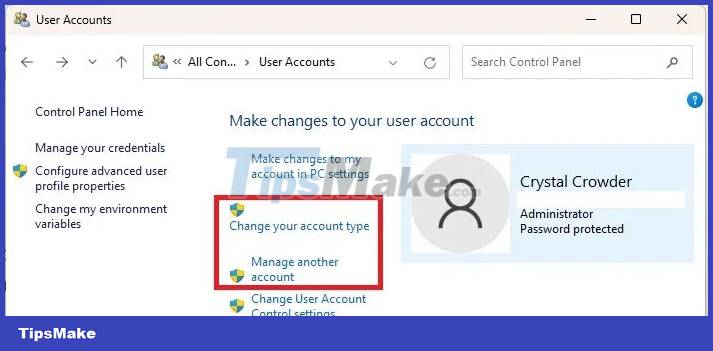
3. If you want to change your own account type, select Change your account type . For other accounts, select Manage another account .
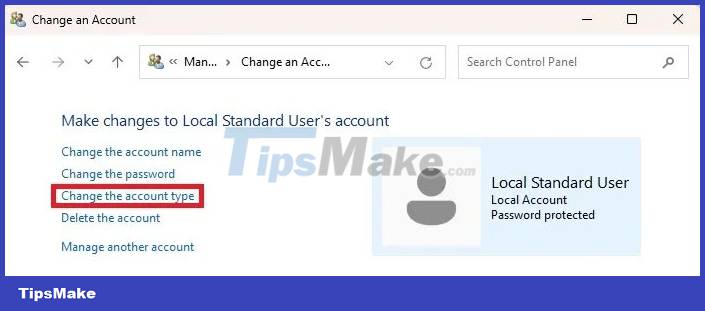
4. Select the account you want to change, then select Change the account type .
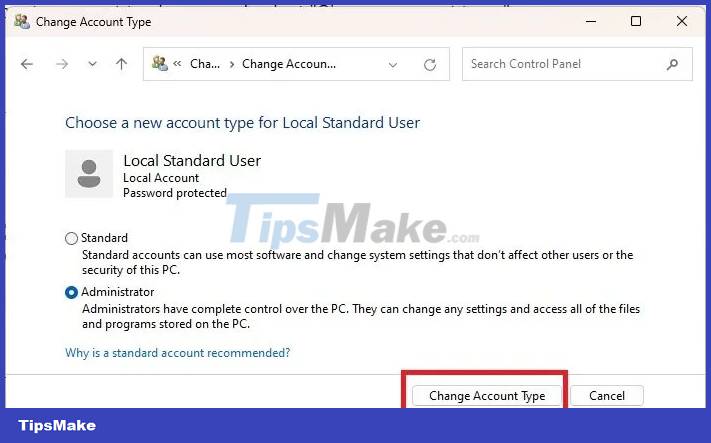
5. Select Administrator (or Standard if you are downgrading) and click Change Account Type .
3. Change Administrator in Windows with Command Prompt
If you don't mind typing a few commands, it's easy to change Windows user accounts between Standard and Administrator. Let's start by changing the Standard user to Administrator.
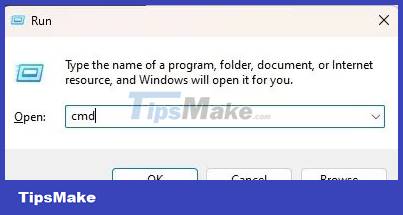
1. Press Win + R , type cmd , then press Ctrl + Shift + Enter to open Command Prompt with admin rights.
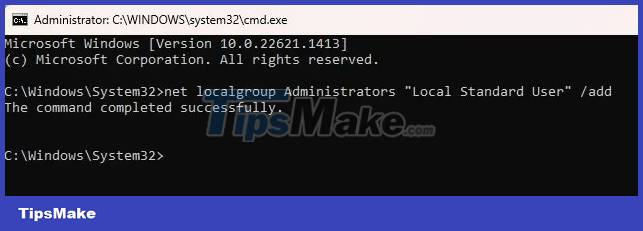
2. Type the following to change the user account type to administrator:
net localgroup Administrators "User Account" /addReplace User Account with the user account name. For Microsoft accounts, use the first 5 letters of the account's email address. For example, for windowsuser@microsoft.com, the user account name would be 'windo'. Remember, you can use Windows 11 without a Microsoft account.
3. Verify the change by typing:
net user "user name"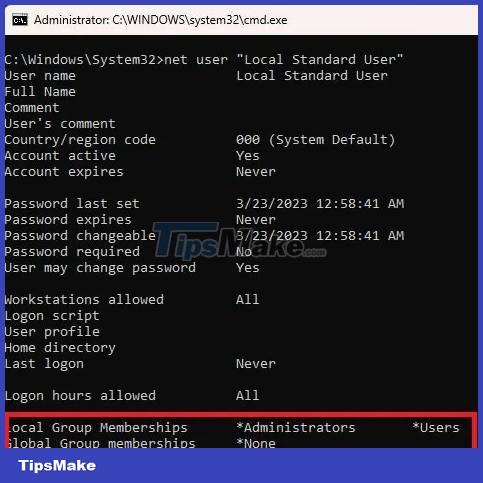
If you need to downgrade the administrator account, the process is similar:
1. Enter the following command, replacing User Account with the account name:
net localgroup Administrators "User Account" /delete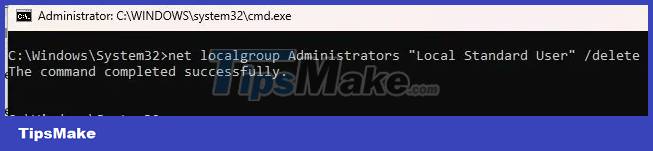
2. Verify the change with:
net user "user name"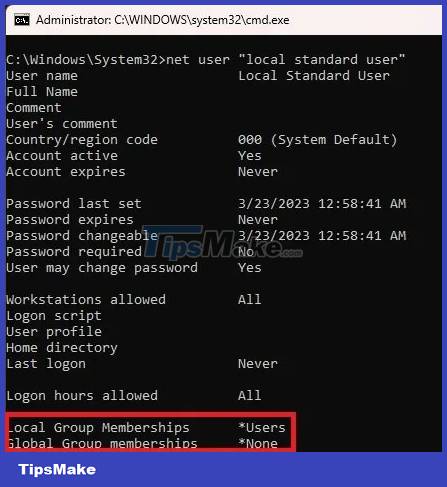
4. Using Powershell
If you prefer PowerShell, here's how to change the administrator in Windows 10 and 11:
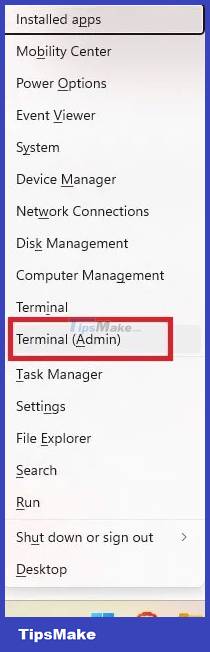
1. Press Win + X and select Terminal (Admin) . For Windows 10, choose PowerShell.
2. Enter the following command at the command prompt, replacing user account with the account name:
Add-LocalGroupMember -Group "Administrators" -Member "User Account"Just like the Command Prompt, the username for a Microsoft account is the first 5 letters of the account's email address. You can also use:
-Member "MicrosoftAccountemailaddress"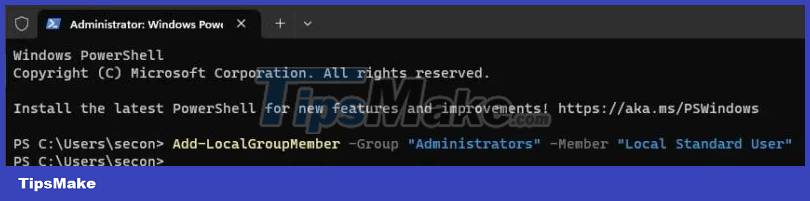
This elevates the Standard user to Administrator. If you need to downgrade an account:
1. Open PowerShell and enter the following, replacing User Account with the account name:
Remove-LocalGroupMember -Group "Administrators" -Member "User Account"
This will switch the account to the Standard user.
5. Using Netplwiz
Another quick and easy method to change the administrator in Windows is to use netplwiz. With this method, every user is listed, and you can switch back and forth between user types as needed.
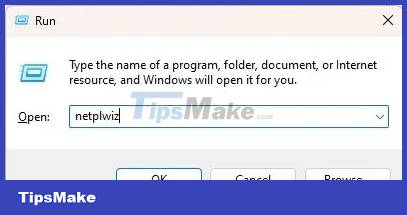
1. Press Win + R to open Run.
2. Enter netplwiz and click OK.
3. Select the desired user and click Properties.

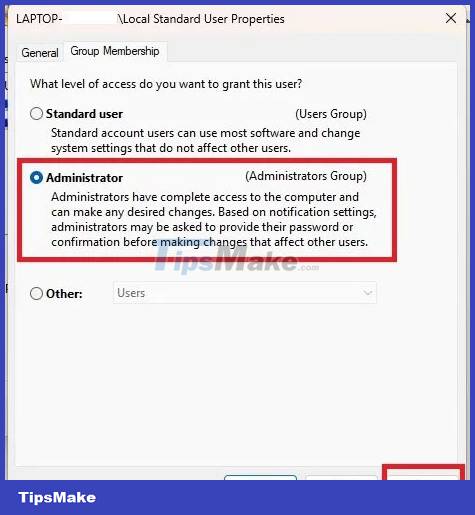
4. Select the Group Membership tab and change the account type. Click Apply.
6. Change Administrator in Windows Via Computer Management
This method only works on Pro versions of Windows 10 and 11. If you have the Home edition, then this option will not be available. Follow these steps to change accounts in Windows 10 and 11.
You can use third party tool lusrmgmr to get the same result. This guide includes steps for both the Pro version of Windows and lusrmgmr. The screenshots are from lusrmgmr.
1. Open the Start menu and search for Computer Management . Select Run as administrator .

2. Expand System Tools > Local Users and Groups .
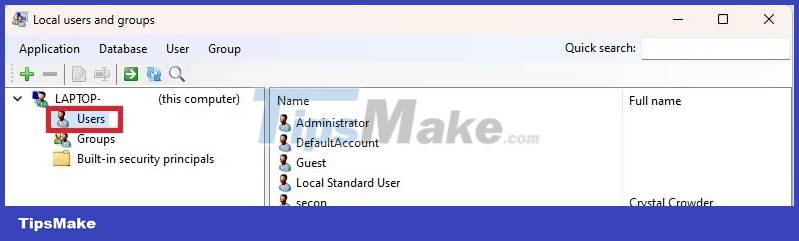
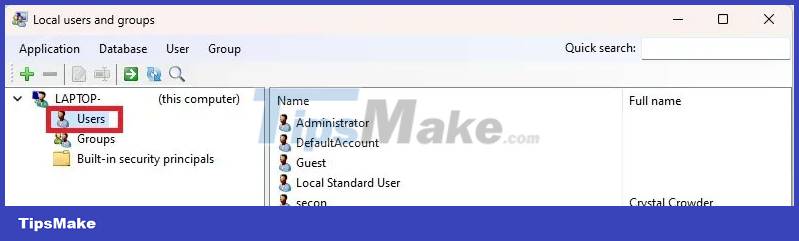
3. Select Users to open the list of users in the center pane.
4. Right-click the user and select Properties. Click Edit for lusrmgmr.
5. Select the Member Of tab and click Add. If using lusrmgmr, click the Group membership tab and select Add membership.
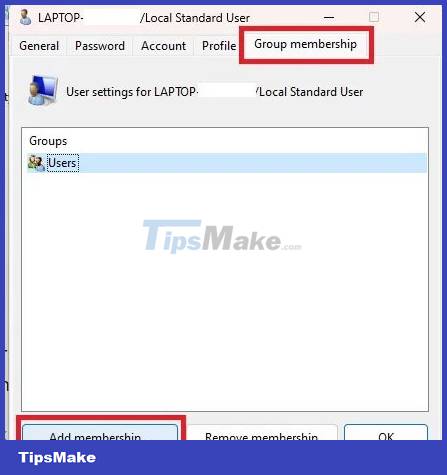
6. Select Advanced.
7. Select Find Now .
8. Select the Administrators group from the list. In lusrmgmr, the group list appears immediately. Select Administrators.
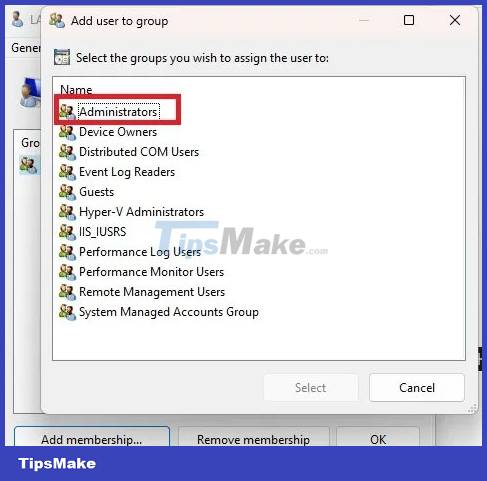
9. Click OK to confirm your selection. In lusrmgmr, select Select.
10. Click OK again to exit the window. You will then see both standard and admin users listed.
You can also downgrade users using the same process. However, you will revoke the permission instead of adding it.
Conclusion
Understanding Change Administrator makes it easier to compare options, avoid common mistakes, and apply the information in this guide more effectively. Review the relevant requirements before making changes or choosing a solution.
FAQ
What is Change Administrator?
Using Windows Settings When you want to change the administrator in Windows, the simplest way is to use Windows Settings.
Why is Change Administrator important?
Understanding Change Administrator helps you evaluate features, compatibility, performance, and potential limitations before you choose a product or follow a procedure.
What should you consider when using or choosing Change Administrator?
Consider your specific goal, compatibility requirements, available features, cost, security, and the practical recommendations described in this guide.
Related Articles
 How to Find and Change Your Computer's Administrator: Step-by-Step Guide7 minutes read
 Click: How to Always Run a Program as an Administrator on Windows3 minutes read
 Instructions for Changing the Default PDF File Reader Application in4 minutes read
 Turn Off the Administrator Account in Windows 73 minutes read
 Run CMD with Administrator Privileges on Windows 7, 8, 8.1, And 104 minutes read
 5 Ways to Enter the Windows 10 Key the Easiest6 minutes read
Reader Comments 0
Sign in with email or Google to join the discussion.